Pages

Showing posts with label Ink Blending. Show all posts

Bright and Joyful Christmas Tree


Hello my crafty friends, Jenn here with a Bright and Joyful Christmas tree card featuring The Rabbit Hole Designs Warm and Cozy stamp set (illustrated by Agota Pop). I wanted to create and easy card, but som,ething that is a little bit elegant too. I hope you enjoy this twist on a traditional Christmas card.

Supply List

Other supplies (from your stash)
Paint brushes
Metalic watercolors
Bearly Arts Craft Glue
White ink
VersaMark Watermark ink
Gold Embossing Powder
Let's take a look at this simple step tutorial:
A - Use either a Bitty Blending Brush or Cottontail Blending Brush with white ink to stencil the Candy Twist stencil design in an oval shape in the center of a piece of 4' x 5 1/4" black cardstock

B - Use a paint bush and gold watercolor to add gold splatters the card front and set it aside to dry

C & D - Use the white ink and lightly stamp the Christmas tree image (from the Warm and Cozy stamp set) onto a piece of black coloring cardstock.  Watercolor the image with green, gold, red, and brown metalic and/or shift watercolors
E - Fussy cut or die cut the colored Christmas tree 

F -  Use the Cottontail Embossing Powder Tool to treat a piece of black cardstock. Stamp the Merry Christmas sentiment (from the Poinsettia and Pinecone stamp set) with VersaMark Watermark ink.  Dust it with gold embossing powder and heat set the sentiment. Use the coordinating dies to die cut the sentiment

G & H - Glue the stenciled card front on a green A2 cardbase.  Use adhesive foam squares to attach the painted Christmas tree to the center of the stenciled Candy Twist oval. Glue on the Merry Christmas sentiment above and below the tree as shown
Thank you for taking time  to visit today's blog and check out this Bright and Joyful Christmas Tree card created with The Rabbit Hole Designs' Warm and Cozy stamp set, Poinsettia and Pinecone stamp and die set, and Candy Twist stencil. I hope you are inspired to create something lovely today!

Be Creative ~ Stay Inspired

Jenn Gross


Follow me, Journey Coach Jenn, on 

Instagram - https://www.instagram.com/journeycoachjenn/

YouTube - http://www.youtube.com/c/JourneyCoachJenn

Blog - https://journeycoachjenn.blogspot.com


Deer Santa... Sweet Cookie Card


Hello crafty friends,  Jenn here with sweet treat of a card for you using The Rabbit Hole Designs' 1 Line Reindeer stamp set and making them into cookies for Santa.  I also added a sentiment from the Bunny Christmas stamp and die set.

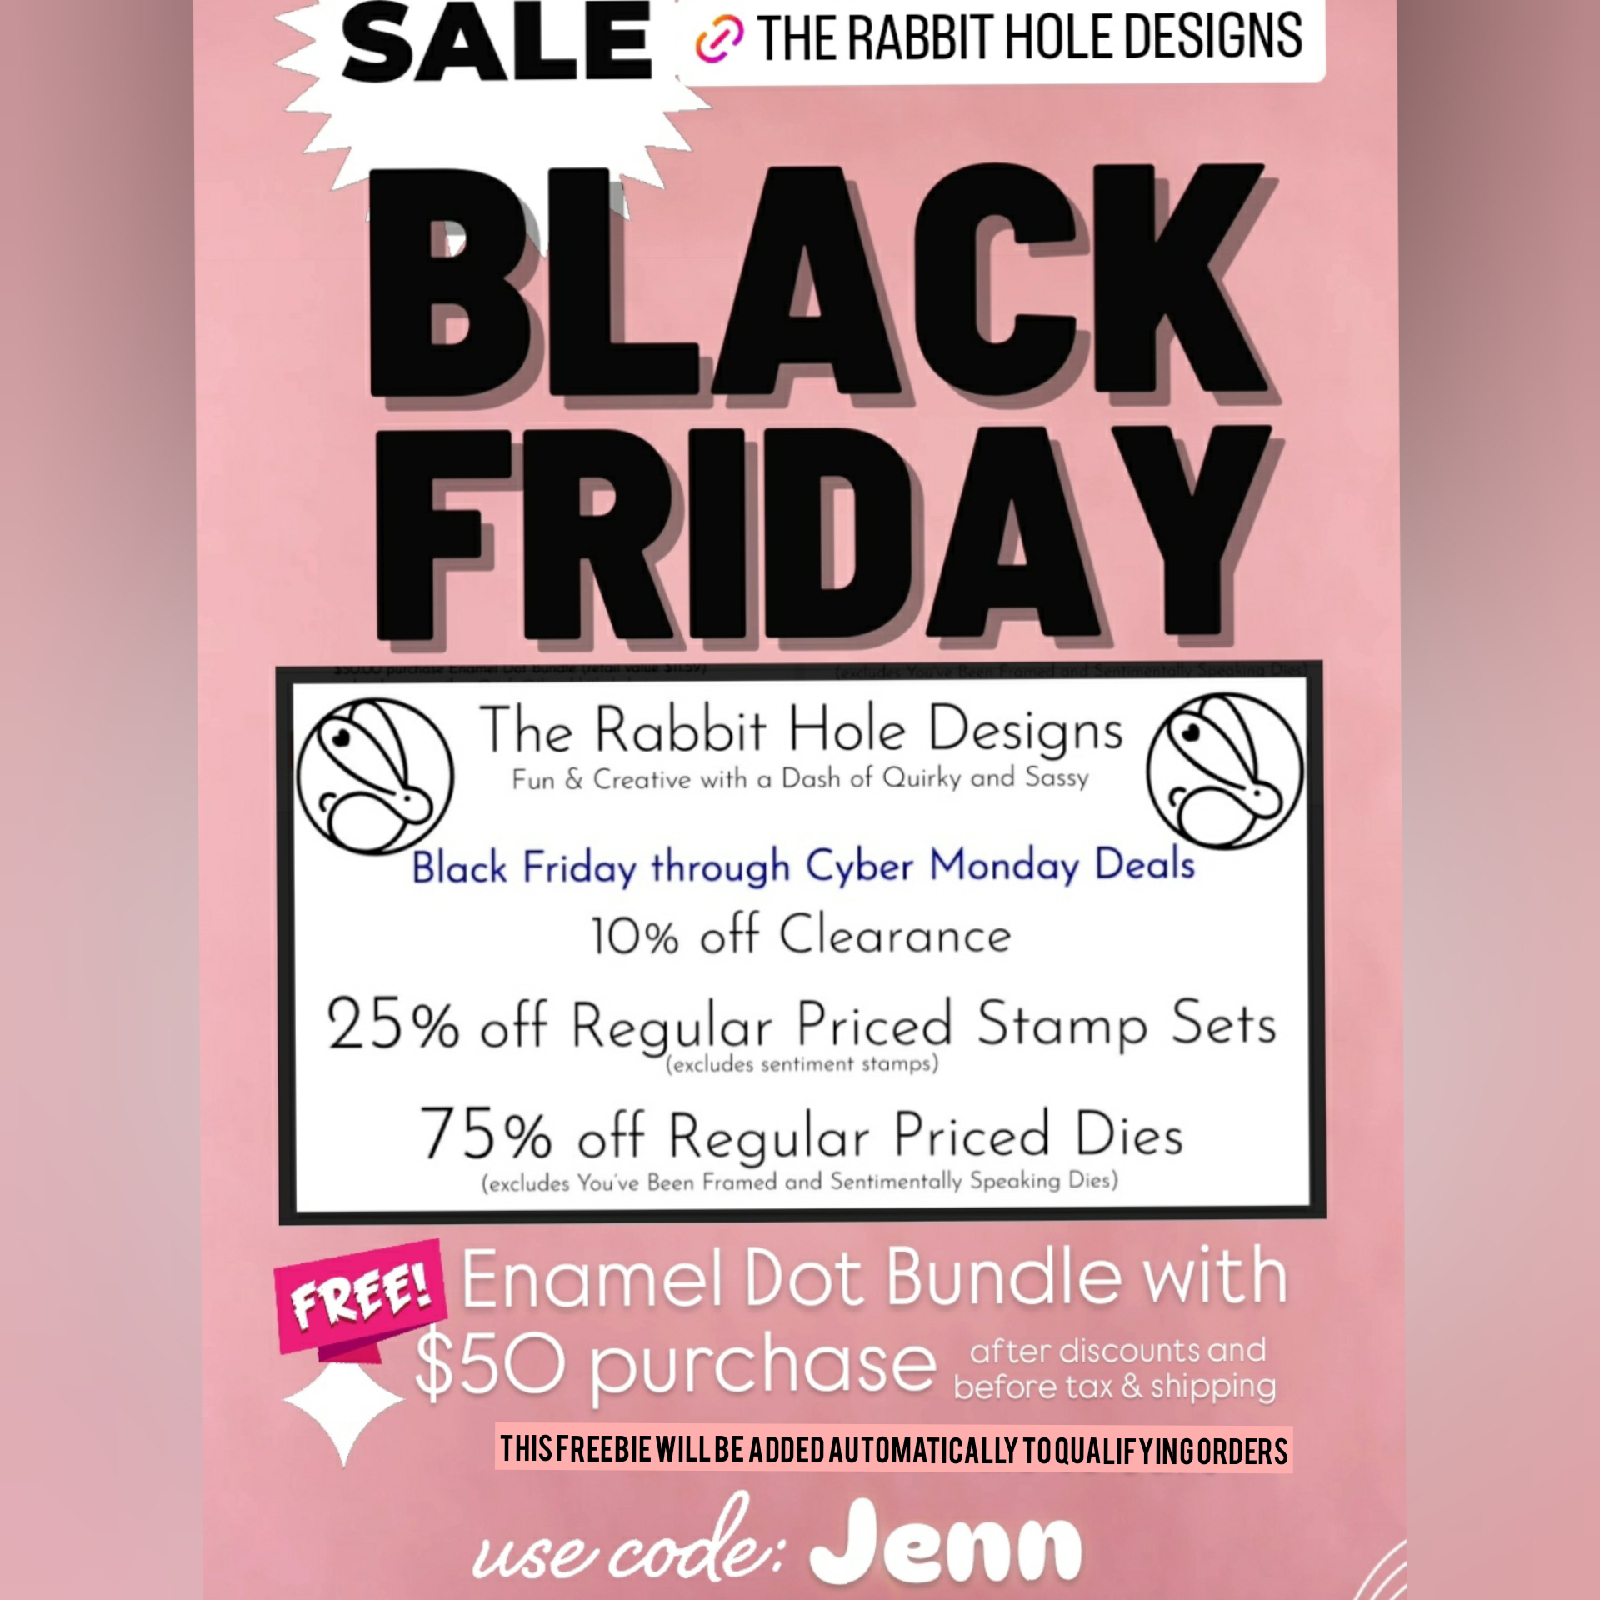
Make sure to take advantage of the BLACK FRIDAY and CYBER MONDAY sales at The Rabbit Hole Designs!  
Sales are from 11/27/2024 through 12/02/2024 11:59pm PST  (No Codes Needed)
Use Code Jenn at check out to share you saw this sale on today's blog!
Let's take a look at this easy step tutorial:
A & B - I stamped out the 1 Line Reindeer using brown ink on light brown cardstock and colored three of them with OLO Markers

C & D - I die cut three 2 1/2" circles from kraft cardstock and shaded the edges using a Bitty Blending Brush and Gathered Twigs Distress Oxide ink to look like a baked cookies
E & F - I die cut three 2 1/4" white cardstock circles to use as frosting on the cookies.  I softly recut the edges to give it a slight wave for more of a hand-iced  look.  I added shadowing with OLO Markers BV2.0 and BV2.2   I fussy cut the reindeer heads and glued them down on the white frosting circles.  I glued these on top of each cookie

G - To create the cookie plate, I die cut a 5" circle with a 4" circle centered inside from a piece of double sided winter printed cardstock in my stash

H - The circle card base is die cut from a piece of folded kraft cardstock and a 5 1/4" circle leaving 1 1/4" of the fold intact as shown in the photo
I & J -  I opened up the circle card base and glued the outer plate circle centering it on one side of the card base.  I truned over the middle circle for the plate and glued it to the center

K - I glued one cookie to the plate and attached the second cookie with adhesive foam squares.  The third cookie has a  bite taken out of it.  I uses a circle die form my stash that has a zig zag decorating the edge and die cut a bit out of the third cookie.  The bitten cookie is attached to the card  with two layers of foam tape.

L - I stamped out the Jolly Holly-Days to you using a sentiment from the Bunny Christmas stamp and die bundle.  I cut out the sentiment and added it above the cookies on the plate to complete the Deer Santa cookie card.

Supply List

Other Supplies (from your stash)
OLO Markers
Gathered Twig Distress Oxide
Circle Nesting Dies

Be sure to check out The Rabbit Hole Designs for the BLACK FRIDAY Specials
Use the code Jenn at check out to let us know you saw this post!

Thank you, I appreciate you taking time from your day to stop by and check out today's blog featuring The Rabbit Hole Designs stamps and dies. I hope you are inspired to create something lovely today!

Be Creative ~ Stay Inspired
Jenn Gross

Follow me, Journey Coach Jenn, on 
Instagram - https://www.instagram.com/journeycoachjenn/
YouTube - http://www.youtube.com/c/JourneyCoachJenn
Blog - https://journeycoachjenn.blogspot.com

For more inspiration, updates, and news make sure to check out these places 

Snow Much Fun Holiday Gift Tag


Hello crafty friends! I created and colored a holiday tag featuring The Rabbit Hole Designs Warm & Cozy stamp set.  The stamp set is an Agota Pop illustration and includes 4 snowman images, a Christmas Tree, 2 presents and 4 cozy sentiments

TRHD Supply List

Other Supplies 
Distress Oxide inks - Salvaged Patina, Victorian Velvet
Pawsitively Saturated ink - Melon
Masking Magic 
OLO Markers
I stamped the snowman with the bird onto a 3" x 7" piece of white cardstock along with the Snow Happy We're Friends sentiment. I created masks for both the snowman and sentiment. I used the Bitty Blending Brushes to ink blended the Melon around the snowman then added the Victorian Velvet to ink blend around the Melon color.  The last color added is Salvaged Patina.

I splattered the ink blended tag with white iridescence watercolor for a snowy effect. I removed the Masking Magic from the tag and colored the image with OLO markers - BV2.2, BV1.4, BV4.4 / R0.3, R0.4, R1.7 / B0.2, B0.3 / O7.3, O7.7

I cut the tag to 3 1/2" x 4 1/2" and attached a teal and pink ribbon to finish the tag.

Thank you, I appreciate you taking time from your day to stop by and check out this easy Holiday Gift Tag created with The Rabbit Hole Designs' Warm & Cozy stamp set. I hope you are inspired to create something lovely today!


Be Creative ~ Stay Inspired

Jenn Gross


Follow me, Journey Coach Jenn, on 

Instagram - https://www.instagram.com/journeycoachjenn/

YouTube - http://www.youtube.com/c/JourneyCoachJenn

Blog - http://www.journeycoachjenn.com/


For more inspiration, updates, and news make sure to check out these places


The Rabbit Hole Designs

The Rabbit Hole Designs Instagram

The Rabbit Hole Designs Facebook Page

The Rabbit Hole Designs Pinterest

The Rabbit Hole Designs YouTube


Have a Brilliant Fall Y'all!


Hello my crafty friends!  Jenn here with another bright and fun fall card featuring The Rabbit Hole Designs Jack of All Faces stamp set paired with a sentiment from the Fall Foxes stamp set.

TRHD Supply List

Supplies from my Stash
VersaMark Watermark ink 
Black Embossing Powder 
White Embossing Powder 
Blue and Purple ink
Colored Pencils 
I stamped the pumpkin with the witch hat using VersaMark Watermark ink on a piece of dark blue cardstock treated with the Cottontail Embossing Powder Tool.  This treatment repels unwanted embossing power allowing the embossing powder to only stick to the stamped image. The images is heat embossed with black embossing powder and then colored with colored pencils.  The eye openings are cut with a craft knife and yellow cardstock is glued behind the image.  The image is fussy cut and a red flower is attached to the hat.
I added four crumpled autumn leaves to the bottom of the card front and added the pumpkin images to the front with adhesive foam tape. The sentiment is stamped on a piece of blue cardstock using VersaMark Watermark ink and heat embossed in white embossing powder.  It is cut to a strip and added to the cardftont with adhesive foam tape completing the card.

Thank you for stopping by to check out this Brilliant Autumn card created with The Rabbit Hole Designs' Jack of All Faces stamp set.  I hope you are inspired to create something lovely today!


Be Creative ~ Stay Inspired

Jenn Gross


Follow me, Journey Coach Jenn, on 

Instagram - https://www.instagram.com/journeycoachjenn/

YouTube - http://www.youtube.com/c/JourneyCoachJenn

Blog - http://www.journeycoachjenn.com/


For more inspiration, updates, and news make sure to check out these places


The Rabbit Hole Designs

The Rabbit Hole Designs Instagram

The Rabbit Hole Designs Facebook Page
The Rabbit Hole Designs Pinterest

The Rabbit Hole Designs YouTube


Create a Meowgical Halloween Highlight!


Hello! It's Lauren on the blog today to share this sweet as can be meowgical cat Halloween card I created using the Meowgical Stamp set and the coordinating die set. 

You can watch me create it here in this quick video on my YT channel:


I just love all the cute images that are in this set and I hope I've given you a bit of Halloween inspiration today. Below are my links to products I used for my card. Thanks for visiting! 

*Disclosure: I use affiliate links where I can. This does not add any extra cost to you, but I do receive a small amount which helps keep me creating. Thank You*

Meowgical Stamp Set: https://shrsl.com/4nzof

Meowgical Die Set: https://shrsl.com/4oq0p

Cottontail Blending Brush: https://shrsl.com/3htkd

You can follow me here:

Jack of All Faces - Happy Halloween Blended Pumpkins

Hello friends! Welcome back to the blog. Today's card features the new Jack of All Faces stamp set.


Card details:

  • Stamp the pumpkins from Jack of All Faces on an A2 white cardstock panel with a MISTI (stamp positioning tool) with a light-colored ink. Do not remove the stamp from the MISTI.
  • Use Post-it tape to mask one vertical stripe over the stamped image. Blend with light, medium and dark orange inks, top to bottom.
  • Adjust the Post-it tape to mask another stripe next to the original one. Blend with light, medium and dark orange inks, bottom to top (or in the opposite order of the first blended stripe). After blending, remove all Post-it tape from the cardstock panel.
  • Stamp the same image again in black ink. It should line up perfectly on top of the original stamped image since the stamp is still in the MISTI. TIP: I did light ink first for 2 reasons - to prevent any possible smearing of the black ink while blending and to have a crisp black image on top of the blended stripes.
  • Attach the white A2 panel to a card base. Splatter with a dark gray spray to finish off the card.


Have you heard about the Tic-Craft-Toe monthly challenge? My card fits the challenge with these 3 elements: Mask, Holiday and Orange. Check out this IG post for more info. There's a prize up for grabs!

Thanks for visiting!

Amrita

You can find me on IG @amritapettus

For more inspiration, updates, and news check out these awesome places! 


The RHD Affiliate Disclaimer:

We want to ensure transparency and honesty in our interactions with you, our valued readers. Please be aware that the links provided on The Rabbit Hole Designs Blog may be affiliate links. This means that if you make a purchase through these links, the project designer may earn a small commission at no extra cost to you. Your support means the world to us!


We kindly request that you accept the tracking cookie for the affiliate websites. Rest assured, this will not expose your computer to viruses or compromise your information. It's a necessary step for the company to attribute the sale to the affiliate, ensuring that creators like our creatives receive their rightful commissions.


Your trust and support empower our creators to continue sharing creativity and inspiration through our blog. Thank you for being an integral part of The Rabbit Hole Designs community!


Dive Into Creativity with a Twisted Underwater Card!

Hello, crafty friends! Rick here, and I’m thrilled to be sharing today’s project on The Rabbit Hole Designs LLC blog. We’re diving deep into the creative ocean with a whimsical underwater-themed card that I had an absolute blast creating. Using some of my favorite products from The Rabbit Hole Designs, this card started as a simple idea and quickly evolved into something truly special. Let’s take a closer look at how it all came together!


Making a Splash with Balloon Animals 2

The inspiration for this card came the moment I laid eyes on the Balloon Animals 2 Stamp Set from The Rabbit Hole Designs. There’s something so delightful about these playful balloon animals, and the octopus in particular caught my eye. I knew it was the perfect focal point for an underwater scene, and I couldn’t wait to get started.

To begin, I stamped the octopus onto a piece of watercolor paper using a light brown dye ink (from my stash). This ink is ideal for watercoloring because it doesn’t smudge when you apply water. I then used some blue and teal reinkers (from my stash) to watercolor the octopus, bringing it to life with rich, oceanic hues.

Pro Tip: When watercoloring with reinkers, start with a light wash of color and build up layers gradually. This technique allows you to create depth and dimension in your images without overwhelming the design.


Creating the Perfect Ocean Background

Once my octopus was colored and dry, I wanted to give it a stunning ocean background that would make it pop. That’s where the Making Waves 6 x 6 Stencil from The Rabbit Hole Designs came into play. I used a circle mask (from my stash) to protect the octopus while I ink blended the waves around it.

Starting at the top of the card, I used a light blue dye ink (from my stash) and gradually blended down with darker shades like teal and deep blue (from my stash) using my Cottontail Blending Brushes. This gradient effect gives the background a sense of depth, making it feel like the octopus is floating in the depths of the sea.

Pro Tip: When blending multiple ink colors, it’s helpful to overlap each color slightly for a smooth transition. This technique not only creates a cohesive look but also adds visual interest to the background.


Adding Seaweed and Bubbles

To enhance the underwater scene, I added some seaweed using a green dye ink (from my stash) and the seaweed pattern on the Making Waves Stencil. This subtle detail adds a pop of color and helps anchor the design. I also couldn’t resist adding a few bubbles around the octopus using the same blue inks I used for the waves. These small touches bring the scene to life and add a bit of fun to the overall design.

The moment of truth came when I removed the mask and stencil, revealing a clean, crisp circle around the octopus. It’s such a satisfying step and really highlights the focal point of the card.


Finishing Touches with Sparkle

No card is complete without a little bit of sparkle, and the Clear Sparkle Enamel Dots from The Rabbit Hole Designs were the perfect finishing touch. I scattered a few of these dazzling dots around the card, adding just the right amount of shimmer. To tie it all together, I stamped a sentiment in Versafine Clair Nocturne Ink in the clean area of the card, making sure it stood out against the colorful background.

Finally, I added some white gel pen highlights to the octopus and a touch of glitter glue (from my stash) to give it that extra bit of magic. These small details can make a big difference in the overall look of your card, adding depth and dimension that really make your design shine.

Wrapping It Up

This card was such a joy to create, and I hope it inspires you to dive into your own creative projects. Whether you’re a seasoned card maker or just starting out, remember that the best designs often come from letting your imagination take the lead. Don’t be afraid to experiment with different products and techniques—sometimes, the most unexpected ideas turn out to be the most fun!

Thanks for joining me today on The Rabbit Hole Designs LLC blog. I can’t wait to see what you create, so be sure to share your projects with us. Happy crafting!

Rick

For more inspiration, updates, and news check out these awesome places! 


Affiliate Disclaimer: This post contains affiliate links. If you make a purchase through these links, I may receive a small commission at no additional cost to you. Thank you for supporting The Rabbit Hole Designs LLC and helping us continue to bring you creative content!

Under Your Spell - Halloween Shaker Card

Hello crafty friends!  Jenn here, follow mw on social media @journeycoachjenn  Today I am sharing this fun interactive halloween card created using five products from The Rabbit Hole Designs. 

I started out with the newly released Pinwheel stencil, an A2 Shaker Acetate Sheet for the infinity shaker, the patented Cotton Tail  Embossing Powder Tool to treat the gray cardstock before heat embossing white cobweb images in the background and the sentiment on the black pumpkin, and images from the Meowgical stamp set. 

Supplies include:

Other  Supplies
OLO Markers
Chunky upper case alphabet letters to spell out "BOO" (from my stash)
Small Pumpkin die (from my stash) 
Purple and Orange sequins (from my stash)
Distress Oxide inks - Villianous Purple and Carved Pumpkin
VersaMark Clear Watermark Ink
White Embossing Powder
Bearly Arts Craft Glue
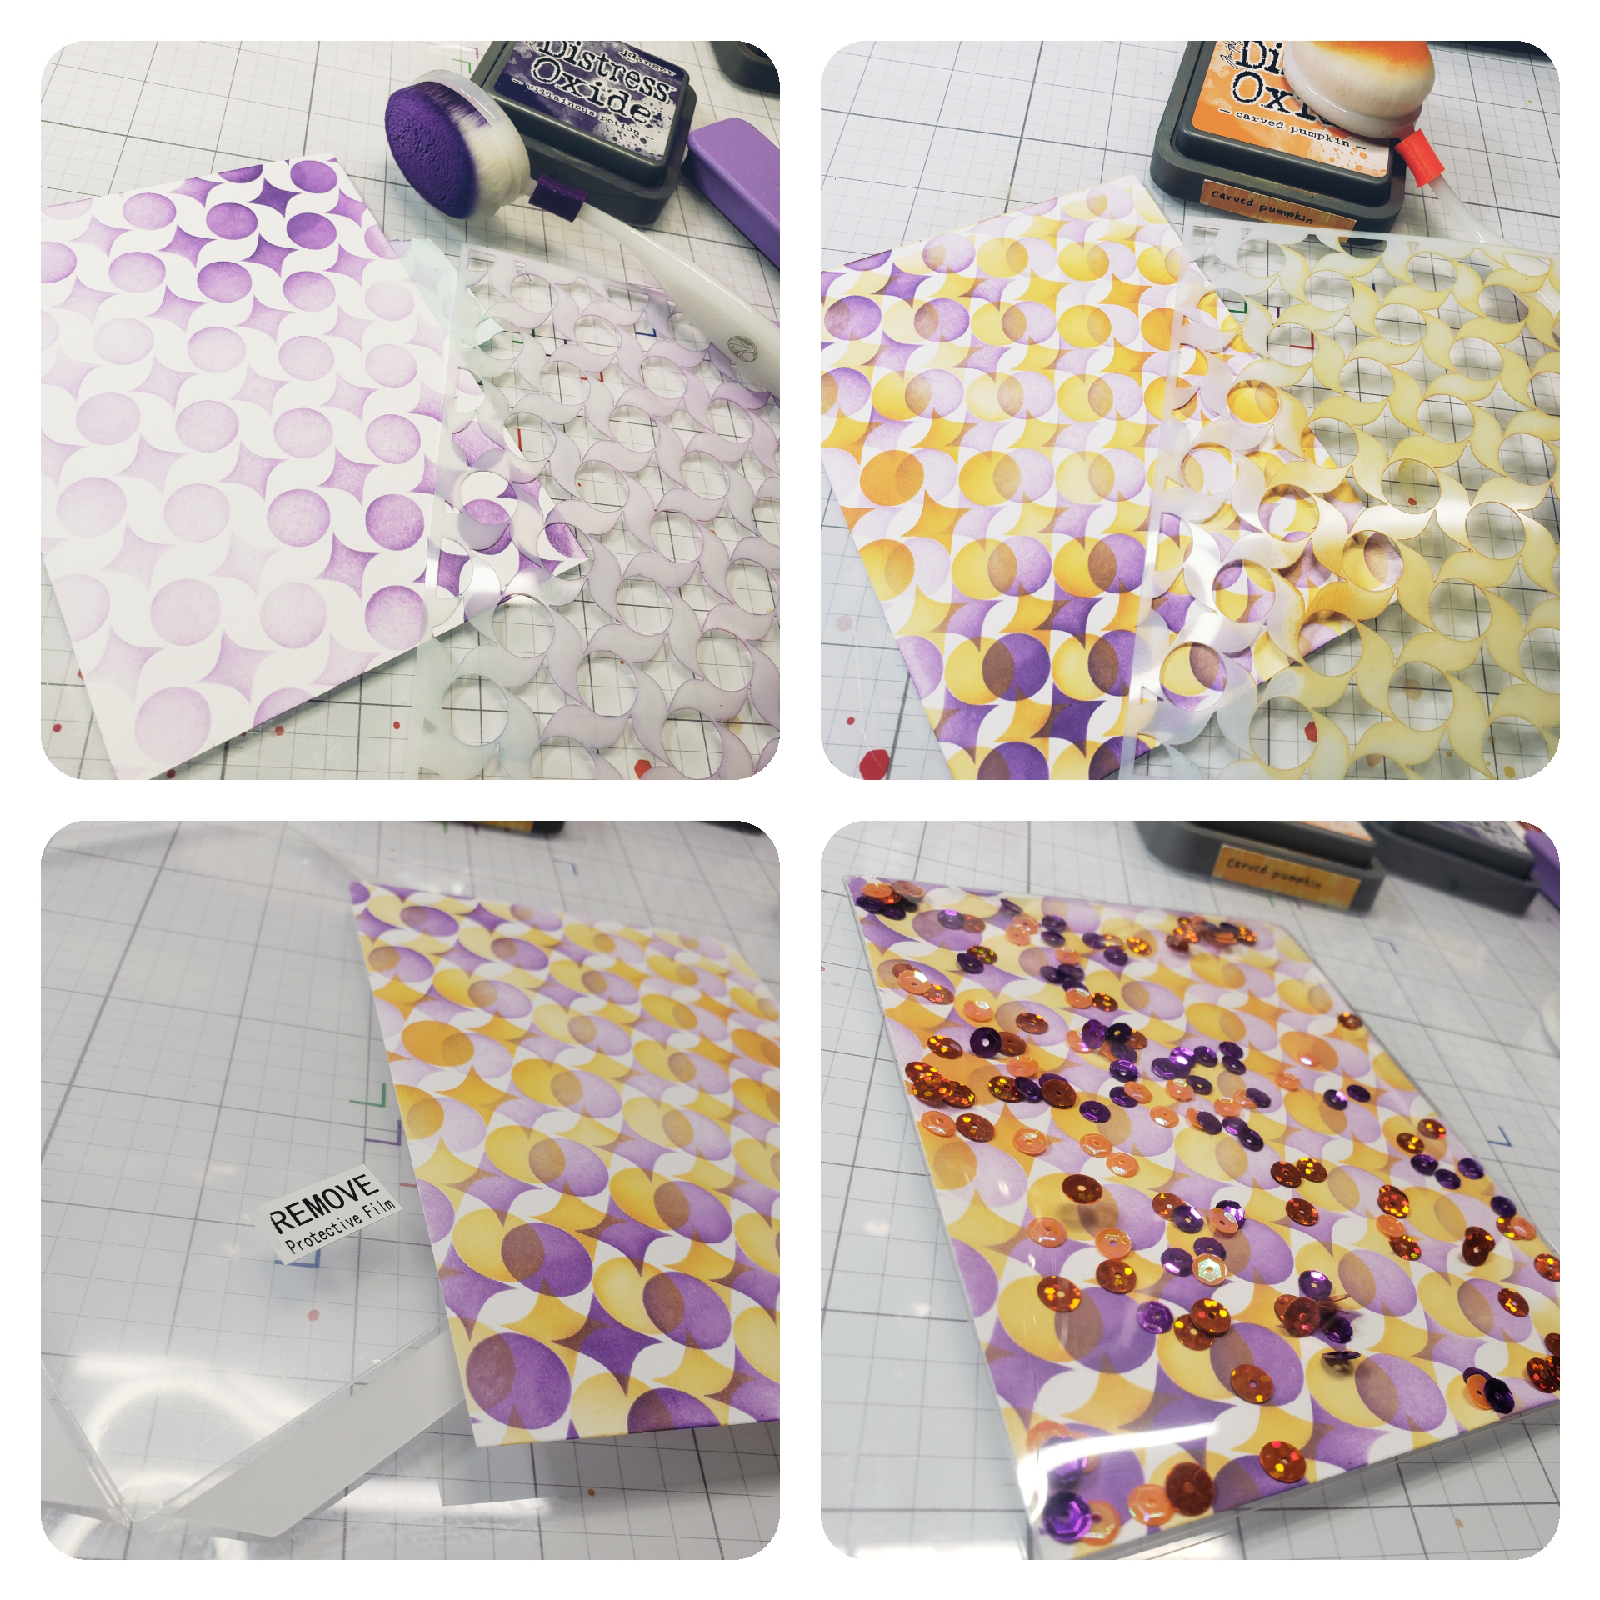
I stenciled a piece of 4 1/8" x 5 3/8" white cardstock using the Pinwheel stencil with Villanous Purple Distress Oxide ink. Clean the stencil and place it over the purple Pinwheels shifting it slightly catching the curve of the stencil circle in the curve of the purple stencil pin wheel.  Stencil it with Carved Pumpkin Distress Oxide ink.

Use one of the A2 Shaker Acetate Sheets and adhere it to three of the four sides of the Pinwheel stenciled background card. Add some purple and orange sequin shaker bits in the pocket and seal the remaining shaker window opening.
Using the Meowgical stamp set (illustrated by Agota Pop), stamp the spiderweb four times on gray cardstock. Heat emboss with white embossing powder. Use die cut alphabet letters from your stash to die cut the word "boo" from the embossd spiderweb cardstock and die cut a second set from black cardstock. Glue the spiderweb letters on top of the black letters off setting them slightly to create a black shadow. Set them aside.

Stamp the cat in the pumpkin.  I colored him with OLO markers using the Orange, Blue Green markers and cut out the image.
I stamped and heat embossed the sentiment  "I purred a spell on you" onto a piece of black cardstock treated with the Cottontail Embossing Powder Tool.   It is stamped with VersaMark Watermark ink and heat set with white embossing powder.  I used a pumpkin die from my stash to cut out the sentiment. Glue on the BOO at the top left side of the shaker card and glue the black  pumpkin sentiment with the kitty in the pumpkin image to the lower right side of the shaker card.  Attach the card to a whit A2 card base to complete the card.

Thank you, I appreciate you taking time from your day to stop by and check out today’s The Rabbit Hole Design project.  I enjoyed sharing the steps to recreate this fun halloween shaker card.  I hope it inspires you to create something lovely today!


Be Creative ~ Stay Inspired

Jenn Gross


Follow me, Journey Coach Jenn, on 

Instagram - https://www.instagram.com/journeycoachjenn/

YouTube - http://www.youtube.com/c/JourneyCoachJenn

Blog - https://journeycoachjenn.blogspot.com/  


For more inspiration, updates, and news make sure to check out these places


The Rabbit Hole Designs

The Rabbit Hole Designs Instagram

The Rabbit Hole Designs Facebook Page

The Rabbit Hole Designs Pinterest

The Rabbit Hole Designs YouTube 

Sparkle and Shine! It's your Birthday!


Hello crafty friends!  Jenn here with a fun and sparkly Birthday card!   I wanted to try stenciling on a piece of fine glitter cardstock.  I thought it would be interesting to see the sparkle through the stenciled colors.

I am using The Rabbit Hole Designs' new Paisley Bandana 2 Layer stencil paired with the Happy Scripty Word and Shadow Layer dies, the Birthday Scripty Word with Shadow Layer die, and the Matte White Enamel Dots.  I created a frame using the You've Been Framed dies.  
On a piece of 6"x6" snow white glitterstock from my stash, I am use the Cottontail Blending Brushes with Distress Oxide inks randomly stenciled with Cracked Pistachio, Dusty Concord and Picked Raspberry with the Layer #2 stencil. I let it dry for five minutes and then positioned the Layer #1 stencil and randomly inked it with Rusty Hinge and Uncharted Mariner. I am pleased with the results!
I ink blended the same ink colors on a piece of 5 1/2" x 4 1/4" white cardstock.  I added flecks of white gold watercolor and red gold watercolor to the ink blended panel. While it dried, I die cut Happy and Birthday twice from white cardstock  and glued the 2 layers together. I die cut the Happy and Birthday from the ink blended panel making sure to use all the ink blended color bands. I glued the ink blended words to the white layers.
I cut the 6"x 6" stenciled glitterstock to a 5 1/4" x 4 " card front. I nested and die cut the small and medium frames (from the You've Been Framed dies) and cut them from white cardstock. I centered and glued the frame to the card front.  I positioned the Happy Birthday sentiment in the frame and glued it into place. Using the Bitty Blending Brushes, I colored the Matte White Enamel Dots with the Distress Oxide inks.  After letting them dry, I added the colored Enamel Dots to the card front and attached it to an A2 green cardbase.
TRHD Supplies

Other Supplies (from my stash)
White Glitterstock
Gansai Tambi - Stary Night Gold watercolors
Distress Oxide inks in: Cracked Pistachio, Dusty Concord  Picked Raspberry, Rusty Hinge and Uncharted Mariner

Thank you for taking time to check out this fun and sparkly Birthday card!  I had a lot of fun creating it.  You can follow me on social media @journeycoachjenn
I hope you are inspired to create something lovely today!

Be Creative ~ Stay Inspired

Jenn Gross


Follow me, Journey Coach Jenn, on 

Instagram - https://www.instagram.com/journeycoachjenn/

YouTube - http://www.youtube.com/c/JourneyCoachJenn

Blog - https://journeycoachjenn.blogspot.com/  


For more inspiration, updates, and news make sure to check out these places


The Rabbit Hole Designs

The Rabbit Hole Designs Instagram

The Rabbit Hole Designs Facebook Page

The Rabbit Hole Designs Pinterest

The Rabbit Hole Designs YouTube