Pages

Showing posts with label no line coloring. Show all posts

Deer Santa... Sweet Cookie Card


Hello crafty friends,  Jenn here with sweet treat of a card for you using The Rabbit Hole Designs' 1 Line Reindeer stamp set and making them into cookies for Santa.  I also added a sentiment from the Bunny Christmas stamp and die set.

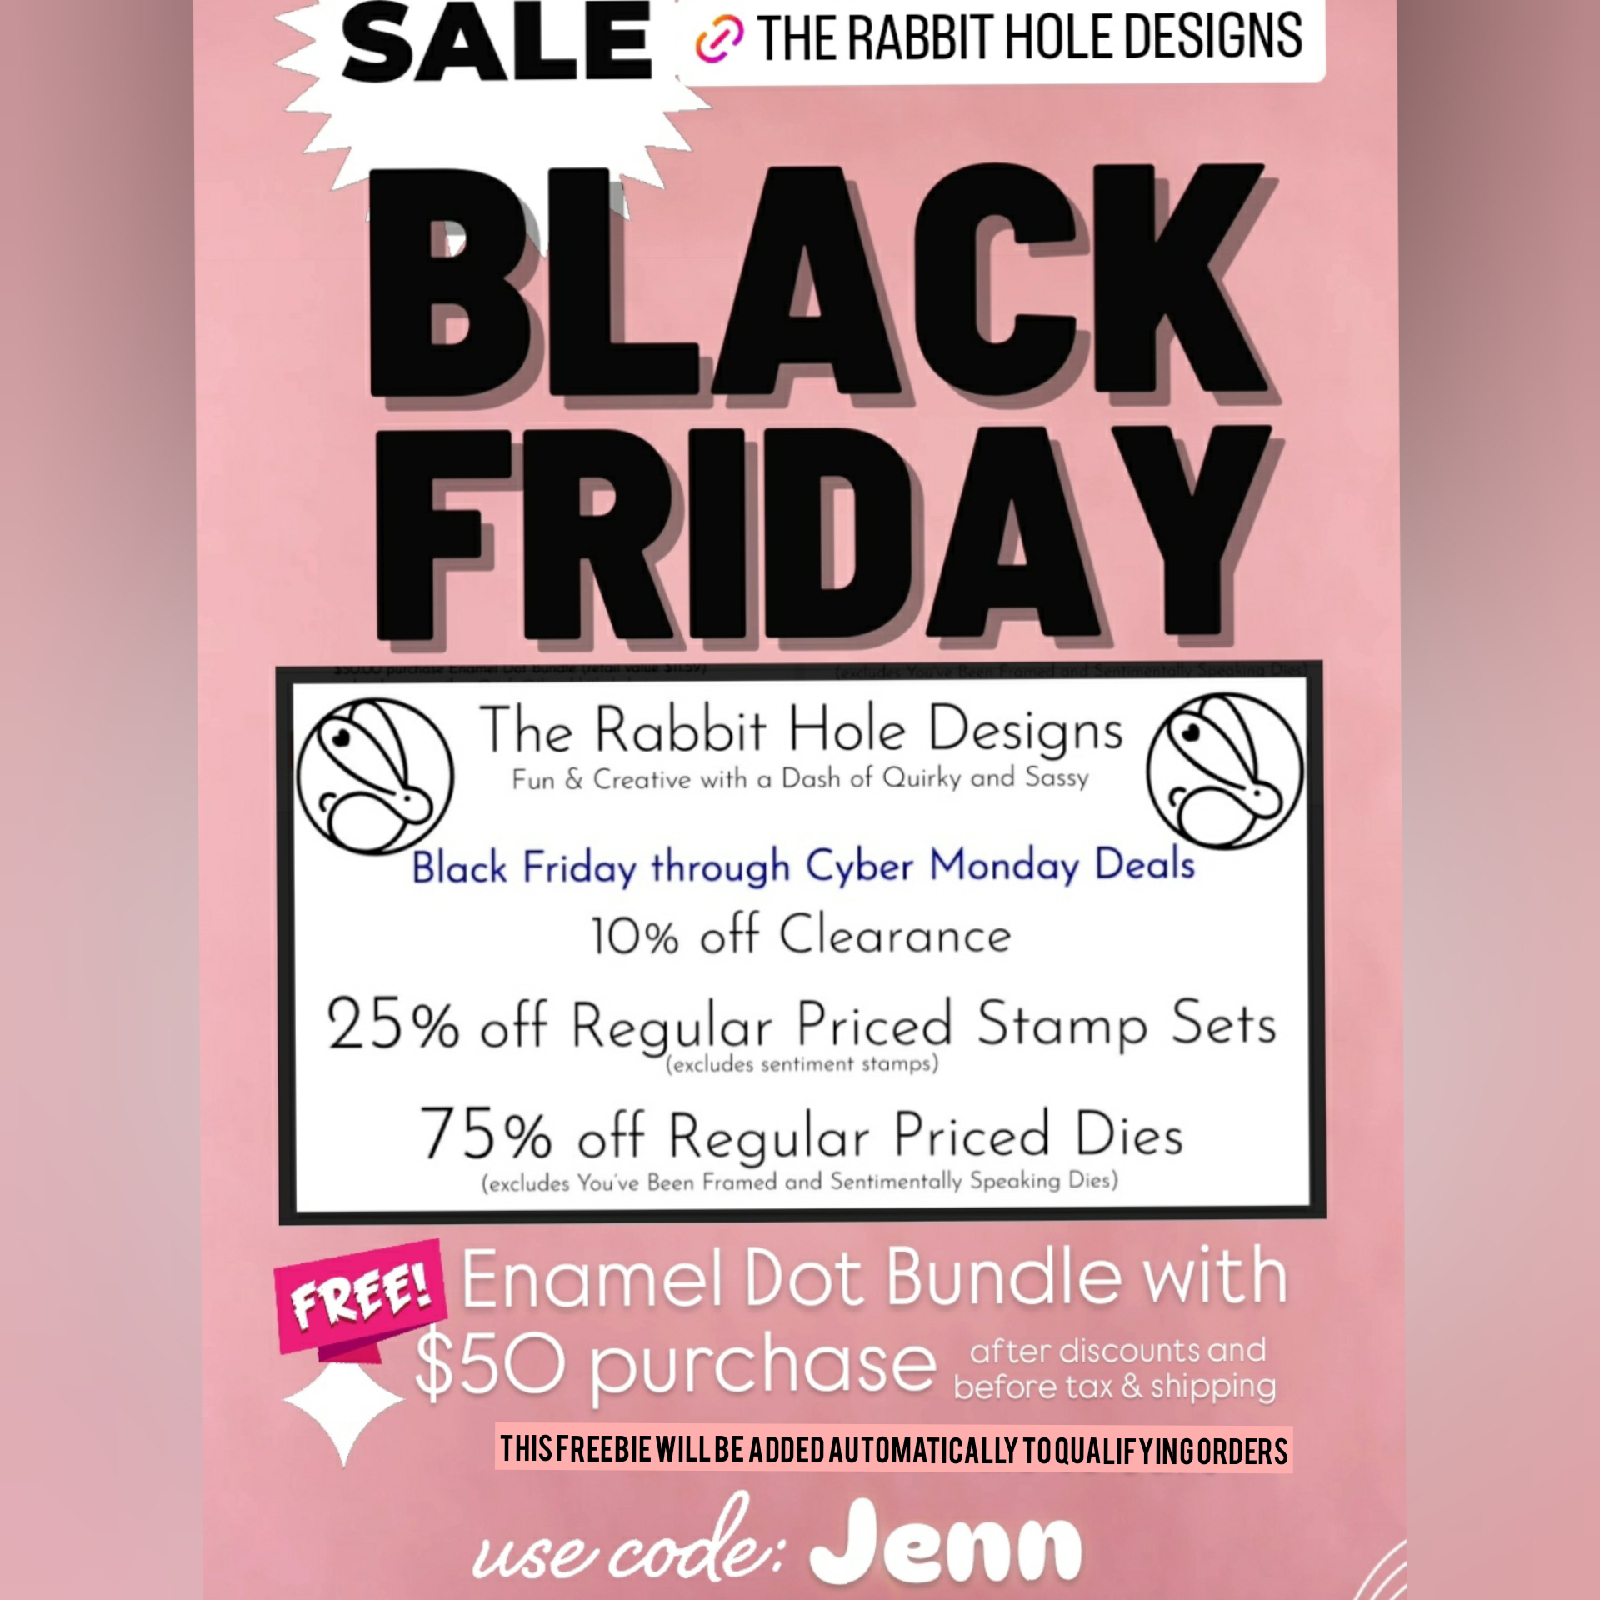
Make sure to take advantage of the BLACK FRIDAY and CYBER MONDAY sales at The Rabbit Hole Designs!  
Sales are from 11/27/2024 through 12/02/2024 11:59pm PST  (No Codes Needed)
Use Code Jenn at check out to share you saw this sale on today's blog!
Let's take a look at this easy step tutorial:
A & B - I stamped out the 1 Line Reindeer using brown ink on light brown cardstock and colored three of them with OLO Markers

C & D - I die cut three 2 1/2" circles from kraft cardstock and shaded the edges using a Bitty Blending Brush and Gathered Twigs Distress Oxide ink to look like a baked cookies
E & F - I die cut three 2 1/4" white cardstock circles to use as frosting on the cookies.  I softly recut the edges to give it a slight wave for more of a hand-iced  look.  I added shadowing with OLO Markers BV2.0 and BV2.2   I fussy cut the reindeer heads and glued them down on the white frosting circles.  I glued these on top of each cookie

G - To create the cookie plate, I die cut a 5" circle with a 4" circle centered inside from a piece of double sided winter printed cardstock in my stash

H - The circle card base is die cut from a piece of folded kraft cardstock and a 5 1/4" circle leaving 1 1/4" of the fold intact as shown in the photo
I & J -  I opened up the circle card base and glued the outer plate circle centering it on one side of the card base.  I truned over the middle circle for the plate and glued it to the center

K - I glued one cookie to the plate and attached the second cookie with adhesive foam squares.  The third cookie has a  bite taken out of it.  I uses a circle die form my stash that has a zig zag decorating the edge and die cut a bit out of the third cookie.  The bitten cookie is attached to the card  with two layers of foam tape.

L - I stamped out the Jolly Holly-Days to you using a sentiment from the Bunny Christmas stamp and die bundle.  I cut out the sentiment and added it above the cookies on the plate to complete the Deer Santa cookie card.

Supply List

Other Supplies (from your stash)
OLO Markers
Gathered Twig Distress Oxide
Circle Nesting Dies

Be sure to check out The Rabbit Hole Designs for the BLACK FRIDAY Specials
Use the code Jenn at check out to let us know you saw this post!

Thank you, I appreciate you taking time from your day to stop by and check out today's blog featuring The Rabbit Hole Designs stamps and dies. I hope you are inspired to create something lovely today!

Be Creative ~ Stay Inspired
Jenn Gross

Follow me, Journey Coach Jenn, on 
Instagram - https://www.instagram.com/journeycoachjenn/
YouTube - http://www.youtube.com/c/JourneyCoachJenn
Blog - https://journeycoachjenn.blogspot.com

For more inspiration, updates, and news make sure to check out these places 

Blue & White Poinsettia Thank You Card


Hello! It's Lauren on the blog today sharing my pretty, white and blue poinsettia thank you card. I used my colored pencils with the Poinsettia and Pinecones stamp set and created a subtle brick background using the Back Alley stencil. 

You can watch me create my card in this quick video.


 Thanks for visiting! 

 *Disclosure: I use affiliate links where I can. This does not add any extra cost to you, but I do receive a small amount which helps keep me creating. Thank You*

Here are my links to the products I used to create this card:

Poinsettia & Pinecones Stamp Set: https://shrsl.com/47y0j

Poinsettia & Pinecones Die Set: https://shrsl.com/47y0l

Back Alley Stencil: https://shrsl.com/4p8mv

Sentimentally Speaking Stamp Set: https://shrsl.com/4lmc6

Sentimentally Speaking Die Set: https://shrsl.com/4mrcf

Autumn Wonders


Hi! It's Lauren on the blog today sharing this no-line colored Autumn card. I used this wonderful book image from the Autumn is Calling stamp set and colored it with my colored pencils.

You can watch me create my card in this short on my YT channel.


I really enjoyed coloring up this image in fall colors. I can just picture coming in from a chilly fall day and getting cozy in front of a fire with a good book! I hope my card has inspired you to color up this pretty stamp set. 

Thanks for visiting! 

 *Disclosure: I use affiliate links where I can. This does not add any extra cost to you, but I do receive a small amount which helps keep me creating. Thank You*

Here's my links to the products I used to create this card:

Autumn is Calling Stamp Set: https://shrsl.com/4pkit

You've Been Framed Die Set, The Rabbit Hole Designs: https://shrsl.com/3xto5


Happy Trails, A Cute CAS Card


Hi there! It's Lauren on the blog today sharing my cute clean and simple card featuring the fun Glamping with Tailette stamp set illustrated by Agota Pop! I had such fun coloring these images and creating my card! 

I started out by stamping my camper image using a fade out/no line ink. I then covered it with a mask I created and stamped my first trio of trees. I masked those off and stamped another trio, moved my mask to the new trees and stamped a final trio of trees. I then colored all the images using my colored pencils.


Once I had everything colored and added some shading/shadows below the camper and trees, I stamped on my sentiment.


 To finish my card, I trimmed my colored panel to 4.20x5.45". Then, I adhered it to a black cardstock panel measuring 4.23x5.48" and adhered that onto a white A2 (4.25x5.5") card base.

Really loved creating this card and how it turned out. I hope I've inspired you to create a similar card! I've linked the products I used below. Thanks for visiting!! 


I use affiliate links when I can. This does not add any extra cost to you, but I do receive a small commission which helps keep me creating.
Thank you for visiting!

*You can use code Lauren10 at checkout to save on your purchase. *

Glamping With Tailette Stamp Set, The Rabbit Hole Designs: https://shrsl.com/4ka9l


Sweet No-line Colored Mermaid


Hi! It's Lauren on the blog today. I am loving Mer-May and all the fun images there are to color in these fabulous sets illustrated by Agota Pop! I used the Salty Air set to create my card in a classic pink and blue color combo. 

I started out by stamping my images in a no-line/fade out ink. Then I colored all the images using my colored pencils.


Next, I used my colored pencils to color a few of the Matte White Enamel Dots so that they matched my mermaid perfectly. I added them to my panel then adhered the panel to a white, top folding, A2 card base (4.25x5.5")

Here's a quick video showing me stamp my background and color the enamel dots.


I hope you are loving this Mer-May release and that I have inspired you to create your own Mer-May card! I've linked the products I used below and added a special coupon code for you! Thanks for watching! 

(Use code Lauren10 at checkout to save)
Disclosure: I use affiliate links where I can. This does not add any extra cost to you, but I do receive a small amount which helps keep me in craft supplies. Thank You for visiting!

Salty Air Stamp Set: https://shrsl.com/4jf9u
Matte White Enamel Dots: https://shrsl.com/4jf9s 

Soft Hugs Mini Slimline Card


Hello! It's Lauren here today with a cottony slimline card using the Soft Hugs Cotton Flower stamp set illustrated by Agota Pop Illustrations. 

I no line colored the cotton and leaves, die cut them out and then adhered them onto a mini slimline background I prepared using Lindy's Magicals onto watercolor paper. 

Head over to my blog for more detailed information about how I created this card. 

Below, you will find links to The Rabbit Hole Design products I used to create this card. Thanks for visiting! 

 Soft Hugs, Cotton Flower Stamp Set: Soft Hugs - Cotton Flower 5x6.5 – The Rabbit Hole Designs

Soft Hugs, Cotton Flower Die Set: Soft Hugs - Cotton Flower Dies – The Rabbit Hole Designs

You've Been Framed Die Set: You've Been Framed - Layering Dies – The Rabbit Hole Designs

You can follow me at these places:

Floral Friendship Card - featuring the Lovely Lilies stamp set

Hello crafty friends!  Today I am sharing this simple one layer card created using the new Lovely Lilies stamp set.  These images are beautiful illustrated by Kelly Taylor exclusively for The Rabbit Hole Designs. 
I started off by stamping the two bloom lily image on a piece of 4 1/4" x 5 1/2"  Premium Coloring Cardstock using Pink Sand Fresh Ink for no-line coloring. I Googled lilies and chose the Royal Sunset Lily as my color inspiration.  The lilies are colored with OLO Markers using Violet, Orange,  Orange-Red, Green and Yellow-Green families.
I stamped and cut the same image from Masking Magic to cover the lilies while I ink blended the background.  After the background was dry,  I treated it with the Cottontail Embossing Powder Tool before stamping and heat embossing the sentiment in a copper embossing powder.

I cut the card front  down to measure  4" x 5 1/4" and mounted it on a purple A2 card base competing the card.

The Rabbit Hole Designs Products 


I hope you enjoyed this CAS card featuring  the new Lovely Lilies  stamp set.  May you be inspired to create something lovely today!

Be Creative ~ Stay Inspired

Jenn Gross


Follow me, @journeycoachjenn on: 

Instagram - https://www.instagram.com/journeycoachjenn/

YouTube - http://www.youtube.com/c/JourneyCoachJenn

Blog - http://www.journeycoachjenn.com/


For more inspiration, updates, and news make sure to check out these places


The Rabbit Hole Designs

The Rabbit Hole Designs Instagram

The Rabbit Hole Designs Facebook Page

The Rabbit Hole Designs Pinterest

The Rabbit Hole Designs YouTube


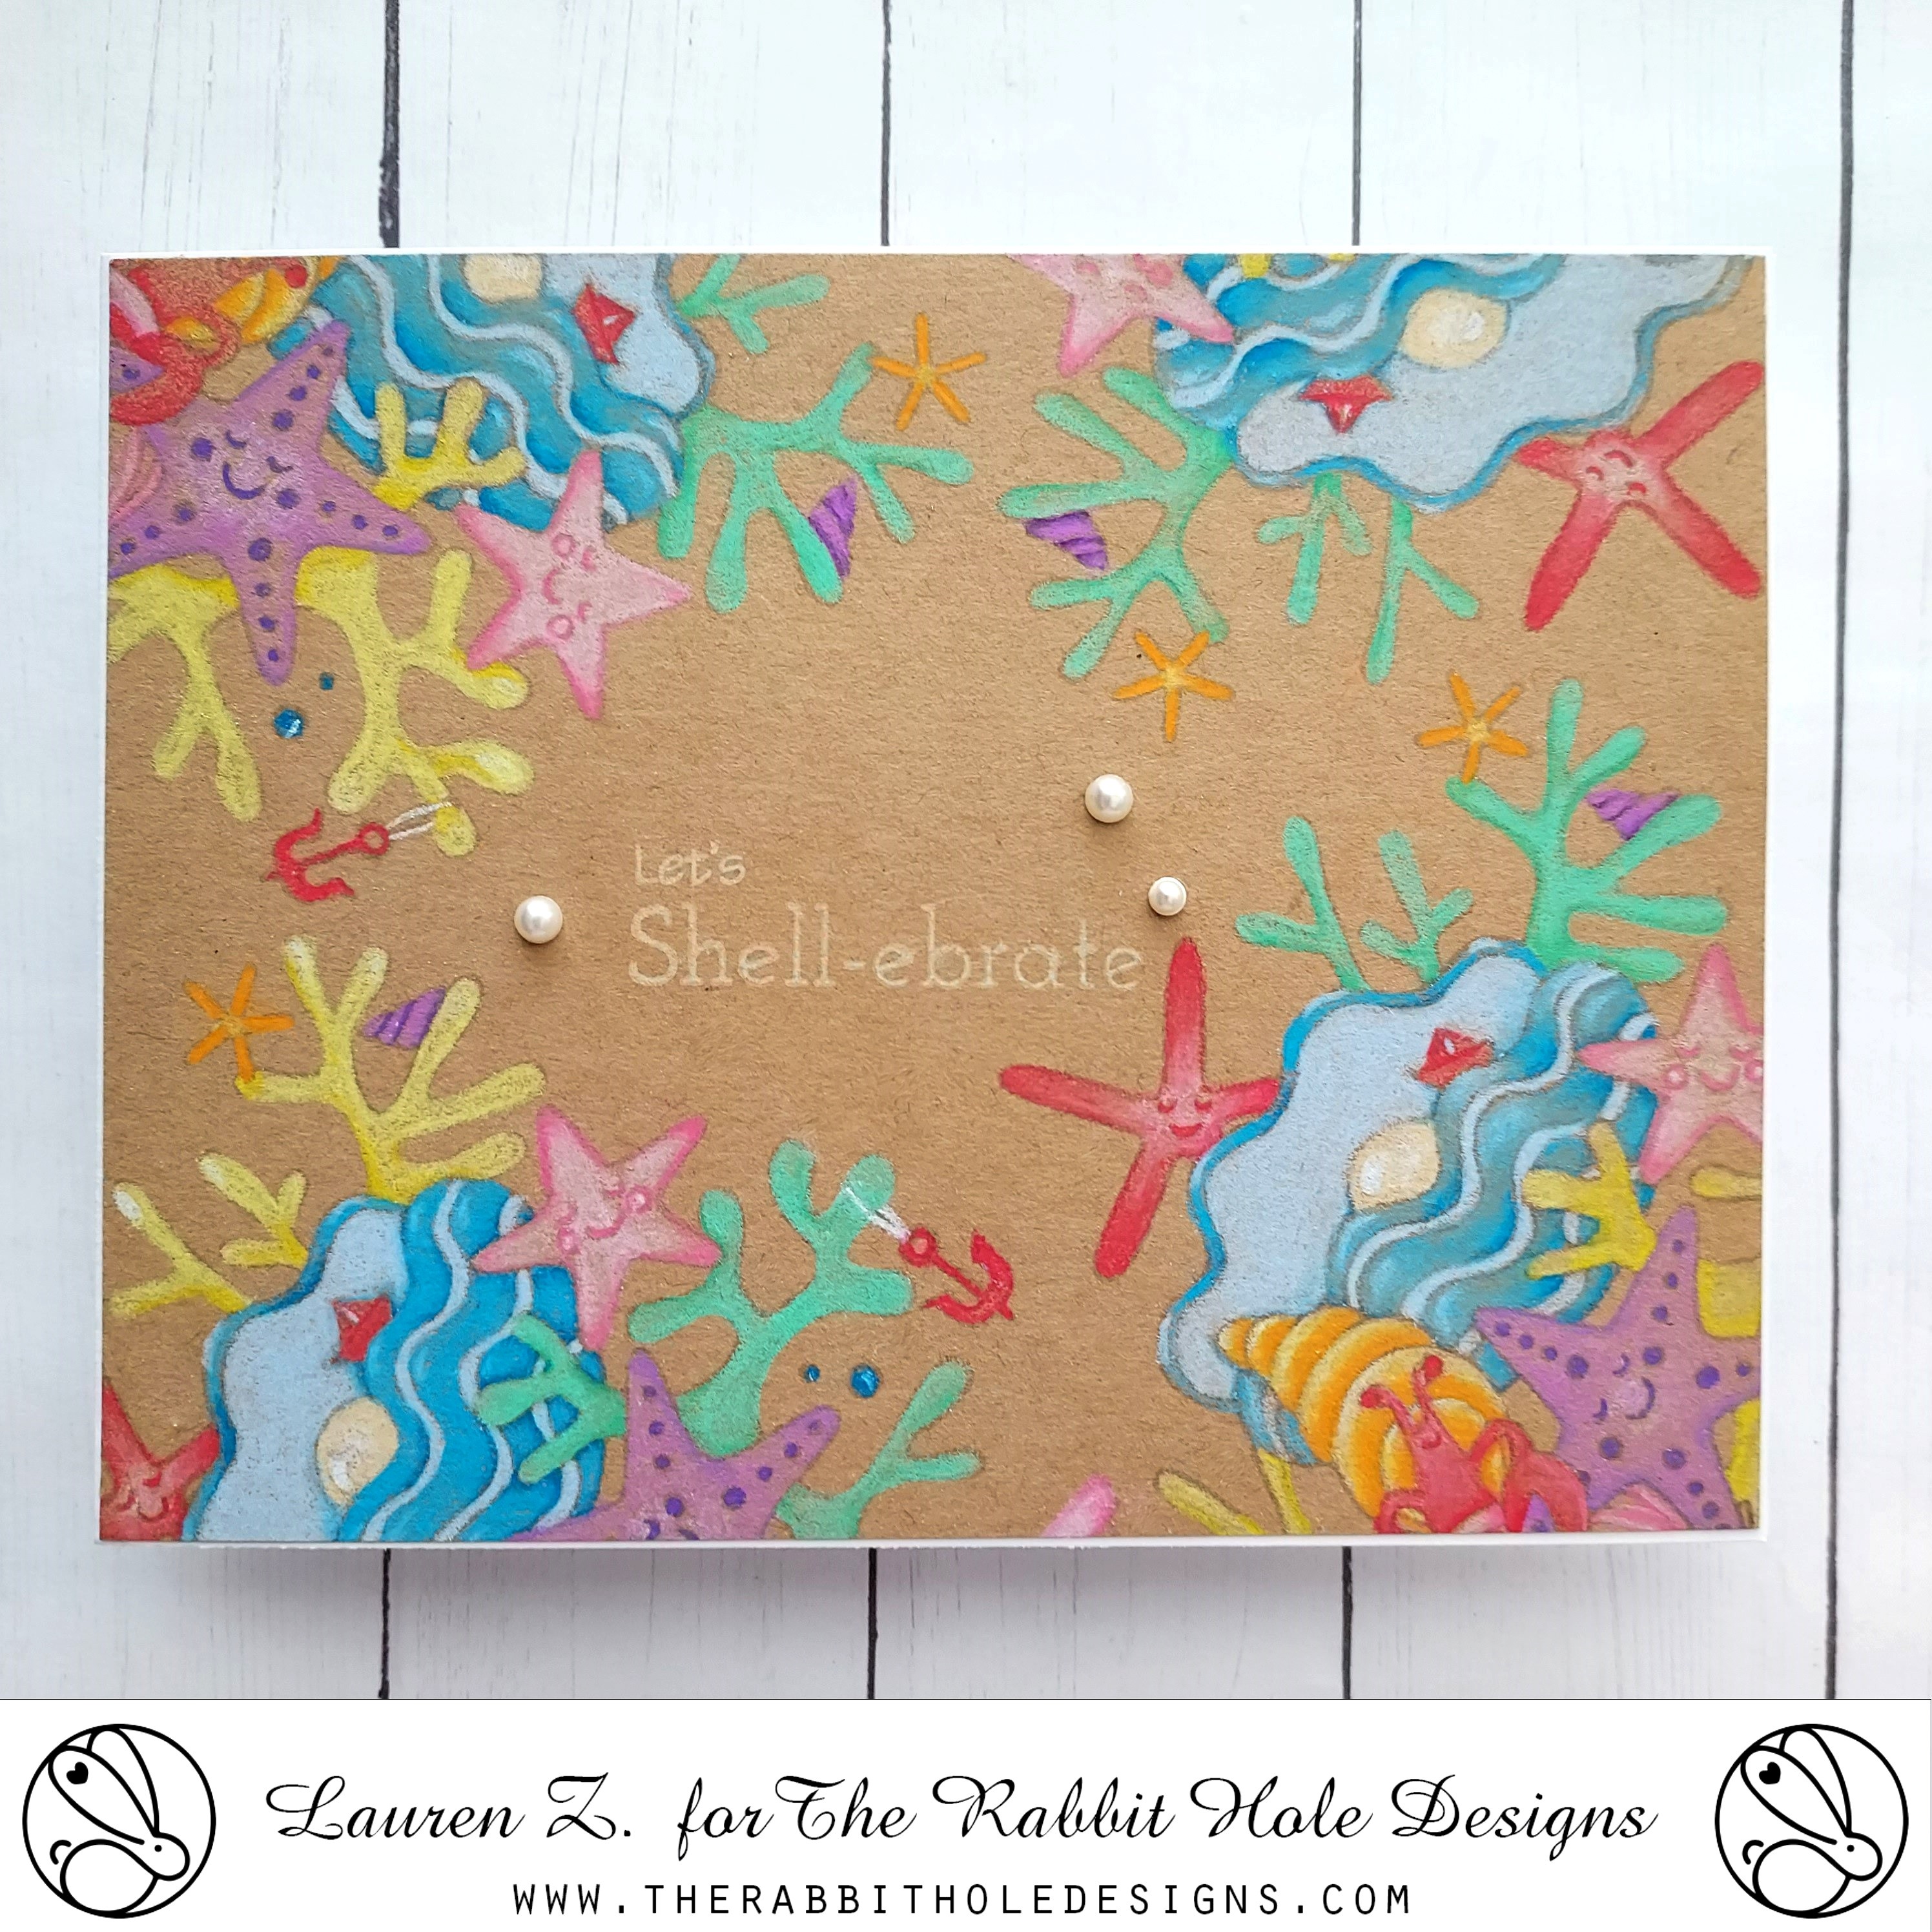
Shell-ebrate Border Card


 Hello! Lauren here with a colorful card that is sure to please any lover of the ocean and beach! I used the newly released Shell-ebrate stamp set, illustrated by Tatsiana Zayats to create an all-occasion card.

First, I used the stamp to create a border of sort around the sides of an A2 sized (4.25x5.5") kraft cardstock panel. I didn't want a black border around my images, so I used fade-out ink, for a no line coloring look.

I then colored all the images up using my colored pencils. 


Then I stamped the sentiment in the center using Antique Linen Distress Oxide ink.


Finally, I adhered the panel to an A2 sized, white card base and added a few self-adhesive pearls from my stash to finish off the look.

Here's the link to the Shell-ebrate Stamp Set: Shell-ebrate 4x4 – The Rabbit Hole Designs