Pages

Showing posts with label Broken Glass Stencil. Show all posts

Bicycle Witch Treat tag

Hello Everyone!
Kelly here for The Rabbit Hole Designs!


To continue the Halloween fun, I made this treat tag featuring "Bicycle Witch" and "Broken Glass" stencil. 

I started with neon orange glitz gel on the "Broken Glass" stencil.
When it dried, I cut out a circle and circle frame.

I stamped the images from "Bicycle Witch" and colored them with Copics.
I cut them out (dies now available) and adhered 
them to the tag with double-sided tape. 

I punched a hole in the top of the tag and added twine.
It's fun, festive and very bright!


Bicycle Witch 


 Broken Glass Stencil


For more inspiration, updates, and news make sure to check out these places


Thank for stopping by today!
Let's Get crafty!
Kelly


Neon Trees

Hello! It's Alison Heikkila. I really enjoy making holiday cards in non-traditional colors. Today, I decided to go neon. Yup, neon. I used the fun Slice of Christmas Stencil, as well as the Broken Glass stencil. 


I have 3 of the Rina K Glitz Glitter Gels from Therm O Web, and I thought the trees from the Slice of Christmas stencil would look great in these vibrant colors. I put all 3 on white cardstock and fussy cut them once they were dry.


I didn't want to create a scene for this card, and of course I wanted the trees to be the focus, so I decided to apply some blue ink to the Broken Glass Stencil and die cut it in a circle. This sort of "cooled off" the "heat" of the neons a bit.


Now I needed a background, and I really wasn't sure what direction I wanted to go in. I was chatting with my son about it (if you have visited my blog before, you probably know that he is also a crafter and has a great eye for design), and we thought I should check out the stash of backgrounds I have accumulated. I found this one, which is Distress Oxides on glossy photo paper. The chalky finish of the oxides rubs off to leave the most vibrant, beautiful colors. It was perfect for my neon trees. I needed a sentiment too, so Phoenix suggested I used the "Peace" from the Old School Tattoo-Affirmation stamp set with a bright color, so I used Vivid Green Embossing Powder from Stampendous on white cardstock. I adhered everything to a white card base, and popped up the green tree with foam squares.


This card is so fun and bright! I love how it turned out. The trees are so whimsical, they really lend themselves to these unnatural colors, and the background helps them really pop. Thanks for stopping by. Have an inspiring day!

For more inspiration with your The Rabbit Hole Designs Creations, be sure to follow along at these other locations:


For more details about products used in this post, you may also follow along at my personal blog HERE.

C-Ant Before Coffee


Good morning Rabbit Hole fans, it's Lisa from Oh So Cute By Lisa and today I 
have a card to share with you using the recently released Buggy For Caffeine stamp set and the Broken Glass stencil from The Rabbit Hole Designs.   
Here's a look at these 2 fun products:


I started by coloring up my little ant with my Copic markers on a small rectangular panel and notching the 4 corners just for a little extra detail.  I inked the edges of the panel to make it stand out against the background.  For the background of the card I used a Distressed Edge Rectangle die and did some ink blending over the Broken Glass stencil with some brown ink. I love the way the brown ink on kraft colored card stock gave the card an underground feeling. After the stenciling was done I stamped the caffeine symbol all over the background for some extra fun.
It's no secret that bugs are not my favorite thing in life but this stamp set really was fun to play with.  

🐜 🐜 🐜 🐜 🐜 🐜 🐜 🐜 🐜 🐜 🐜 🐜 🐜 🐜 🐜 

I hope this coffee loving Ant puts a little smile on your face today.
Make sure to visit The Rabbit Hole Design's shop and take a look around. You'll find a lot more caffeinated critters to make you smile, I guarantee it!
You can also find The Rabbit Hole products at Simon Says Stamp!

For more inspiration, updates, and news make sure to check out these places ...


Have a great day, I already am!
🐜 🐜 🐜 Lisa  🐜 🐜 🐜  

Don't Bug Me!

Hi everyone! Von Marie here and I'm so happy to be on the blog today, I have a fun Buggy card to share with you.


Isn't this Buggy cute?  I think so.  I used Buggy For Caffeine and the Broken Glass Stencil for my card today. I first stamped him onto some Neenah Classic Crest Cardstock and colored him with my Copic markers.  I then fussy cut him out and put him aside to work on my background.  I used the Broken Glass Stencil with Vintage Photo Distress Oxide ink and a blending brush over my rectangle. I then used a stitched rectangle die do make my panel.


I also cut out a small decorative rectangle and used Mowed Lawn Distress Oxide Ink and ink blended it. I then added some glittery green paste all over it.  I added the rectangle onto my stenciled panel and added my buggy with foam tape.  I stamped my sentiment and cut it out with my paper trimmer and added a little green distress oxide on it.  I then added it with foam tape and added enamel dots to match.  I hope you like my buggy card today?.  Thank you for stopping by!


Supplies I used:


For more inspiration, updates, and news make sure to check out these awesome places!

Thank you so much for stopping by today!

C-ANT before Coffee

Hello Everyone! 
Donna here with you today sharing our mid-month post.
I can't believe it's already the middle of May.
I hope you've been able to enjoy some creative time as a diversion 
during all the craziness going on in our world right now.

For my post this month I created this cute little layered card using lots of
scraps from my stash along with some new products.

I chose water color for my medium on this cute little Ant from the
Buggy For Caffeine stamp set.


Buggy for Caffeine
This stamp set has a bazillion possibilities and there is also a coordinating Buggy for Caffeine die set. 


Broken Glass Stencil

To add some interest on my card base I used the Broken Glass Stencil and created some
shadows which I kinda sorta think look like ant trails. I used Picket Fence distress ink for the shading on that element of my card.  

Thank you so much for joining me today!
Wishing you the most beautiful day.
~Donna K


For more information, news and updates check out these links:

You Mocha Life Sweet

It's Kelly here and I am sharing a card that features 
the Rabbit Hole Designs NEW stencil "Broken Glass".
I paired it with "Caffeinated Goat".

To make this card I stamped, colored and fussy cut my goat.
I stamped "hello" on the mug from "Doggone"
Then I die cut the circle out of thick vellum.

For the background, I sprayed my "Broken Glass" stencil with pixie spray
and adhered it to my Bristol Smooth cardstock.
I gave it a good rub/smoosh to get good contact to the paper.

I used blender brushes to blend three colors of ink (blue, teal and green).
I mixed a tiny bit of Liquid Pixie Dust with water and splattered the card.
I carefully removed the stencil and let the panel dry completely.
Meanwhile, I stamped the sentiment from "Perfectly Blended" on a white strip.

Once the stenciled panel was dry, I added my vellum circle a bit to the left and trimmed off the edge.  Then, I added my goat with dimensional foam.  I added gloss to his eyes and mug and glitter to his forelock, beard and tail.
I was AMAZED at how beautifully this worked with this intricate stencil.  
The lines were so pretty and clean! 


I hope you enjoyed my take on the new "Broken Glass" stencil 
with a classic Caffeinated Critter.

This is such a pretty and unique stencil. 
Performs beautifully with blending inks as well as gels. 
Thanks for stopping by,
Kelly 


For more information, news and updates check out these links:


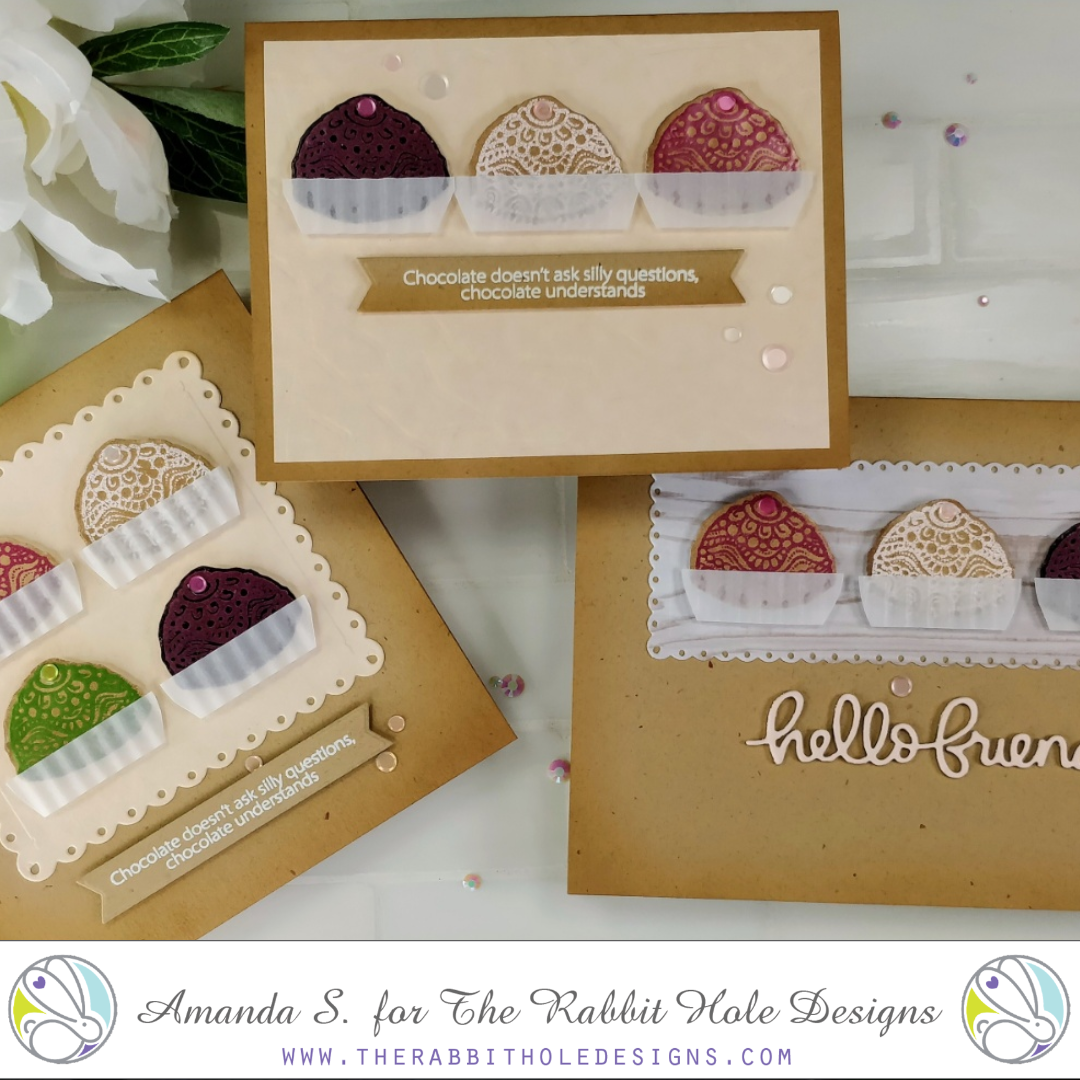
Chocolate Truffles

Scented Embossing Chocolate Truffles

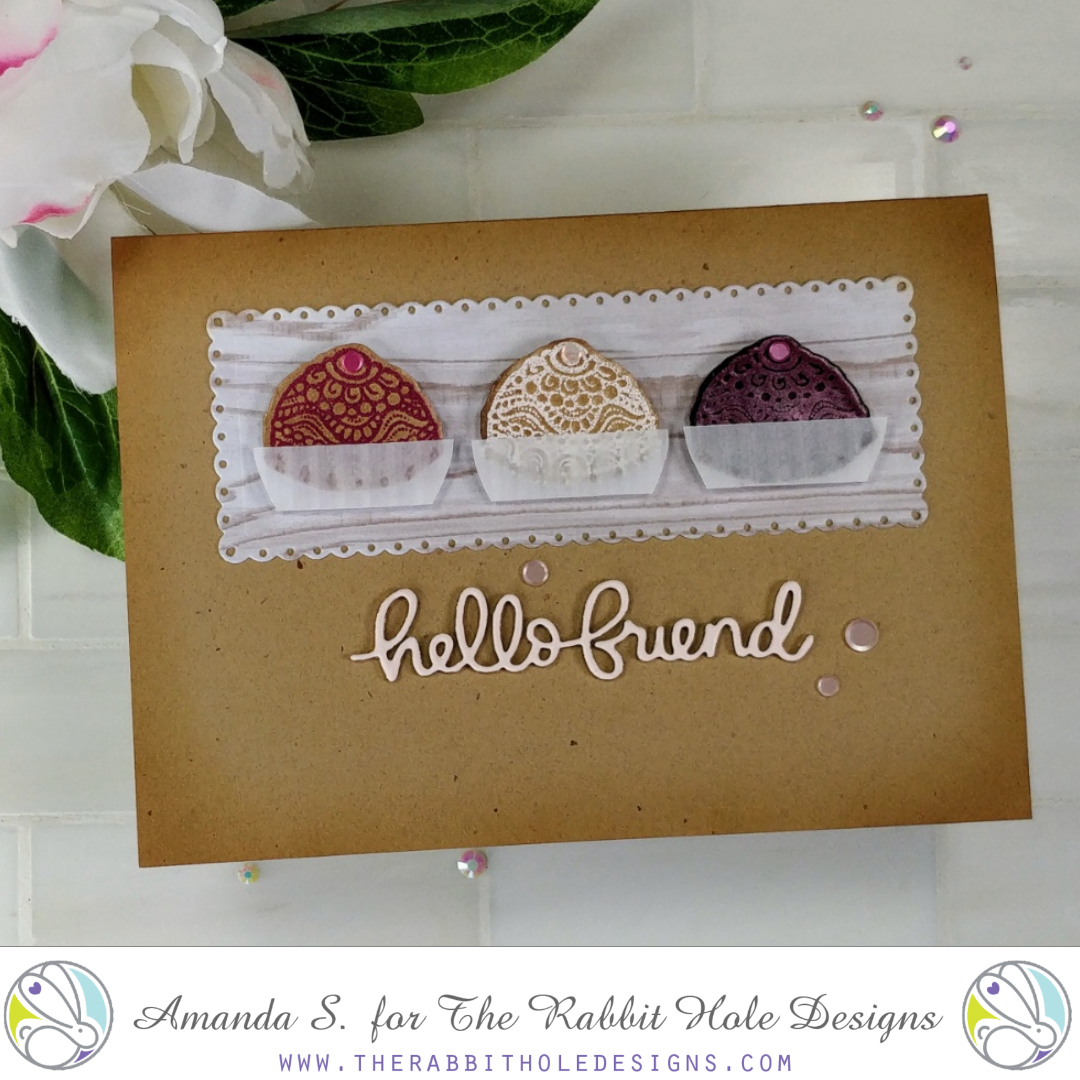
Hey crafty friend, it's Amanda from Pear Blossom Press, back with some more scented cards today. These were inspired by my friend, Katie Brooks. When the Sassy Sentiments stamp set came out last year, she had the brilliant idea to turn the jellyfish from Sofishticated into a truffle and pair it with the funny chocolate saying. As soon as my scented embossing powders arrived, I knew I wanted to recreate the idea!

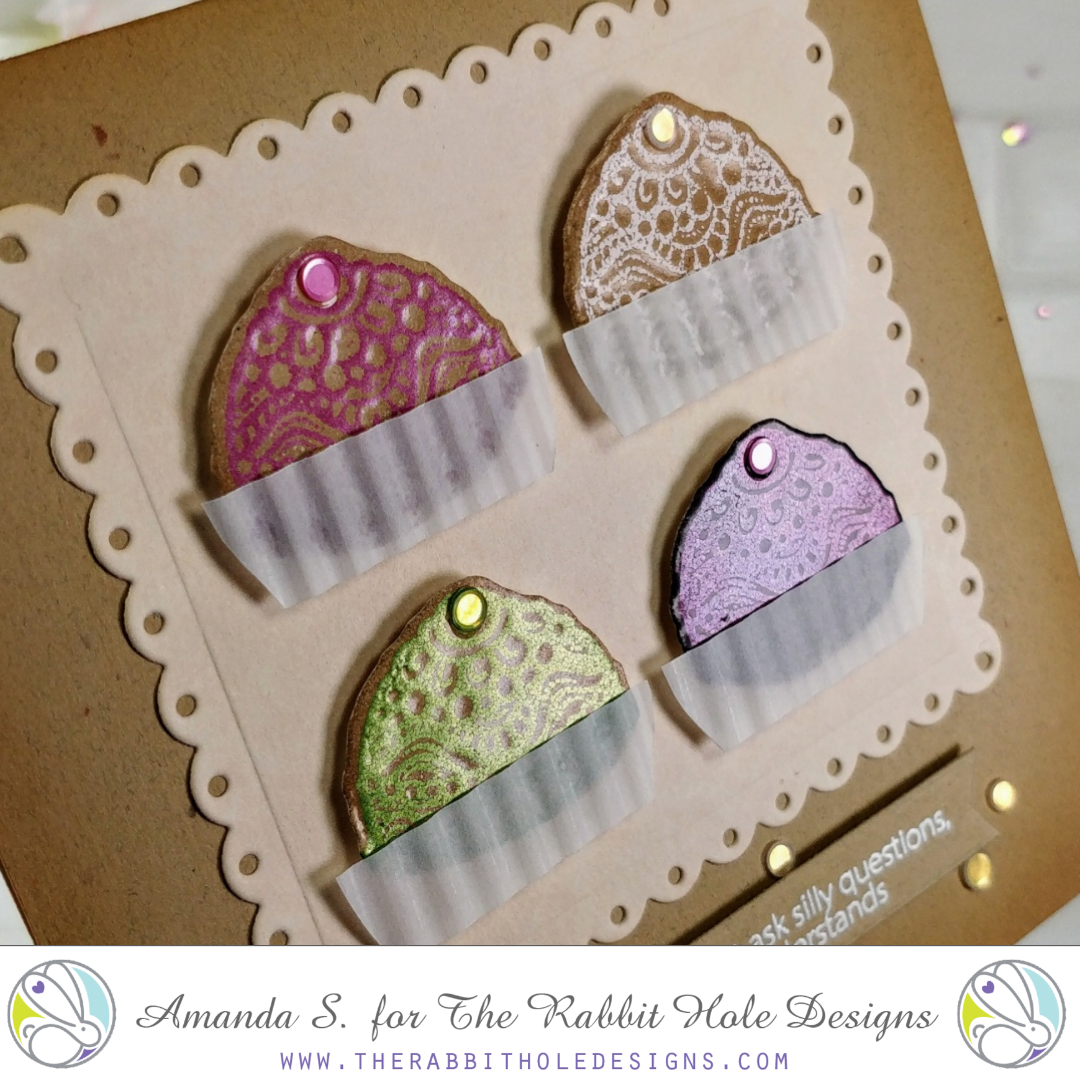
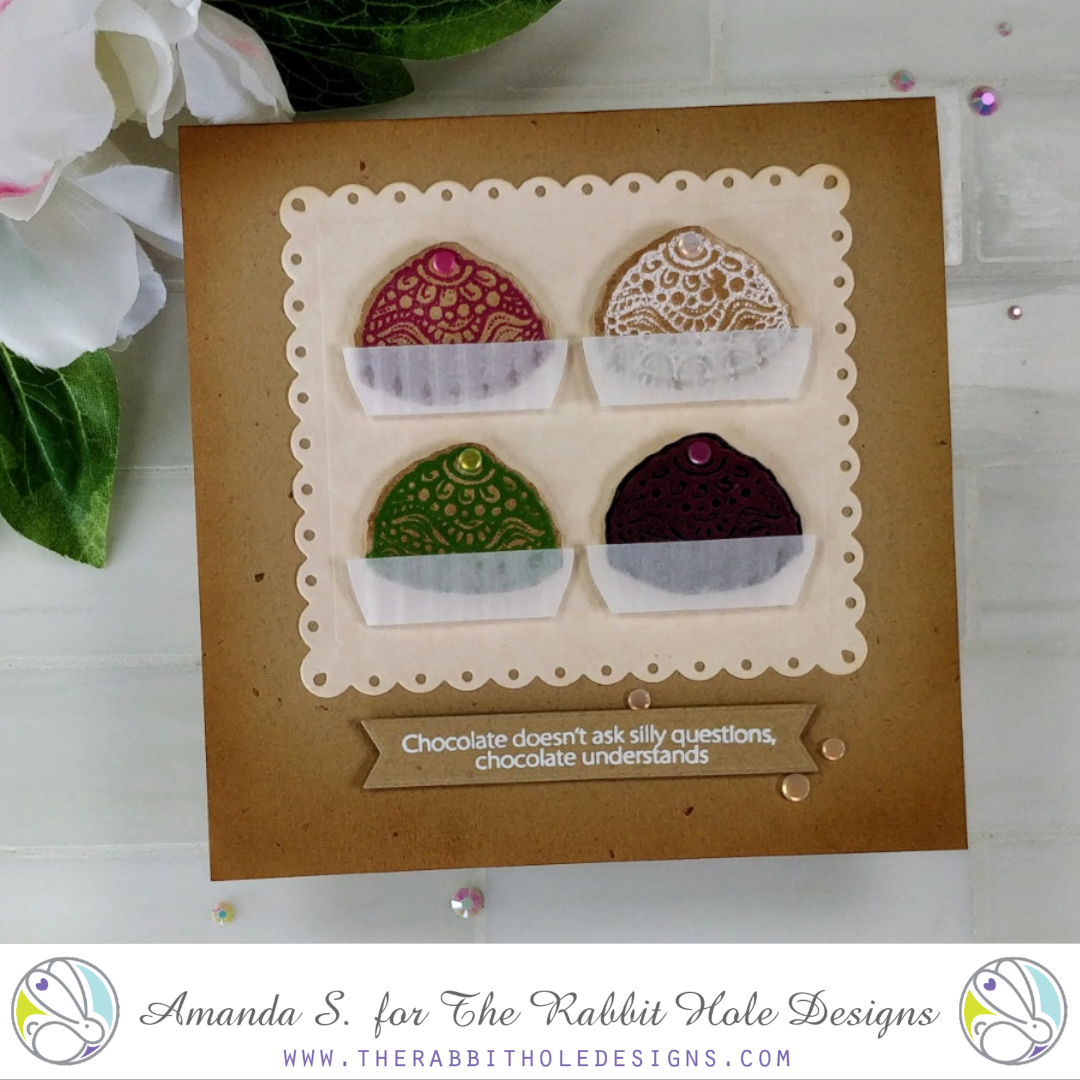
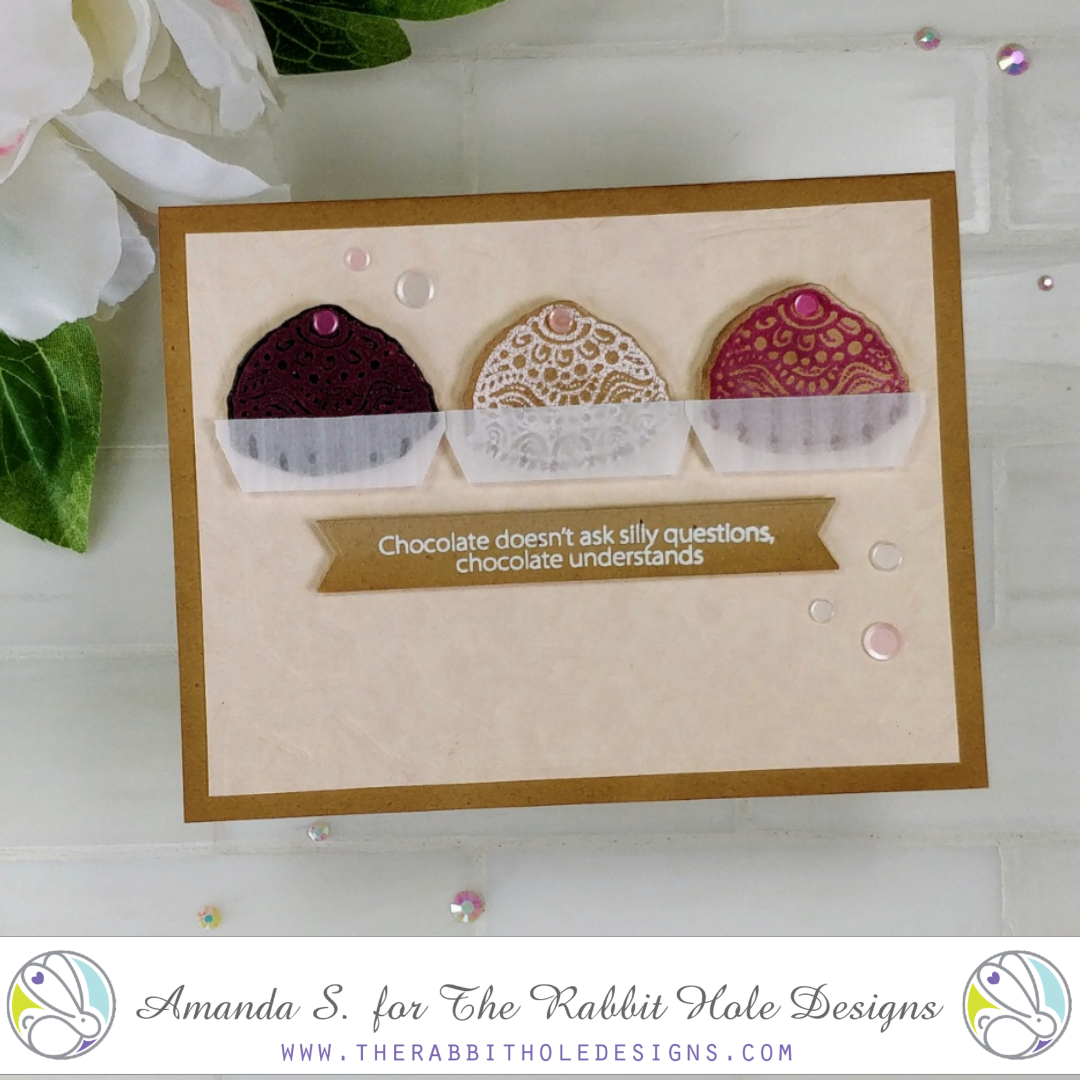
To start, I stamped the top of the jellyfish onto white cardstock, then added a narrow border to it, and cut it out multiple times with my ScanNCut. (You could fussy cut the shape, or use a circle die and cut the bottom flat if you don't have a ScanNCut.) I coated the entire front of each cutout with Versamark ink, and melted several layers of chocolate embossing powder on top. Next, I lined the cutouts up in my Misti, and stamped the top of the jellyfish over the chocolate with more Versamark ink. I sprinkled on a second scented powder and heat embossed it. The new layer melted into the chocolate, creating a smooth, flat surface, but leaving crisp lines. (The different scents used were raspberry, rose, and apple.)

Scented Embossing Chocolate Truffles

To create the paper cups for the truffles, I cut strips of vellum and ran them through my paper crimper. I trimmed the strips to fit over each truffle and glued them in place.

To complete my cards, I created various backgrounds and either die cut them with a fancy scalloped rectangle, or dry embossed with the new Broken Glass stencil. A die cut sentiment pulled the cards together, and a few sequins finished them off.

Scented Embossing Chocolate Truffles Scented Embossing Chocolate Truffles Scented Embossing Chocolate Truffles

I have to tell you, these cards smell so good! The chocolate isn't very strong, so the other scents don't get lost. They all blend nicely, and smell like a fancy box of candy. But fair warning, everyone in the house will want to know what you're baking if you start melting the scented embossing powders.

Thanks for stopping by today! I hope Katie and I have inspired you to give this idea a try. Wouldn't it be great for Valentine's Day too? You can find the sister article to this over on my blog; head on over for links to the specific products I used. I'll be back soon with more fun cards to share.

For more inspiration, updates, and news make sure to check out these places.
The Rabbit Hole Designs

Love Forever

Hello there! Michelle here. I love the newest stencil, Broken Glass! It's one of the most versatile 
stencils out there! I paired it up with Old School Tattoo- Anchor and love the way it turned out.


I inked up the stencil with victorian velvet and dried marigold distress oxide inks. I spritzed the stenciled background with water, than splattered some gold and black paint. Allow to dry.
I trimmed the panel to 4 x 5 1/4inches.  Next, I trimmed a piece of vellum to 2 1/4 inches and kept it long enough to fold over the stenciled panel. I embossed the sentiments with black embossing powder. The 'love' sentiment is from the stamp set Put a Bow on It.  
Adhere the vellum strip to the stenciled panel, than adhere to a piece of glitter paper that measures the same as the card base, 4 1/4 x 5 1/2.


I stamped the anchor with black ink than colored up with Copic Markers. I used shades:
W1, W3, W5, W7; RV32, RV34; YR00, YR61, YR02. I fussy cut the anchor. I laid down a piece of gold thread, than adhered the anchor on top. 
For a finishing touch I added some stickles glitter glue and sequins.

Thanks for stopping by for a peek!

Michelle


For more inspiration with your The Rabbit Hole Designs Creations, be sure to follow along at these other locations:


The Ants Go Marching...

It's Kelly here with a card featuring the new stamp set "Buggy For Caffeine"
This card was inspired by the brave battle my local ants presented in my kitchen in early spring. 
 Little, buggers.... 

I started off this card by blending brown inks at the bottom of my Bristol paper.
I then put the "Broken Glass" stencil on the bottom part and used a little yellow/orange ink to get the contrast and show the pattern of the stencil to make it look like dry, cracked dirt.  

I then used masking paper and made two masks of the same ant.
I stamped the ant four times across the paper, leaving space inbetween. 
I then masked the left and right ant, and stamped between them. 
I did this across the panel. 

I then stamped the ant again on my copic friendly paper, colored him red and cut him out. I gave him colorful mugs.  I colored the other ants brown with subtle yellow mugs and added some marker lines on their eyes to make them look sleepy.   My idea here is that the red guy is red and colorful after getting his coffee. I know I feel a bit more colorful after a  cup or three...

I carefully blended some blue on the background using bits of paper to avoid the yellow mugs and stamped the sentiment from the set.   The red ant is raised on foam and covered in Nuvo glaze.


 I hope you enjoyed my little scene.
I had a great time masking the image to give depth to the scene.
Thanks for stopping by!
Kelly


Out of Work Dragon


Good morning Rabbit Hole fans, it's Lisa from Oh So Cute By Lisa and 
today I have a card to share with you using the recently released Broken Glass stencil from The Rabbit Hole Designs.  I paired the stencil with the previously released 
Caffeinated Dragon. Here's a look at these 2 fun products:


I actually made the stenciled background for another card but decided against using it when I changed color schemes.  I don't throw away backgrounds like this in case I want to use them for another card and that's exactly what happened here.  The same goes for my colored images.  I had this dragon all colored and cut for a previous card that I didn't wind up using.  When I went through my colored images I found this guy all colored in yellow and purple and I knew he was meant for this background.  Disclaimer: These are not my go to colors but it sure is fun to color outside the box every now and then! Even though he looks sick in my eyes I feel like he reflects a little bit of what we are all feeling right now.  Luckily I am not out of work right now but my heart absolutely breaks for those who are! The world is upside down and some days my head is too.

I hope this sad/tired/out of work Dragon puts a little smile on your face today.
Make sure to visit The Rabbit Hole Design's shop and take a look around. You'll find a lot more caffeinated critters to make you smile, I guarantee it!
You can also find The Rabbit Hole products at Simon Says Stamp!

For more inspiration, updates, and news make sure to check out these places ...


Have a great day, I already am!
🐉 ☕️  Lisa ☕️  🐉 

May Release Inspiration Hop ~ Day 3


Hello and welcome to Day 3 of the Inspiration Hop. We are so excited for you to join us as we present to you our May release.  Our fabulous Design Team has been sharing their projects over the last couple days, so be sure to visit their blogs and leave them some crafty love.


 The 2 new stamps sets (one with a coordinating dies set) and 1 new stencil are all available to purchase right now in the shop.


The stencil that is being highlighted today is ...

Broken Glass Stencil


Thank you so much for hopping along with us and the team for our May Inspiration Hop.


Here is the line up for the hop:

The Rabbit Hole Designs

Michelle
Jenn
Kelly
Tangii
Alison
Amanda
Lisa

_______________________


**Giveaway**


To celebrate the May release, The Rabbit Hole Designs is giving away two gift certificates; one to a lucky Instagram Follower and one to a lucky Fan Page follower.  Winner will be chosen at random from the comments left on the INSTAGRAM post, and tagging friends, and also from commenting on the Fan Page post.  So make sure to head on over to INSTAGRAM and look for the giveaway post @therabbitholedesignsllc and look for the post at The Rabbit Hole Designs Fan Page by 11:59 p.m. PST 04-30-2020.  Winner will be announced on The Rabbit Hole Designs blog 05-01-2020.

This is the graphic you are looking for on our IG and FB


___________________


For more inspiration, updates, and news make sure to check out these awesome places! 


Thank you so much for stopping by today!