Pages

Showing posts with label Love You More. Show all posts

Holiday Tags!

 Hello there and Happy Holidays!

It's Kelly here on the blog today sharing some holiday tags.

Pull out your Rabbit Hole favorites and spread some holiday joy!

This is a picture heavy post. I had SO MUCH FUN making these tags!

My tags feature several Rabbit Hole Designs Products:
  • Candy twist stencil
  • Caffeinated Reindeer stamp and die
  • Love You More stamp set
  • Kringle stamp and die


To make my tags, I stamped, colored and die cut or fussy cut my images.

I applied Glitz gel with the Candy Twist stencil on store-bought tags.

Stencils work GREAT on tags and are so much fun.  

I assembled my tags after the glitz dried. I used double-sided sticky tape to adhere the elements to the glitter. Nuvo gloss, glitter and foam make these tags extra special.


 for my hubs: 


For more inspiration, updates, and news make sure to check out these places.

The Rabbit Hole Designs 

The Rabbit Hole Designs Instagram

The Rabbit Hole Designs Facebook Fan Page

The Rabbit Hole Designs Pinterest

The Rabbit Hole Designs YouTube


Thank you for stopping by. I hope these tags inspire you to use those Rabbit Hole favorites in fun, festive and even unexpected ways this holiday.

Have a GREAT holiday! 

-Kelly 


Love is in the Stars Card


Hello Everyone! Justin here, and I today I am incredibly excited to be sharing this card I made using the new Aim for the Stars Stencil!

I figured this stencil paired so well with the balloon couple from the Love You More set, so I took the idea and just ran with it!

First, I colored up my couple with Copic Markers, fussy cut them out and set them aside.

Next, I die cut a stitched panel with stitching from white cardstock, a scalloped rectangle from navy cardstock, and cut an A2-sized piece of blue patterned paper. I also die cut another stitched panel from white cardstock, and then cut it with a cloud border die.

I took my white rectangle stitched panel and used a cloud stencil to blend clouds that went from pink, to purple, to navy with Oxide Inks. I also took my cloud border and distressed the bottom edge with pink oxide ink. I stamped the sentiments "love" and "is in the air" from Love You More in purple ink, along with some hearts from the set as well in various ink colors.

On my cloud panel, I took the Aim for the Stars stencil, put it into place, and applied a solid layer of purple Glitz Glitter Gel. I carefully removed my stencil and set my panel to dry entirely. I also cleaned off my stencil right away.

Once my stars had dried entirely, I adhered my cloud banner and couple with foam tape to this panel. I then adhered this layer to the scalloped navy panel, adhered the scalloped navy panel to the A2-sized blue patterned paper panel, and then adhered the whole unit to an A2-sized card base.

I finished my card off by adhering a few The Rabbit Hole Designs sequins, and was done!

This project uses the following products:


For more inspiration with your The Rabbit Hole Designs Creations, be sure to follow along at these other locations:


For more details about products used in this post, you may also follow along at my personal blog, Just a Note by Justin, as well!

I cannot wait to see what you craft up using these amazing new June release products, especially this fun stencil! Be sure to share them in The Rabbit Hole Designs Fan Page (and don't forget about the Anything Goes Challenge Album as well!

Happy Crafting!

You feel like home to me...


Hello and welcome to The Rabbit Hole Designs blog! It's Lisa here with you from 
That is the name of the stamp set I used to make this card. 


I just love the whimsical feel of this image. Everything from the messy hair to the shirt hanging off her shoulder. It just gives you a laid back easy kind of feeling and we all need that right about now! The sentiment is from another Rabbit Hole set called Love You More.  Isn't that just the sweetest sentiment you've ever seen! I think we all have a new appreciation of home right now.... It's our safe space and we are surrounded by our loved ones during this time of social distancing.  I know we have spent a lot more time together just in family meals alone! 
The background of my card was made with the 
Diamond Flower Stencil and two different color oxide inks.

I am very happy with how this card came out.  It has a nice easy feel with some cool colors and I don't even hate my Copic coloring.
😂

Thank you so much for stopping by my blog today!

For more inspiration, updates, and news make sure to check out these places ...


Have a great day, I already am!
☕️Lisa ☕️

You Feel Like Home To Me Card

Hey Rabbit Hole Crafters! Justin here, and I'm here with a fun traditional Valentine's Day project!

This card uses solely the Love You More set, but only uses the, what I call, scene building images!

I was looking at this card and knew that it was the set I wanted to use to create a Valentine's Day project, but didn't know which images I wanted to use. This set comes with 2 really cute pairings of a boy and girl couple, but what really inspired me was the sentiment "You Feel Like Home To Me". Since the set included images of houses, I knew that was the direction I was going to go.

First, I colored up a handful of houses and clouds with Copic Markers, alternating between a few different Red and Pink groupings I had come up with. I then cut all of the images out using my Scan and Cut.

Note: for images that are generally white, I color them up with a super light/diluted color. For these clouds, I took a super light pink marker and just went around one side's edges. You can also blend this out with a colorless marker if you deem fit.

I die cut a "Slightly Smaller Than A2"-sized stitched rectangle on white cardstock and again on black cardstock. I took my black cardstock panel, marked where I wanted my grounding for the house to be, and die cut a stitched curved edge on the panel. Then an A2-sized rectangle on red cardstock.

I took the white panel and ink blended a background. From the bottom up, I used a light pink, bright pink, and then a lighter red to create an ombré Valentine's Day appropriate sky.

I adhered my black stitched grounding section to the bottom of the ink blended panel. I then laid out how I wanted my houses to be layered, having some houses in front of others to create a little bit of depth, and adhered them. I also adhered my clouds, pairing some of them up, and adhered them with foam tape to raise them off the paper a bit.

I cut two very thin strips of black cardstock and heat embossed one sentiment on each, "You Feel Like Home To Me" and "Happy Valentine's Day". I then adhered those, one sentiment a bit removed and on top of the other, with foam tape in the top left section of my card.

I wanted a little bit of detail on the bottom of my card, so I had some red and white twine on my desk. I wrapped the twine along the bottom edge of my card and tied a bow. Fun tip, when using string to create a bow, sometimes it's hard to get a taught string (i.e. sometimes part of the string on the front is droopy). Remember, nobody is going to see the underneath of your panels, so they don't have to look perfect. I sometimes pull the strings from the back so they look taught on the front. I then take a piece of washi tape to the back to hold the string in place! And see, you'd never really know unless I told you!

I took some red and silver sequins that have been included in past The Rabbit Hole Designs orders and adhered them to my card. I finished by mounting my scene panel to my red A2 panel, and then mounting the entire piece to an A2 card base that is folded on the top edge! And that's how I made my Valentine's Day Card

I used the following products to create this project:


For more inspiration with your The Rabbit Hole Designs Creations, be sure to follow along at these other locations:


For more details about products used in this post, you may also follow along at my personal blog, Just a Note by Justin, as well!

No matter how you're celebrating Valentine's Day this year, I hope this card inspires you to go out and create a fun project with one of your favorite Rabbit Hole Designs sets, or even try out a new one!

Thanks for reading, and happy crafting!

Doggone It, Be My Valentine!

Valentine's Day is coming! I'm sharing a card featuring many products from  The Rabbit Hole Designs

I love this card so much and I cannot wait to give it to the Hubs!! 

I stamped the background using the paw print and bone 
from the "Doggone" set with brown ink on kraft paper.
Several paw prints in the set to pick from. 

I used gold glitter glitz gel with the "Candy Twist" stencil. 
Once it dried, I cut it out with a heart die.

Then I stamped, colored and fussy-cut my pups.

I stamped & colored the large open hearts 
from "Love You More" to create balloons.

I stamped the sentiments from "Doggone".

There's glitter pen on the dog's scarf and Nuvo Glaze on the balloons.  


For more inspiration, updates, and news make sure to check out these links.


 Hope you enjoyed my Valentine take using the "Doggone" set!
Thanks for stopping by! 
-Kelly

Holiday Smooch With "Love You More"

Happy Holidays!
New DTM Kelly here and I am excited to share my first project for

I took a their romantic Valentine themed stamp set, "Love You More" and 
set the couple in a holiday theme under the mistletoe.  
I use their incredibly sweet "Candy Twist" stencil on the background panel with red glitz gel.  
I used the large heart in the set upside down to create the mistletoe.


I was inspired by Kristina Werner's guest post to add snow to their hair.
They are both dressed in holiday colors. 


Products Used:

https://static.wixstatic.com/media/e7803a_2256ead09d6b489cbf739f529b83c3ac~mv2.png/v1/fill/w_660,h_924,al_c/e7803a_2256ead09d6b489cbf739f529b83c3ac~mv2.png


I hope you enjoyed my holiday take on this very versatile set "Love You More"!

For more information, news and updates check out these links:


Thank you for stopping by and have a great day!
Kelly


Deck the halls!

Hey everyone, DT Member Jammie here wish a fun little card for you to see...
I used the new set from the November release "Love you more" but I modified it just a bit.  I used the image where the two little people are decorating the Christmas tree and changed it just a touch. Take a look:


I placed them at the front stoop of their little apartment decking the halls!  They really should invest in a ladder! I can totally Identify with this girl though, I want to decorate all the things! Lol! 

I hope that this project inspires you and I really hope that you can look at your stamps and make something different out of them, think outside of the box.  I love figuring out different ways to use my stamps, it just makes them so much more versatile.  I cannot wait to see all of the fun things you create with this adorable little stamp set! 

Hope you all have a wonderful holiday!  Tootles! -Jammie

All I want for Christmas...

Happy Saturday! Charmaine from CharCards here to post my last blog entry for The Rabbit Hole Designs. It has been a blast working with so many incredibly talented people!
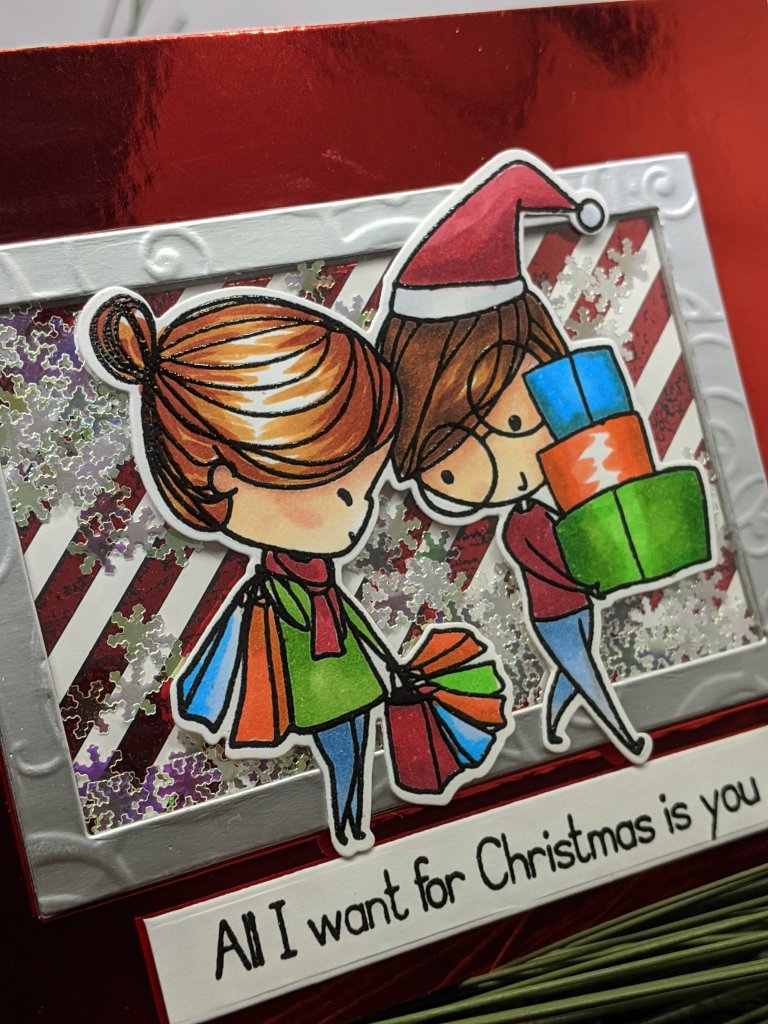
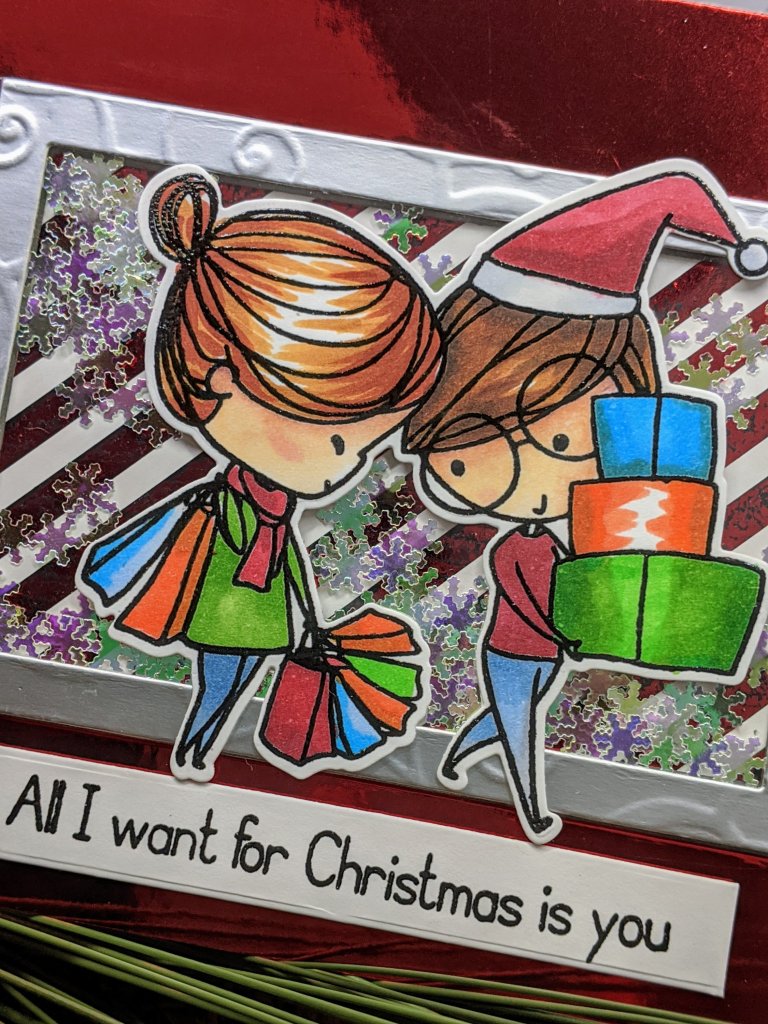
I hope you like my last card featuring this beautiful and sweet Love you more Christmas Frost stamp and die set. How appropriate for me to end with a shaker card!

Love you More - Christmas Frost 4x8

This stamp and die set is also available at Simon Say Stamp.


This was a very simple card to make. Basic shaker elements, a little bling and a beautiful stamp. I feel it is necessary to buy the coordinating die as even my Brother Scan N Cut had some difficulty cutting the space in between the lovebirds.


I used Copic markers for the stamp and red and silver mirror card stock for the background. The frame inside is easy to create; MFT carries a metal die set that will cut three different sizes of frames. I used the medium size for the silver frame.
Quick Tip: If you use shakers and want some shakers to stay more to the top instead of all being at their feet, glue some shaker elements with some clear glue. 
Also, don't be afraid of color! See what works. This is what I imagined looking like walking down the streets after shopping!


For more inspiration, updates, and news make sure to check out these awesome places!

The new release is around the corner and if you love this couple as much as I do, you don't want to miss it!

Hope to see you around and keep on crafting!
Hugs and Kisses,
Charmaine Canham
www.facebook.com/charcards2017


Therm O Web Collaboration: Fall is in the Air


Morning Friends! 
Charmaine with CharCards on the Rabbit Hole Designs Blog!

This week we are teaming up with Therm O Web to showcase you some old and new products that we use in our products. 
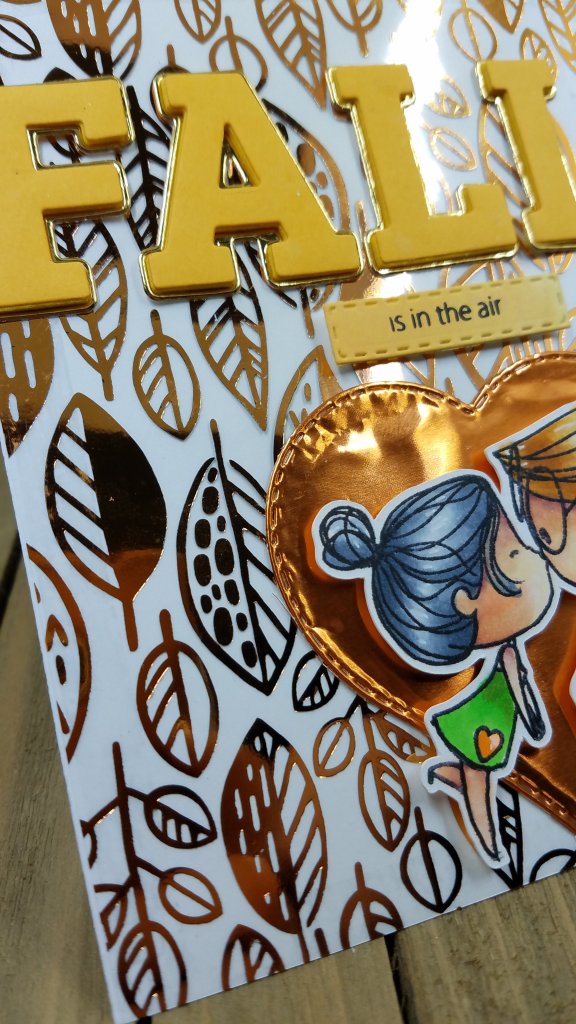
I am an Autumn baby so these gold Deco Foil and leafy designer toner sheets just spoke to me! I will link all my products used in the post.

This image has an empty alt attribute; its file name is 20190915_1600267456851903282201301.jpg


Using my favorite Love you more stamp, I decided that they need a Fall background. This stamp set is available 
Deco Foil Clear Toner Sheets - Endless Leaves pictureDeco Foil Transfer Sheets - Copper picture
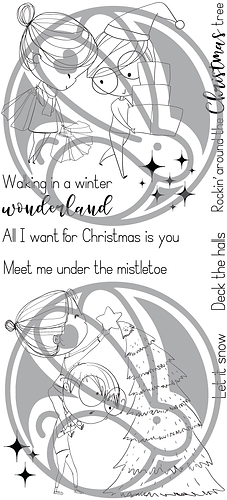
Love You More Clear Stamp 4x6

Here is what I did:

** Switch on your laminator***
1. Stamp, cut and color the lovely couple. I used Copics.
3. Stamp the sentiment on yellowish paper, used
  My Creative Time's sentiment strip for the stitched die
4. For the "Fall", I used Pinkfresh's Adore Alpha Die Set and craft foam. Cut another set out of yellow cardstock and another out of gold/ mirror card stock. 
5. Glue the foam and cardstock with liquid adhesive. I used Gina K connect glue

This image has an empty alt attribute; its file name is 20190915_1558458713080945495934890.jpg

6. Now for the fun background: 
This clear Deco Foil Designer Toner Sheet, Endless Leaves, is GORGEOUS.
7. Pair it with ICraft Deco Foil Copper Cabre transfer sheet and run it through the laminator.
(Follow the directions of the packaging). 
The Rabbit Hole has transfer sheets in stock as well. Click here.
8. Cut the leafy background down to your card size (4.25 x 5.5)
9. Adhere the leafy background to the card using Therm O Web tape runner. This will not show through the clear sheet. Amazing right???
10. Adhere all the elements onto the card and as a final touch, use the gold "shadow outline" from letters and adhere to the word Fall. 
11. I used dimensional tape to adhere the sentiment

Hope you liked my card and all the elements I used from Therm O Web. These Clear designer Toner Sheets are amazing and very easy to work with. I hope you will give it a try!

For more inspiration, updates, and news make sure to check out these places.


Leafy kisses!
Charmaine 


Kitty Dreams with Katie

Happy Sunday!  Katie here with a fun Kitty card!


This scene makes me happy, it is so sweet.  I just returned from vacation, and I like to imagine this kitty is me.... dreaming of vacation again. :)  

Here is how I made it: 

  • I stamped this kitty from the Cattitude set and the bird from the Love You More set on Copic friendly paper.  I colored them both and fussy cut them out and set them aside. 
  • I cut a piece of light blue paper to 3.75 X 3.75.  I stamped some clouds from the Love you More set directly on the blue. then I added some white highlights. 
  • I die cut the flowers and grass scene builders and added them to the blue background.  
  • Next,  I added my kitty and added a bit more grass in front.  
  • Lastly, I mounted it all on a 4X4 notecard. 

 Here you can see the dimension. 


One more shot of the card from a different angle. This makes for a small but sweet notecard, perfect for most occasions.


Supplies Used:
Cattitude
Love you More

I hope you enjoyed this card, it was fun to make.  I have a full list of supplies and a wee bit more info about my vacation on my blog if you are interested.  Thanks for visiting!
For more inspiration, updates, and news make sure to check out these places


Anniversary Card


MaryAnn, from PaperDreamz here to share a really easy to make card with you that features the images from the
The Rabbit Hole Designs set Love You More


Card Recipe
  • Create a stamped with versamark watermark ink and clear powder heat embossed background on Neenah Classic Crest White 80lb cardstock using the smaller elements from the stamp set "Don't forget to use your anti-static powder on the panel before stamping" 
  • Grab your favorite blending tools and some inks and set about blending them on the panel any way you wish.  Honestly there is no wrong way here, just go with it!
  • I then stamped the couple with a Copic friendly ink and die cut the panel on a slant.  I found it really easy to do with rectangle dies so I could have a nice finished edge. 
  • I am no pro at Copic coloring of people so I quickly grabbed some markers and gave the stamped image a quick pass with some color. 
  • I stamped the sentiments on the left over piece of cardstock at the bottom of the now diecut couples panel lined it up and gave a quick stamp and I was happy.  Now to assembly.
  • To adhere the ink blended panel to the 110lb card base I used Tombow Multi glue in the green bottle. For the couple panel I added 3D mounting foam to the back of the panel and attached to the top left edge flush top and left of the ink blended panel. I repeated the mounting foam with the sentiment strip but left a bit of space between so you can see some of the background peeking thru. To finish off this card some pink confetti sequins and a couple of clear heart shaped drops that I used some red glitter glue to adhere to the front, give the card a nice pop of sparkle and shine.

For more inspiration, updates, and news make sure to check out these places.

That is all for me today.  I hope I have inspired you to maybe give this technique a go and create some fast and easy cards.
If you are looking for further details about my project including links to instruction and products not listed please feel free to drop on by my blog
PaperDreamz
Thank you for falling down The Rabbit Hole for a few minutes!
MaryAnn