Pages

Showing posts with label Birthday Scripty Stamp Set. Show all posts

A Look Back at 2023 - Fun Holiday Birthday Card

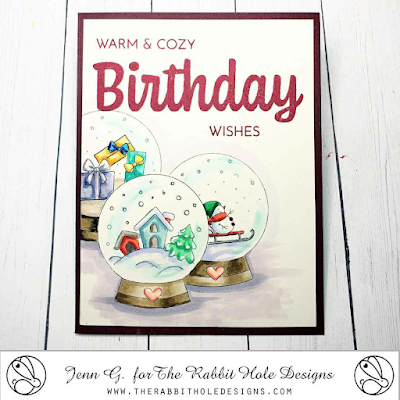
Hello there crafty friends! We are looking back at a sweet winter birthday card create this past summer using two stamps sets from The Rabbit Hole Designs - Christmas In July Release from 2023.

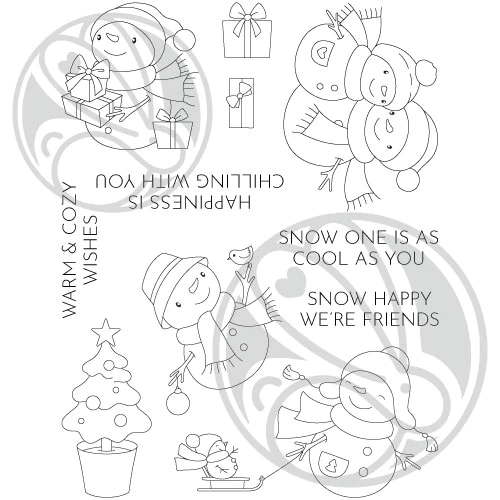
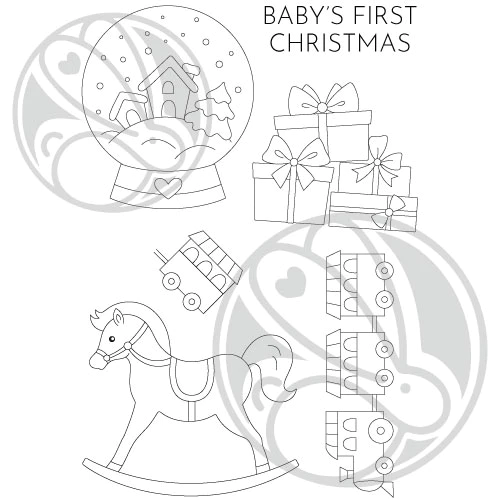
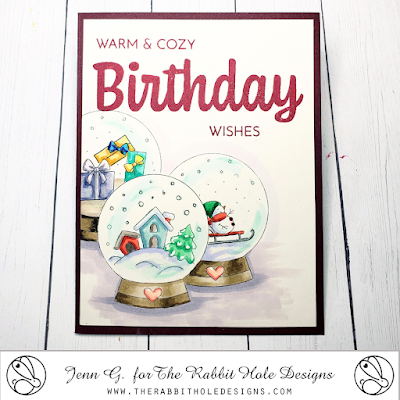
The Rabbit Hole Designs Baby's 1st Birthday stamp set, Warm & Cozy stamp set, and Birthday Scripty stamp set were combined to create this A2 Snowglobe Birthday Wishes card.

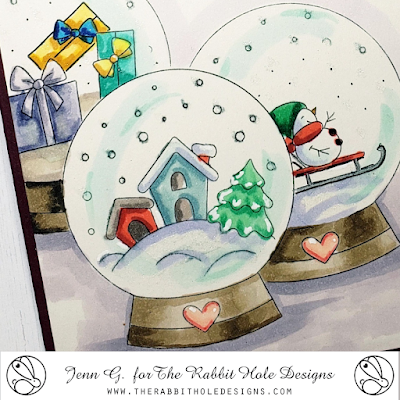
I stamped the snowglobe image on a 4" x 5 1/4" piece of coloring cardstock and masking it off.  I stamped the snowglobe two more times masking the middle of these two globes.  I added the sledding snowman image to the partial snowglobe on the right and the gifts to the partial snowglobe on the left.
I colored each of the snowglobe images and added shading using OLO Markers. A sparkle pen is used to add glitter to the snowglobes.
I positioned and stamped the sentiment in red ink and glued the card front to a dark red A2 card base.


Thank you for stopping by check out today's look back at one of my 2023 The Rabbit Hole Designs card.  I hope you are inspired to create something lovely today!

Be Creative ~ Stay Inspired

Jenn Gross


Follow me, Journey Coach Jenn, on 

Instagram - https://www.instagram.com/journeycoachjenn/

YouTube - http://www.youtube.com/c/JourneyCoachJenn

Blog - http://www.journeycoachjenn.com/


For more inspiration, updates, and news make sure to check out these places


The Rabbit Hole Designs

The Rabbit Hole Designs Instagram

The Rabbit Hole Designs Facebook Page

The Rabbit Hole Designs Pinterest

The Rabbit Hole Designs YouTube 

Birthday Penguin

 Hello, Erin here to share a card that I made with the Penguining from The Rabbit Hole Designs! This adorable stamp set has three little penguins that can be used together or they can be cut apart to use separately.  For this card, I decided to use just one of the three penguins, which I cut from the other two using the Penguining Dies.


I started by looking through the Retro Christmas Paper Pack and found this very pretty red paper.  I wanted to make a winter themed card that wasn't for Christmas so I choose to stamp the word "Birthday", from the Birthday-Scripty stamp set, in a red ink that coordinates well with the paper.  I then cut it out using the shadow die from the Birthday-Scripty Word with Shadow Layer Dies
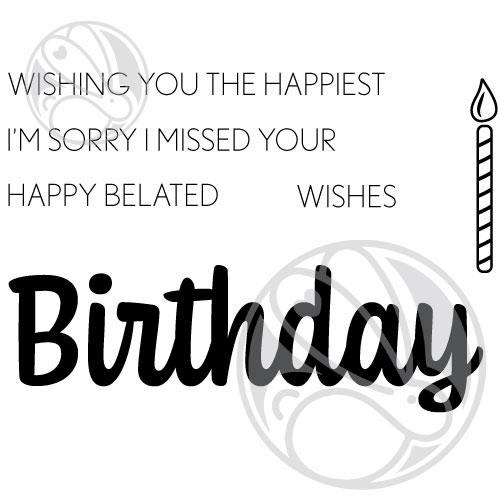
The sentiment "Wishing you the happiest" also comes from the Birthday-Scripty stamp set and I stamped that onto a white rectangle which I then mounted onto the red patterned paper.  I popped up the penguin and the word "Birthday" with some foam tape for a little dimension added that them to the card front.  I layered everything onto another white rectangle and mounted the whole card front onto a red card base. 

I have a family member with a birthday just before Christmas and she once told me that growing up, she always received combined "Merry Birthday" or "Happy Christmas" gifts. Since then, I've ensured that we celebrate her birthday completely separate from Christmas. After all, everyone deserves a special day!  I always make sure her gifts are wrapped in Birthday-themed wrapping paper and that the cake, cards or dinner don't have any Christmas related theme. I think this card will work perfectly for her birthday this year because it is winter themed but doesn't mention Christmas at all.


Snowglobe Birthday Wishes


Hello there crafty friends!  Thank you for stopping by to check out today's fun snowglobe birthday card!

This card is created with two stamps sets from The Rabbit Hole Designs new Christmas In July Release and inspired by the Craft Roulette weekly card challenge. The card needed to includes these parameters:
1) Type of Card - a Birthday card 
2) Colors - picnic colors (red and white)
3) Theme -  a collection (3 snow globes)
4) Random - black dots (snowman buttons)

I am using The Rabbit Hole Designs Baby's 1st Birthday stamp set, Warm & Cozy stamp set, and Birthday Scripty stamp set for this A2 Snowglobe Birthday Wishes card.

I stamped the snowglobe image on a 4" x 5 1/4" piece of coloring cardstock and masking it off.  I stamped the snowglobe two more times masking the middle of these two globes.  I added the sledding snowman image to the partial snowglobe on the right and the gifts to the partial snowglobe on the left.
I colored each of the snowglobe images and added shading using OLO Markers. A sparkle pen is used to add glitter to the snowglobes.
I positioned and stamped the sentiment in red ink and glued the card front to a dark red A2 card base.
 
The Rabbit Hole Designs Products 

Thank you for stopping by The Rabbit Hole Designs Blog to check out today's card.  I hope you are inspired to create something lovely today!

Be Creative ~ Stay Inspired

Jenn Gross


Follow me, Journey Coach Jenn, on 

Instagram - https://www.instagram.com/journeycoachjenn/

YouTube - http://www.youtube.com/c/JourneyCoachJenn

Blog - http://www.journeycoachjenn.com/


For more inspiration, updates, and news make sure to check out these places


The Rabbit Hole Designs

The Rabbit Hole Designs Instagram
The Rabbit Hole Designs Facebook Page

The Rabbit Hole Designs Pinterest

The Rabbit Hole Designs YouTube


Clarence Birthday


Hi Everyone, Cindy here with my first post here on the Rabbit Hole Designs Blog with Clarence Birthay which I have colored using copics. 
I used the matching dies to cut him out. 
For the background of the card I used the stamp with the Birthday Scripty Words Set and stamped it all over a piece of 4.75 by 6.75 inches and attached it to a picked of black card stock
For the two outer squares I used my Nutty 2 Layer Stencil  with two different colored brown inks, then cut out and layered onto black, leaving the center one plain, I then added Clarence and the Sentiment from the Birthday Scripty Words Set and some sequins
Thanks for looking and see you soon
Cindy 

Floral Birthday Mini-slimline Card


Hey crafty friend, it's Amanda from Pear Blossom Press again. And today, I'm sharing a lovely mini-slimline birthday card, featuring one of my favorite stamp sets, Pretty in Peony. Isn't it lovely paired up with the new hot foiled BIRTHDAY sentiment? That gold foil really adds an elegant touch. 

If you'd like all the specific Copic markers, and details on how I colored this card, head on over to my blog... pearblossompress.com.

Supply List
Pretty in Peony
Birthday - Scripty Word Hot Foil Plate
Birthday - Scripty Word with Shadow Dies
Birthday - Scripty Stamp Set

Thanks so much for stopping by today! I hope I've inspired you to give this card a try. If you do, tag me on Instagram @pearblossompress so I can cheer you on! I'll be back soon with more fun cards to share. In the meantime, check out these fun places for more inspiration, updates and the latest news...

Birthday Wishes


Hi all! Lauren here to share with you a colorful birthday card. I used only the new Birthday-Scripty stamp set and the matching Shadow die set to create this card. 

I started out by making my candle background. I inked the candle stamp that is included in the set with fade out ink designed for no line coloring. Randomly stamping it all over white cardstock. Then I used color pencils to color the candles in rainbow colors and trimmed the panel down to just under 4.25x5x5.


Once I had all the candles colored, I inked up the Birthday word using Distress oxide inks. The colors I used to create the rainbow word were; Candied Apple, Ripe Persimmon, Squeezed Lemonade, Lucky Clover and Prize Ribbon. 


Next, I used the shadow die to cut out the word. I also cut out 3 more shadows and adhered them all together with the colored one on the top. 

Then, I stamped the wishes word onto white cardstock in black ink. I trimmed it out and bordered it with black cardstock.


After that, I adhered a 4.25x5.5" black cardstock panel onto the front of my card base of the same size. Then I adhered on my candle panel and the words. I added a few colored confetti circles from my stash to complete the look. Such a fun colorful card.

I love how easy it is to create a quick card using just the one stamp and matching die set. And these candles are really great to practice no line coloring on! 

For more inspiration, updates, and news make sure to check out these awesome places! 


Thank you so much for stopping by today!

EZ Birthday Card


Hello my crafty friend, it's Amanda from Pear Blossom Press again. Today, I'm sharing a quick look at a fun birthday card that actually lights up! 

Here's a look at the finished card...


Simply push the button, and watch the flames light up...


Isn't that awesome? Who wouldn't love a card like this? Head on over to my blog for all of the details... pearblossompress.com.

If you'd like to recreate a card like this, here is the supply list...

Thanks so much for stopping by today! I hope I've inspired you to give this card a try. If you do, tag me on Instagram @pearblossompress so I can cheer you on! I'll be back soon with more fun cards to share. In the meantime, check out these fun places for more inspiration, updates and the latest news...

Happy Belated Birthday


Hey yall, happy weekend!!!  For today's card I used the Birthday Scripty stamp set & dies for a quick birthday card.  On the smaller white panel I stamped my sentiment in the upper left corner and then added some staggered candles in the lower left.


After coloring the candles in with Copics, I added the "birthday" layers.  For that I just used the shadow die on some fun & flowery patterned paper and then added the word die in pink!

That pink background is actually a patterned paper, it's kind of an ombre look, but it was way too subtle and looked to plain for me so I got pale pink ink and then stamped some more candles around the edges.  The white panel is popped up with foam tape.  

You can also read about this card on my blog, here with links to the products I used, etc.  Thanks for popping by, come back again soon!

September 2021 Inspiration Hop - Day 3

Hello and welcome to Day 3 of the inspiration hop. We are so excited for you to join us as we present to you our September release. Our fabulous Design Team have been sharing their projects over the last couple of days, so be sure to visit their blogs and leave them some crafty love.

 The 8 new stamps sets, 8 coordinating die sets, an uppercase and lowercase alphabet die set, and 4 stencil are all available to purchase right now in the shop.

The 3 new stamp sets and dies & 2 new stencil being highlighted today are ...


Thank you for being part of our September Inspiration Hop.

Here is the line up for the hop:

___________________

**Giveaway**

To celebrate the September release, The Rabbit Hole Designs is giving away two savings vouchers; one to a lucky Instagram follower and one to a lucky Fan Page follower.  Winner will be chosen at random from the comments left on the INSTAGRAM post, and tagging friends, and also from commenting on the Fan Page post.  So make sure to head on over to INSTAGRAM and look for the giveaway post @therabbitholedesignsllc and look for the post at
by 11:59 p.m. PST 09-02-2021. 
Winner will be announced on The Rabbit Hole Designs blog 09-03-2021.

This is the graphic you are looking for on our IG and FB

__________________

For more inspiration, updates, and news make sure to check out these awesome places! 


Thank you so much for stopping by today!