Pages

Showing posts with label Back Alley Stencil. Show all posts

Blue & White Poinsettia Thank You Card


Hello! It's Lauren on the blog today sharing my pretty, white and blue poinsettia thank you card. I used my colored pencils with the Poinsettia and Pinecones stamp set and created a subtle brick background using the Back Alley stencil. 

You can watch me create my card in this quick video.


 Thanks for visiting! 

 *Disclosure: I use affiliate links where I can. This does not add any extra cost to you, but I do receive a small amount which helps keep me creating. Thank You*

Here are my links to the products I used to create this card:

Poinsettia & Pinecones Stamp Set: https://shrsl.com/47y0j

Poinsettia & Pinecones Die Set: https://shrsl.com/47y0l

Back Alley Stencil: https://shrsl.com/4p8mv

Sentimentally Speaking Stamp Set: https://shrsl.com/4lmc6

Sentimentally Speaking Die Set: https://shrsl.com/4mrcf

Cute Pumpkin Halloween Wishes


Hi Y'all. Lauren here today to share my cute paper pieced Halloween card I created using the fun Silly Pumpkins stamp set. 

You can watch me create it in this quick video on my YT channel:


I just LOVE the cute expressions on these pumpkins! I hope I've given you some fun crafty inspiration today. I've linked products I used, below. Thanks for visiting!


 *Disclosure: I use affiliate links where I can. This does not add any extra cost to you, but I do receive a small amount which helps keep me creating. Thank You*

Silly Pumpkins Stamp Set: https://shrsl.com/4p8mr

Back Alley Stencil: https://shrsl.com/4p8mv

Jack of All Faces stamp set, The Rabbit Hole Designs: https://shrsl.com/4nuh3


You can follow me here:

Christmas Penguin

Hello, Erin here to share a card I made using the Penguining Stamp Set from The Rabbit Hole Designs!  Now that Halloween has passed, I am in full Christmas mode!  I haven't allowed myself to drag out the totes of Christmas decorations yet but it won't be long.    


To start this card, I stamped the three penguin images. In this stamp set they are all connected but the coordinating dies are perfectly shaped to cut them apart.  It's nice because you can either use them together in a row or separate them.  I decided to separate them for this card.  I picked the penguin with the candy cane and colored it with colored pencils.  I like that the images in this set are pretty quick to color.  I don't mind long coloring projects sometimes but occasionally it is nice to have something that doesn't require too much coloring.  I don't think I spent more than 10 minutes coloring the penguin and probably even less than that.


My intention was to make a red and white striped background to look like a candy cane.  I really struggled with it, I just couldn't get the exact look that I had in my mind.  So after a bit I gave up on the candy cane background idea and pulled out my stencils.  The Back Alley stencil is one of my favorites, I use it fairly often.  I do love products that I reach for again and again!  I used red ink for the stenciling and left a white area in the middle for the sentiment and the image.

Next, I loaded the background onto my Misti and placed the sentiment stamps  at the top and bottom of the white space.


After I added the penguin in the middle, I mounted the background on red card stock. I didn't feel like it was quite done so I grabbed an Acetate Shaker Sheet and some red and green sequins. The shaker sheets make it so easy to turn a simple card into something interactive in just minutes!


School Bus

 Hello!  Today I am sharing a card I made using the new School Sightings stamp set from The Rabbit Hole Designs.  This is such a fun stamp set for anything related to back to school.  It would be perfect for teachers, school staff or students.  And don't forget the bus drivers!  I like to give a small end of the year gift to our bus driver and I think this card is perfect for that.  I'll probably add a coffee shop gift card or a box of Girl Scout cookies.  I've got three kids that ride the bus, my two boys and our exchange student, so our bus driver definitely deserves a little appreciation!


I decided to do something totally out of my comfort zone for this card.  I left it with no sentiment. Crazy, I know! 😂 I'm really trying to branch out in my card making and this is a step in the right direction.  When I give this card out, I'll probably add a thank you stamp inside with my handwritten message.  But for now it is sentiment-less and I'm convincing myself that I'm okay with that! 

For the background I used the Back Alley stencil. Our school colors are blue and gold so I used a blue ink for the brick background to match the yellow bus. Other than the stenciling, I kept the card pretty simple with just a few layers of dark blue card stock and a strip of ribbon.  The bus image is colored with colored pencils.

For more inspiration, updates, and news make sure to check out these places:


Birthday Wishes

  Hi everyone!  Amy here today sharing a card I created featuring the gorgeous Year 4 Birthday Stamp Set illustrated by Agota Pop, and the You've Been Framed - Layering Dies.

Year 4 Birthday Stamp and Die Set illustrated by Agota Pop, You've Been Framed - Layering Dies, Back Alley Stencil by The Rabbit Hole Designs #therabbitholedesignsllc #therabbitholedesigns #trhd

I started this card by die cutting a piece of smooth white cardstock with the second largest die from the You've Been Framed - Layering Dies.  I then masked off the top portion of the card and used the Back Alley Stencil with Distress Oxide Ink Weathered Wood.  Keeping the stencil in place, I applied a layer of glitter paste to create a sparkling brick wall background!

I stamped out the beautiful flower bouquet and gift images from the Year 4 Birthday Stamp Set, colored them with copic markers, and cut them out using the coordinating die set 

Year 4 Birthday Stamp and Die Set illustrated by Agota Pop, You've Been Framed - Layering Dies, Back Alley Stencil by The Rabbit Hole Designs #therabbitholedesignsllc #therabbitholedesigns #trhd

Next, I stamped the sentiment, which is from the Year 4 Birthday Stamp Set, directly onto the background in gray pigment ink, and clear heat embossed for some shine!

I assembled my card using gray cardstock for the base, and foam tape to pop up the images for some dimension!

Year 4 Birthday Stamp and Die Set illustrated by Agota Pop, You've Been Framed - Layering Dies, Back Alley Stencil by The Rabbit Hole Designs #therabbitholedesignsllc #therabbitholedesigns #trhd

For finishing touches on this card I added white gel pen accents, glitter, and a few sparkling sequins!  Thank you and I hope you enjoyed my card today!

For more inspiration, updates, and news make sure to check out these places:

Bunches of Books


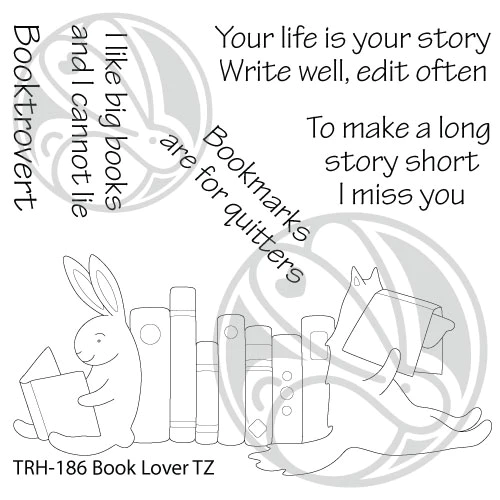
Hi! Lauren here again. Today, I have a book lovers card featuring the newly released Book Lover 4x4 stamp set illustrated by Tatsiana Zayats. It's such a cute set with fantastic sentiments!

For this card, I started by stamping the image near the bottom of an A2, 4.25x5.5", white cardstock panel. I then secured the Back Alley stencil over it and used a Cottontail Blending brush to blend Tumbled Glass distress oxide ink over it. I used a stitched rectangle die from my stash to trim my panel. 


I then stamped 5 more images onto white cardstock and colored them up using colored pencils. One of them I colored the whole image. The other 4, I colored just the books. Then I fussy cut everything out.

I created shelves for the books from black strips of cardstock. I adhered one of the shelves below the uncolored stamped image on the card panel. Then I adhered the full colored image over top of the uncolored one, on top of the shelf.


Then, I adhered on the next shelf and added the books to it. 


Lastly, I stamped the sentiment above the books and adhered the panel onto a white, top folding A2 sized card base.


I hope you enjoyed this card and that it inspires you to create a fun book filled card. Thanks for visiting!

Here are links to the products I used to create this card. 


Thanks again for visiting. You can follow me here:


Booktrovert

 Hi everyone!  Amy here with you today and I am excited to share this card I created using the adorable Book Lover Stamp Set illustrated by Tatsiana Zayats.

Book Lover Stamp Set illustrated by Tatsiana Zayats, Back Alley Stencil by The Rabbit Hole Designs #therabbitholedesignsllc #therabbitholedesigns #trhd

To start this card I die cut a piece of smooth white cardstock and used the Back Alley Stencil with Distress Oxide Ink Weathered Wood to create a nice spot for our book lovers to read and enjoy their books!

Next, I stamped this super cute image from the Book Lover Stamp Set, colored it with copic markers, and fussy cut it out.  I then added silver glitter pen to all of the accents on the books for some extra sparkle!

Book Lover Stamp Set illustrated by Tatsiana Zayats, Back Alley Stencil by The Rabbit Hole Designs #therabbitholedesignsllc #therabbitholedesigns #trhd

I prepped the background paper where I wanted to stamp the sentiment with the Cottontail Embossing Powder Tool, stamped the sentiment from the Book Lover Stamp Set in gray pigment ink, and clear heat embossed.  

I assembled my card using gray cardstock for the base, and adhered the image with foam tape for some dimension!

Book Lover Stamp Set illustrated by Tatsiana Zayats, Back Alley Stencil by The Rabbit Hole Designs #therabbitholedesignsllc #therabbitholedesigns #trhd

For finishing touches on this card I added accents with a white gel pen and a few sparkling sequins.  Thank you and I hope you enjoyed my card today!

Witches need the right shoes too!

Hi there! Kimberly here to share this card using this month's new release The Right Shoes illustrated by Tatsiana!


To make this quick and easy card, I began ink blending Pumice Stone distress oxide through the Back Alley stencil. Then, I stamped the spider from The Right Shoes stamp set around the perimeter and colored them with Copic Markers. Next, I stamped the shoes from The Right Shoes stamp set and colored it with Copics. I fussy cut them out and added foam tape behind the shoes to adhered it to the stenciled card panel.  To finish the card, I stamped the sentiment and layered it on a piece of purple cardstock from my stash. Then I added foam tape to the sentiment and adhered it to the card. Lastly, I added foam tape to the stenciled panel and popped it up on a black card base.  

Thank you for stopping by!
Kimberly

Check out these The Rabbit Hole Designs places for more inspiration!

You're Brew-ti-ful

 Hello crafty friends! Kimberly here and I have a full sneak peek from The Rabbit Hole Designs to share with you today for our "Spring Coffee" stamp set that will be released on March 29th! I love this beautiful image designed by Tatsiana. 


I stamped the image on kraft cardstock and colored it with Copic Markers and fussy cut it out. Then I painted white gesso through my "Back Alley Stencil" on a kraft cardstock panel. Once that dried, I layered it on a panel of white cardstock, popped the image up on foam tape and positioned it over the brick background. I adhered that to a kraft card base and added a few sequins for bling. Isn't his image gorgeous???


Copics used: 
Hydrangea: RV11, RV13  and Prisma pencil PC989
Peony: RV13, RV14
Leaves: YG21, YG23, YG25 
Coffee Cup: E41, E40, E81 Prisma pencil PC938

For more inspiration, updates, and news make sure to check out these places


Easter Bags and Tags

 Hello there, Rabbit Hole Friends!

It's Kelly here on the blog today sharing a couple Easter tags and bags I made for my niece and nephew.
I can't wait to put some treats in here and drop it off at their house. 


 My tag is made from the "Spring Floral 1" paper pack.  I used a store bought tag and traced it on the back to create the base.  I cut thinner strips from other papers in the pack and hand cut the "flags" on the ends.  

I stamped "1 Line Happy Easter" on white card stock and cut the focal point out with a circle die cut.
I carefully cut the sentiment "Happy Easter" so I could stack the words for this project.  I can still use it horizontally later.  I used my stamping tool to align the words on the tag and stamp.  


To decorate the bags, I used stencils and ink.  The pink version uses "Candy Twist" and the green one is the "Back Alley" brick stencil.  The picture shows how I taped one of the bags to prepare it for the ink blending. 


 Thank you for stopping by the blog to see my bag and tag project.
Have a great day,
Kelly

Products used in this project are below:


 1 Line Happy Easter