Pages

Showing posts with label Splish Splash Stencil. Show all posts

Easy and Beautiful With Sympathy Card: Harmony Stamp Set

Hello and welcome to The Rabbit Hole Designs blog; it's Rick back with you again today.   I am going to share an easy and pretty quick (depending how you want to color) sympathy card using the Harmony Stamp Set and the Splish Splash 6 x 6 Stencil from The Rabbit Hole Designs. Along with a few inks pads, and a few other simple tools, that you may already have on hand.


The first thing that I did for my card was to stamp out the image from the Harmony 4 x 4 Stamp Set, Illustrated exclusively by Tatsiana Zayats for The Rabbit Hole Designs, in an alcohol marker friendly ink on my favorite white cardstock. My go to ink for this is black alcohol marker friendly ink.  I encourage you to use your favorites when you make this card.  Use what you know works for you and your coloring style.  

Once I had the image Harmony Stamp Set stamped out I started the coloring process. I used my favorite alcohol markers for this. But, use what you have in your craft room or craft area.  I knew I wanted to do something with a transition of color from the beautifully drawn flowing tail to the body. So, I went with a few shades of blues that would blend nicely at the end of the tail. And then I used a few purple shades to transition the blue into the reds I used on the body. Between the purple and red areas I just went back and forth with my markers adding layers until I achieved the blend that I was going for with a seamless transition. Sometimes with alcohol markers you have to do this to get the look you want. So, don't be afraid to go over the area you're working on a few times. You may have to give it a few minutes to dry each time between layers and come back. This way you don't over saturate the paper to quickly and get bleed out. 


Once I had all the red colored in on the fish (beta or koi). I colored them as beta fish today. I picked colors that I knew would work well with the other colors I had already colored on the fish from the Harmony Stamp Set. I picked a yellow-green for the leaves and a lighter purple color to color the flowers. I stamped the sentiment in the middle of the two beta fish before moving on. Once the coloring was completed I could cut out the image. I did not used the coordinating Harmony Dies for this, but you could if you wanted to. And just stamp the sentiment after the fact. I just traced around the stamped and colored images with a pencil very lightly and used my paper snips to cut inside the lines leaving a slight boarder.

At this point I started working on my background panel. I used the Splish Splash 6 x 6 Stencil along with three shades of Distress Oxide Inks (listed below in the Materials Used Section) and my CottonTail Blending Brushes to ink blend over the Splish Splash Stencil. I started with the lightest color first and then added the darker two shades to the outside edge of the stencil to create a center vignette on the card and draw your eyes to that area. Next I added a second layer with the Splish Splash Stencil but I turned it 180 degrees and flipped it over to add a second layer the exact same way. But this gave me a second layer of ink blending which allowed the colors in some areas to be darker as you can see in the picture if you look closely.


After my ink blending was completed I cut down my panel to 4" x 5 1/4" and attached it to an A2 size white card base.  I then added the focal panel of the stamped and colored beta fish from the Harmony Stamp Set to the card front with foam adhesive. To finish off the card I added a few white gel pen details to the fish for my highlights and sprinkled around a few of the Clear Sparkle Enamel Dots next to the sentiment.

And there you have it my friends that's how you can create a quick and easy with sympathy card using the Harmony Stamp Set and the Splish Splash Stencil. I hope that you have a wonderful day, and remember do something crafty today! 

Happy Crafting

Rick

The RHD Affiliate Disclaimer:

We want to ensure transparency and honesty in our interactions with you, our valued readers. Please be aware that the links provided on The Rabbit Hole Designs Blog may be affiliate links. This means that if you make a purchase through these links, the project designer may earn a small commission at no extra cost to you. Your support means the world to us!


We kindly request that you accept the tracking cookie for the affiliate websites. Rest assured, this will not expose your computer to viruses or compromise your information. It's a necessary step for the company to attribute the sale to the affiliate, ensuring that creators like our creatives receive their rightful commissions.


Your trust and support empower our creators to continue sharing creativity and inspiration through our blog. Thank you for being an integral part of The Rabbit Hole Designs community!

I Otterly Adore You

   Hi everyone!  Amy here with you today sharing this card featuring the super cute Otterly Adore Stamp Set illustrated by Agota Pop.

Otterly Adore Stamp and Die Set illustrated by Agota Pop, Splish Splash Stencil, You've Been Framed - Layering Dies by The Rabbit Hole Designs #therabbitholedesignsllc #therabbitholedesigns #trhd

I started this card by die cutting a piece of smooth white cardstock with the second largest die from the You've Been Framed - Layering Dies.  I then used the Splish Splash Stencil with Distress Oxide Inks Salvaged Patina, Tumbled Glass, and Salty Ocean to create a gorgeous background! 

Next, I stamped out this adorable image of the otters, and accessories, from the Otterly Adore Stamp Set.  I colored the images with copic markers, and cut them out using the coordinating die set.

Otterly Adore Stamp and Die Set illustrated by Agota Pop, Splish Splash Stencil, You've Been Framed - Layering Dies by The Rabbit Hole Designs #therabbitholedesignsllc #therabbitholedesigns #trhd

I then cut out a teal sentiment banner using a banner die from the You've Been Framed Layering Die Set.  I stamped the sentiment, which is from the Otterly Adore Stamp Set, and white heat embossed.

I assembled my card using teal cardstock for the base, and popped up the sentiment banner with foam tape for some dimension!

Otterly Adore Stamp and Die Set illustrated by Agota Pop, Splish Splash Stencil, You've Been Framed - Layering Dies by The Rabbit Hole Designs #therabbitholedesignsllc #therabbitholedesigns #trhd

For finishing touches on this card I added accents with a white gel pen, glitter and glossy accents on their cute little noses.  Thank you and I hope you enjoyed my card today!

For more inspiration, updates, and news make sure to check out these places:

Shell-Ebrate

 Hi everyone!  Amy here with you today and I am excited to share this card I created using the beautiful new Shell-Ebrate 4X4 Stamp Set illustrated by Tatsiana Zayats.

Shell-ebrate Stamp Set illustrated by Tatsiana Zayats, Splish Splash Stencil by The Rabbit Hole Designs #therabbitholedesignsllc #therabbitholedesigns #trhd

To start this card I die cut a piece of smooth white cardstock and used the Splish Splash Stencil with Distress Oxide Inks Salvaged Patina, Tumbled Glass and Salty Ocean.  Keeping the stencil in place, I added glitter paste over the ink blending to create a shimmering background!

Next, I stamped the gorgeous image from the new Shell-Ebrate 4X4 Stamp Set, colored it with copic markers, and fussy cut it out.

https://therabbitholedesigns.com/products/shell-ebrate-4x4

I die cut a teal sentiment banner, prepped it with the Cottontail Embossing Powder Tool, stamped the sentiment from the Shell-Ebrate 4X4 Stamp Set, and white heat embossed.  

I assembled my card using teal cardstock for the base, and popped up the image and sentiment banner with foam tape for some dimension!

https://therabbitholedesigns.com/products/shell-ebrate-4x4

For finishing touches on this card I added accents with a white gel pen and a few sparkling sequins.  Thank you and I hope you enjoyed my card today!

Sparkling Warm Wishes!

Hello crafty friends! Kimberly here and I am so smitten with the new release "Hoppy Holidays" illustrated by Tatsiana! Isn't this bunny the sweetest?


To make this card, I blended Speckled Egg distress oxide through the Splish Splash stencil on Kraft cardstock. Then, without lifting it, I spread glitter paste through the stencil over the distress ink. Next, I put it to the side to dry. 

While I waited for the glitter paste to dry, I stamped the image from the "Hoppy Holidays" stamp set on Kraft cardstock, colored it in with Copic markers and fussy cut it out. Then, I stamped the sentiment on a strip of Kraft cardstock. I cut a flag in one end and layered it on a piece of blue cardstock. 

Once the glitter paste dried, I wrapped twine around the card and tied a bow. I popped the stenciled background up on foam tape and added it to a blue card base. To finish the card, I popped the image up on foam tape, attached it to the card and tucked the sentiment under the bow.  

Thank you so much for stopping by! Check out more awesome products in The Rabbit Hole Designs shop! I hope I have inspired you to create something today!!

Kimberly

Wishing you a Merry Christmoose!

Hello crafty friends!!! I love this new The Rabbit Hole designs Christmoose-Moosemas set illustrated by Tatsiana!!! How sweet are these adorable birds that are adorning this festive moose's antlers???!!??? I had so much fun creating with this set this month.


I started out by stamping the snowflake stamp from the Christmoose-Moosemas set all over my white panel with embossing ink. I heat embossed white embossing powder over the ink. Then, I ink blended Twisted Citron Oxide ink and Tumbled Glass Oxide ink through my Splish Splash stencil over the embossed snowflakes. I used a tissue to wipe any excess ink off the snowflakes. Next, I stamped, colored  and cut out the Moose image and glued it to the white stenciled background. 

To finish the card, I stamped the sentiment on a white strip, layered it on a green strip of cardstock and adhered it with foam tape. Then, layered my card front on a green card base. 

Thank you for stopping by! I hope I inspired you to create something today!!
Kimberly
 

The Debonair Cat


This cat never fails to make me smile! I love everything about him from his cute bowler hat down to his adorable teeny paws. He is the most suave cat I know so I was positive he could pull off a pair of red glasses and bow tie and do it with with flair!

To create my charming card, I first stamped the cat image onto white cardstock using fade out ink for no line coloring. I then colored him up using Prismacolor pencils. Colors I used were:
Cat: Warm Gray, 10%, 20%, 30%. 50% for whiskers, nose, mouth and chin
Glasses, bow tie and umbrella: Poppy Red, Crimson Red and Tuscan Red
Hat and vest: Sienna Brown, Chestnut, Dark Brown then Metallic gold for button
Pants: Light Umber, Dark Umber and Chocolate
Book: Cool Gray 50%, 90% and White
Umbrella handle: Dark Umber, Black and White
Coffee cup: Cool Gray 10%, 50% and Seashell Pink


Once I had him all colored and ready to go, I used a scalloped, stitched circle die to cut him out.

Since he is prepared for wet weather, I decided to give him a watery background. I inked Speckled Egg Distress oxide ink through the Splish Splash stencil onto white cardstock. I then trimmed that down using an A2 sized wonky stitched die from my stash and adhered it to a top folding A2 card base.

I then added double sided foam tape to the back of my dapper cat and adhered him to the front of the card.

 I hope this card/cat makes you smile as much as it does me! Thanks for visiting! Lauren

For more inspiration, updates, and news, make sure to check out these places

 Simple Things 3x4 – The Rabbit Hole Designs


Cotton Tail Blending Brushes – The Rabbit Hole Designs


Happy Valentines Day - Using those stenciled backgrounds

 MaryAnn, here to share some inspiration using backgrounds created with some of our stencils.

Many of you may recognize these backgrounds from the examples of the stencil on our website.  Why is that you may ask? Well because I am the one testing the stencils when they first arrive and then I use the test to take and post pictures to our website of what the final stenciled image will look like for you all.  I have amassed quite the stack of examples and decided to take over the blog today to show you how I used them.  There are no recipes, just pictures.  I hope you enjoy them.


Corner Mandala Stencil


Thank you for falling down The Rabbit Hole for a few minutes!
MaryAnn - Co-Founder The Rabbit Hole Designs

Let's Talk Turkey...


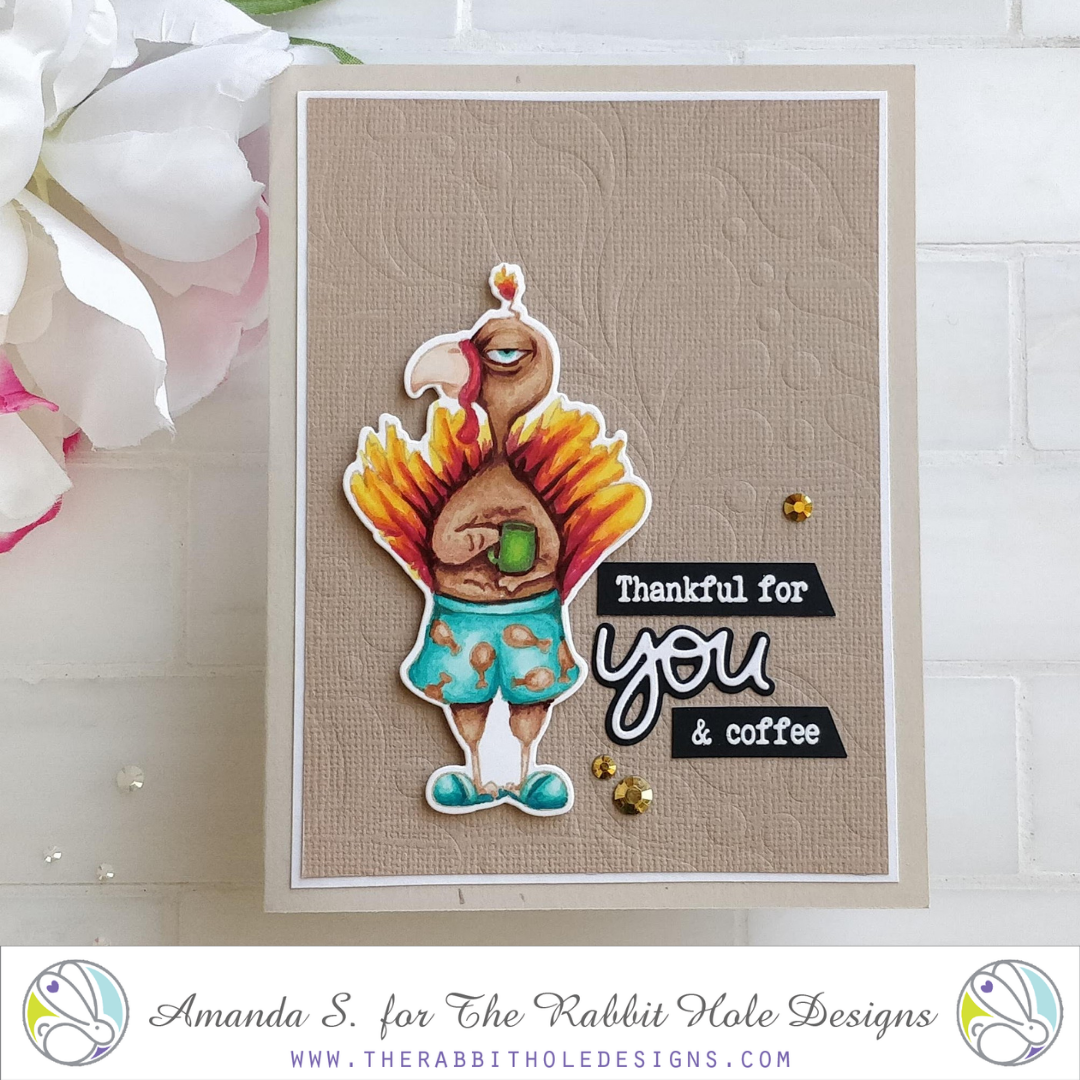
Hey crafty friend, it's Amanda from Pear Blossom Press again. With Thanksgiving less than a week away, I wanted to share one more card for the occasion. The Caffeinated Turkey is such a fun focal point, I had to use him again.

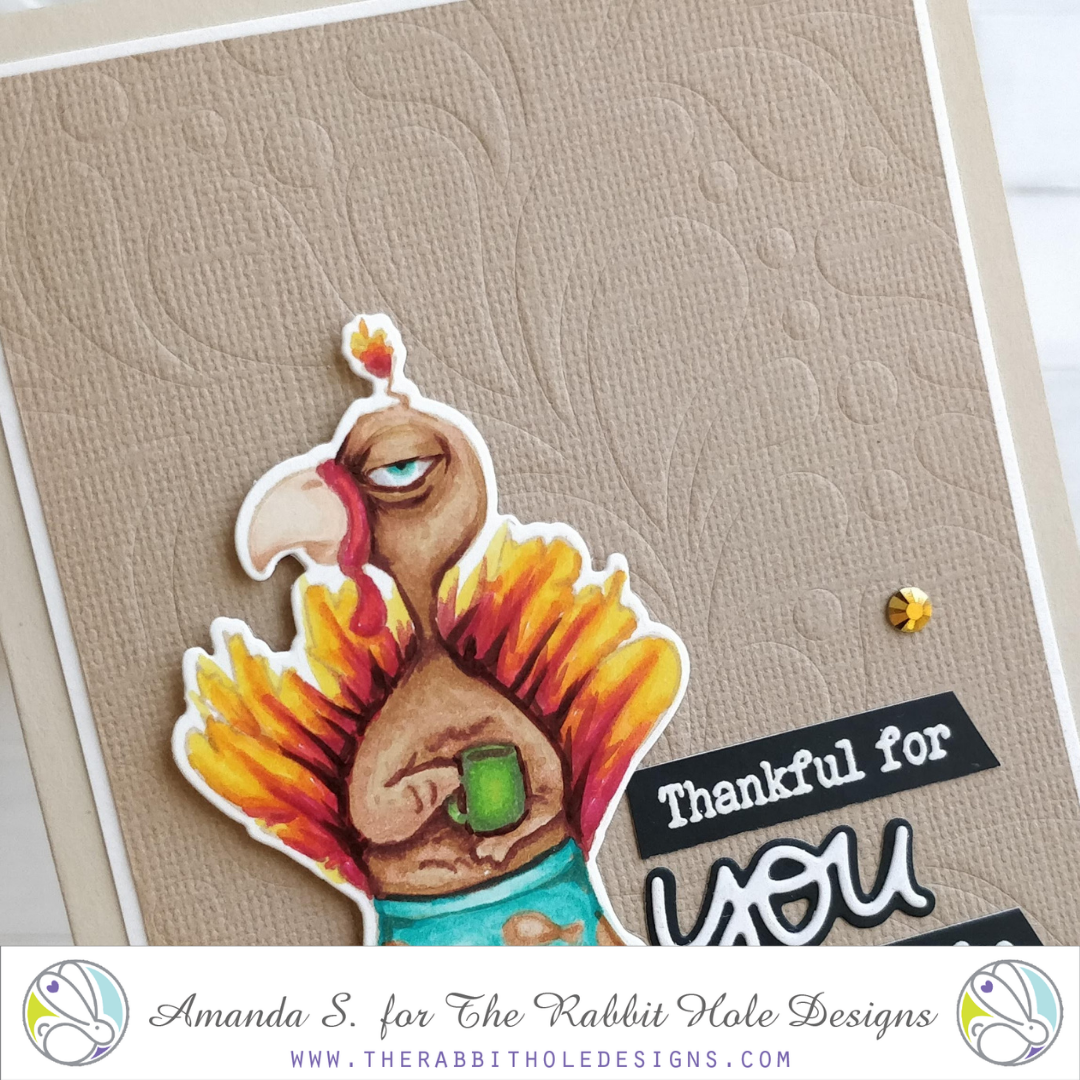
For today's card, I stamped my turkey with Warm Glow ink and Copic colored him, before cutting him out with the coordinating die. To create the embossed background, I ran a tan sheet of cardstock through my die cutting machine, sandwiched between a squishy pad, and the Splish Splash stencil. This is one of my most favorite stenciling techniques (it's fast and mess free too)! 


To pull the card together, I glued the embossed panel to a slightly larger white panel, then glued that to a sand colored card base. Foam tape pops the turkey up. The sentiment is a combination of heat embossed, and die cut words. To make them pop, I used white powder on black Perfect Sentiment Cardstock. This black cardstock is coated, so embossing powder melts fast and smoothly, without sinking into the paper. A few gold gems finish the card. 


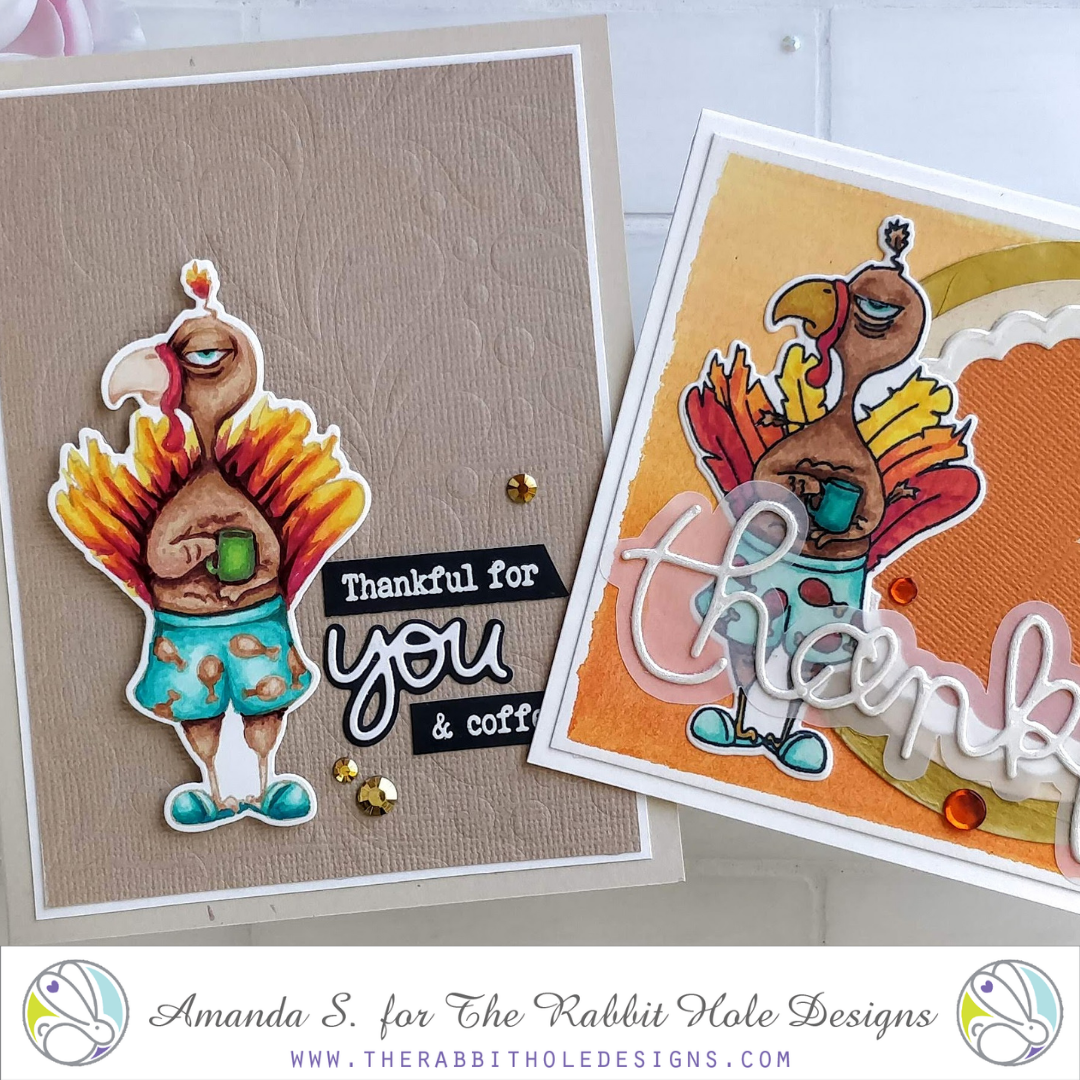
Before I go, I wanted to share a side by side comparison of Caffeinated Turkeys. I still have the card I made with him last year, and when I pulled it out, I was pleasantly surprised to see how far my coloring skills have come! I no longer emboss before coloring. I've ventured into no-line coloring, and I'm not afraid to choose markers with big gaps between numbers. I'm not looking for gradual transitions from one color to the next, I want contrast. Obviously, I have lots of room to grow, and I really want to practice more with adding colored pencil details, but I'm happy with my progress so far! I'll have to remember to color this stamp again next year, and see the difference then.


What do you think of my turkeys? I actually love both cards. Lol, so now the question is, do I send the cards out? Or hoard them to compare again next year? Let me know in the comments below. 

Thanks for stopping by today. I'll be back again soon with another fun card to share! Until then, head on over to my blog for links to the products I used, and for some of the coloring tricks I've picked up along the way. 

For more inspiration, updates, and news make sure to check out these fantastic places! 


Best Friend + Coffee = The Best Medicine


**Hi Guys! I'm so excited because The Rabbit Hole Designs is a Super Sponsor for the Coffee Lovers Fall/Winter Blog Hop! To Celebrate, TRHD is offering 10% off on caffeinated images. Use coupon code CAFFEINE. Happy Shopping**


In celebration of all things caffeine, I have a card with you today featuring the Blended Stentiments 2 Stamp set from the November 2020 Release at The Rabbit Hole Designs


This card was relatively simple to create in design but packs a beautiful glittery punch!


For this card I started with an A2 size panel of white cardstock. I used the Splish Splash Stencil from the October release and applied some glitz glitter gel through it directly onto the panel. I used two different colors and I love the parts where the two blended together. 


While the panel was drying I got to work on the sentiment. I chose one from the new amazing Blended Sentiments 2 stamp set. I adore this sentiment set and I know that I will be using it a ton in the future. I stamped and white heat embossed one of the sentiments on some black cardstock. To assemble the card I simply attached the panel to an A2 size card base and popped the amazing sentiment strip up in the the middle with some foam tape, added some embellishments, and that finishes my card today!


 I hope you enjoyed my card today! Be sure to check out all the items from the new release as well as all the other fabulous products that The Rabbit Hole Designs carries. You can follow this link HERE to see their whole product line. 


Thanks for stopping by!
If you want to check out additional information on the products that I used to create this card you can visit my blog at amyswares.com 

-Amy


For more inspiration, updates, and news make sure to check out these places.

More Than Pink - a card for Breast Cancer Awareness


Hello my crafty friends!  Welcome to today's blog. October is Breast Cancer Awareness and I am using the Splish Splash stencil to add pink to the background behind the Fearless stamp set.

I stamped out the awareness ribbon  and the "More than pink" sentiment with Honeysuckle ink on a light grey cardstock. I fussy cut both out. I created a mask using a piece of paper with a circle die cut out of the middle. I used low tack purpled tape to secured it to a 4" x 5 1/4" Sea Glass cardstock. I added the Splish Splash stencil over the top of the circle opening.  I used Cracking Campfire, Picked Raspberry, an Spun Sugar Distress Oxide inks to  blend and create the design.  I rounded the corners and attached it to a piece of 4 1/8' x 5 3/8" light pink cardstock with rounded corners.  I attached this to an A2 Honeysuckle card base.  To complete the card I glued the awareness ribbon, seniment and sequins to the front of the card.

Here are The Rabbit Hole Design products used in this card:


Splish Splash Stencil

 Fearless stamp set


Thanks you for stopping by today's blog.  I hope you enjoyed this More Than Pink card featuring the Splish Splash stencil and the masking technique.  What is your favorite stenciling technique?


Be Creative ~ Stay Inspired

Jenn Gross


Follow me, Journey Coach Jenn, on 

Instagram - https://www.instagram.com/journeycoachjenn/ 

YouTube - http://www.youtube.com/c/JourneyCoachJenn 

Blog - http://www.journeycoachjenn.com/


For more inspiration, updates, and news make sure to check out these places


The Rabbit Hole Designs

The Rabbit Hole Designs Instagram

The Rabbit Hole Designs Facebook Page

The Rabbit Hole Designs Pinterest

The Rabbit Hole Designs YouTube


At The Swimming Hole


Hi everyone! Lauren here today and I am sharing this card where this Rhino is still enjoying summer He's got his trunks on and is at the local swimming hole for some R & R. 

To make this shaker card, I used the new Splish Splash stencil and also the Caffeinated Rhino stamp set. I love how the stamp set has the cute bird included.

I started with an A2 sized white cardstock panel. Using an oval die, I cut the swimming hole out of the bottom corner. Then onto a separate white panel, I blended Mermaid Lagoon Distress oxide ink over the stencil. This will be the back of the shaker. 


Next, I  masked off a the stencil so I could create the splash coming out of the top of the pool using the same colour ink.

Then onto Copic friendly white cardstock, I stamped the rhino and 3 birds. I had to reverse stamp the last bird in order to get him facing the opposite way. To do this, I stamped the bird onto acetate then carefully placed white cardstock over that and applied pressure to transfer the image onto the card stock. Now I was ready to colour them then fussy cut them all out. The copics I used were:

Rhino: C0, C1, C2, C3 Eye:B24 Mug:Y00, Y06

Swim trunks:B00, BG01, BG06 stars:Y06

Birds: Yellow: YY00, Y06, Y17

          Blue: B00, BG01, B24

          Orange: C01, Y06, YR02, YR07


To create the shaker portion, I cut a piece of acetate so that it extended about .25" past the border of the pool. I adhered behind the pool using double sided tape. I then scored the acetate so it would fold at the same lines of the edges of the white cardstock panel. 

I really wanted the rhino to look like he was standing in the swimming hole, so I decided to cut a slit in the acetate (with my exacto knife) so I could slip his legs through but no sequins could escape.


Once I had the rhino legs in, I placed double sided foam tape all along the rim of the pool. Then I put a bunch of sequins into the area I created. To seal up the shaker, I used the stenciled background I made and placed it on top of the foam tape making sure to get the panel right to the very corner of the acetate I had scored. Next I adhered the acetate onto the back of the stenciled panel.

I stamped the sentiment and bordered it with black cardstock. On the front, I adhered the sentiment, birds and placed double sided tape behind the portion of rhino sticking out of the pool. I backed the whole panel with blue card stock and adhered it to an A2 card base.


Finally, to finish the card off, I glued some sequins onto the front. 

Thanks for visiting! 
 -Lauren
Here are the links to the stencil and stamp set:

https://therabbitholedesigns.com/collections/dies-stencils/products/splish-splash-6x6-stencil


https://therabbitholedesigns.com/collections/stamps/products/caffeinated-rhino-3x4


For more news, info and inspiration be sure to check out