Pages

Showing posts with label CharCards. Show all posts

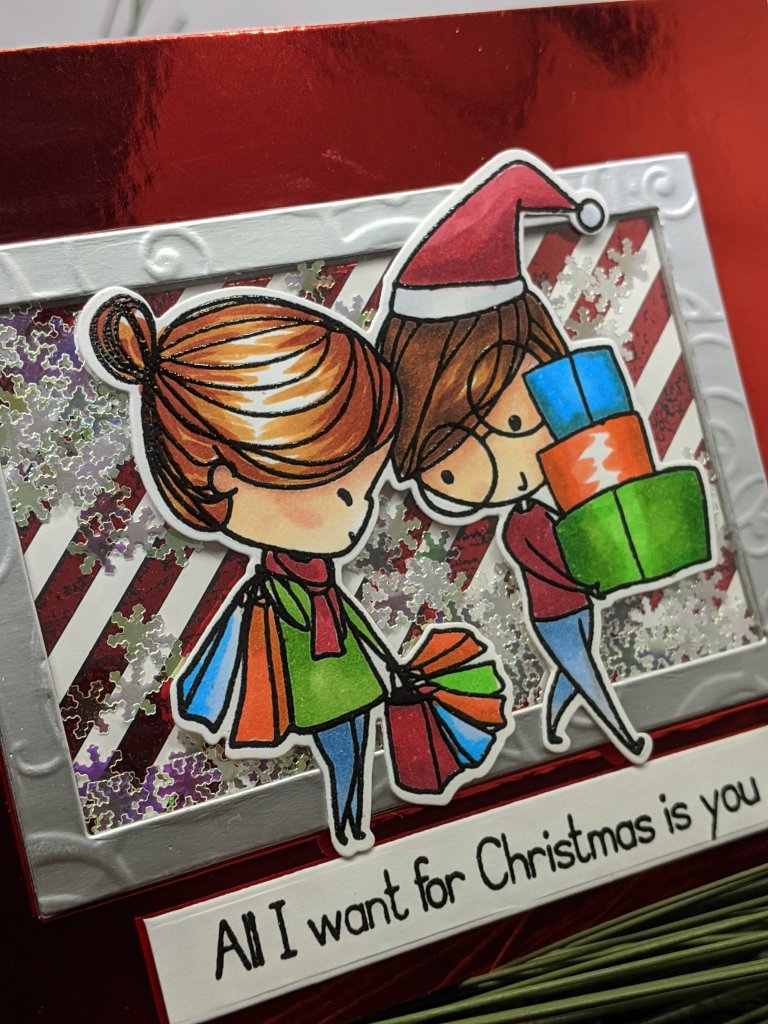
All I want for Christmas...

Happy Saturday! Charmaine from CharCards here to post my last blog entry for The Rabbit Hole Designs. It has been a blast working with so many incredibly talented people!
I hope you like my last card featuring this beautiful and sweet Love you more Christmas Frost stamp and die set. How appropriate for me to end with a shaker card!
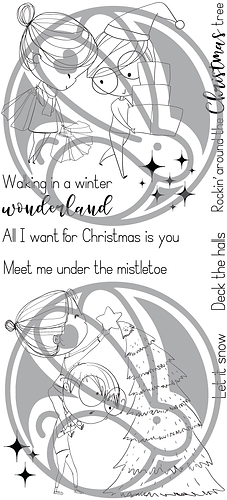
Love you More - Christmas Frost 4x8

This stamp and die set is also available at Simon Say Stamp.


This was a very simple card to make. Basic shaker elements, a little bling and a beautiful stamp. I feel it is necessary to buy the coordinating die as even my Brother Scan N Cut had some difficulty cutting the space in between the lovebirds.
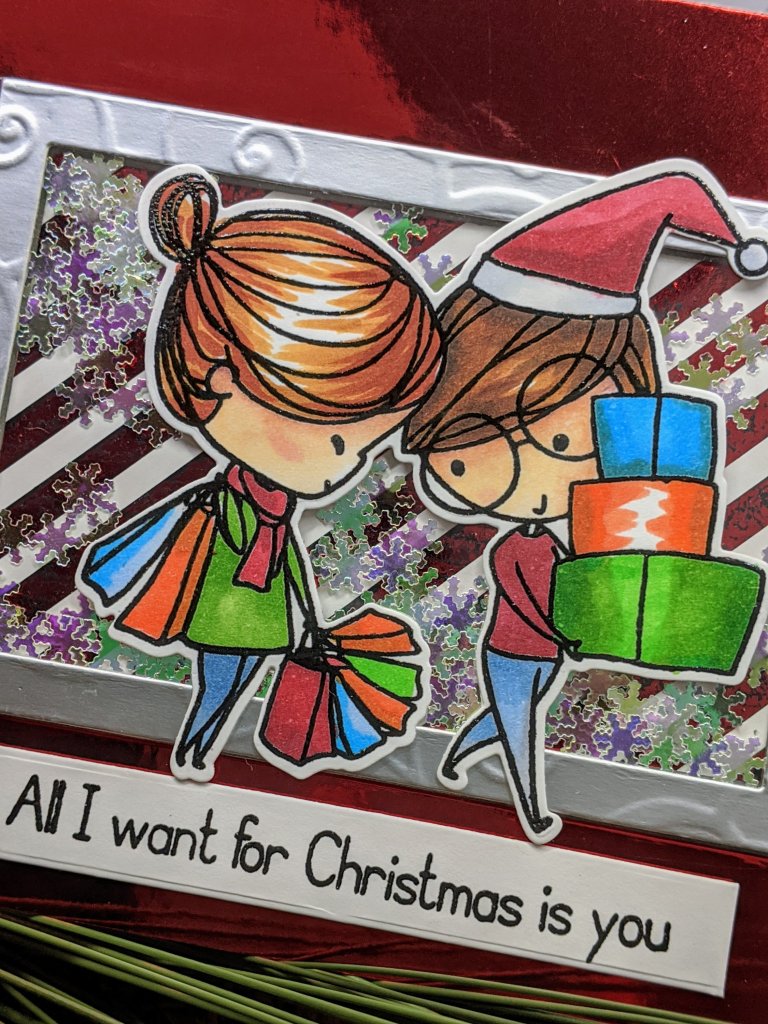


I used Copic markers for the stamp and red and silver mirror card stock for the background. The frame inside is easy to create; MFT carries a metal die set that will cut three different sizes of frames. I used the medium size for the silver frame.
Quick Tip: If you use shakers and want some shakers to stay more to the top instead of all being at their feet, glue some shaker elements with some clear glue. 
Also, don't be afraid of color! See what works. This is what I imagined looking like walking down the streets after shopping!


For more inspiration, updates, and news make sure to check out these awesome places!

The new release is around the corner and if you love this couple as much as I do, you don't want to miss it!

Hope to see you around and keep on crafting!
Hugs and Kisses,
Charmaine Canham
www.facebook.com/charcards2017

Coffee Lover's Fall Blog Hop 2019: HOOO needs caffeine?


Hello and welcome to The Rabbit Hole Designs Blog. We are so excited for you to join us as we join up with the Coffee Loving Cardmakers for their 2019 Fall | Winter Coffee Lovers Blog Hop.  This is our second time joining them and we are happy to announce we are Super Sponsors for this event. In addition to the prizes being given away over on their Blog Hop page we will be doing some fun giveaways randomly right here, so be sure to come back each day of the HOP to see what we might be giving away just by commenting on the blog post of the day. 


SPECIALS WE ARE OFFERING FOR THE DURATION OF THE HOP
15% off everything in the Caffeinated section of the shop.
Use Code: FallBrew


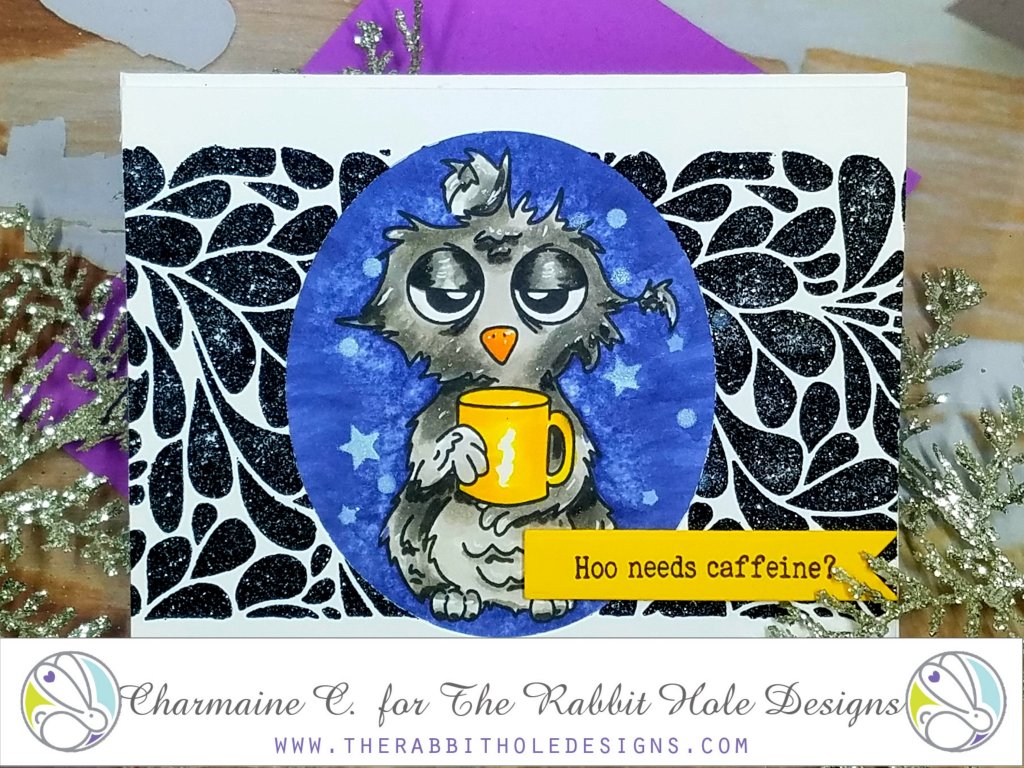
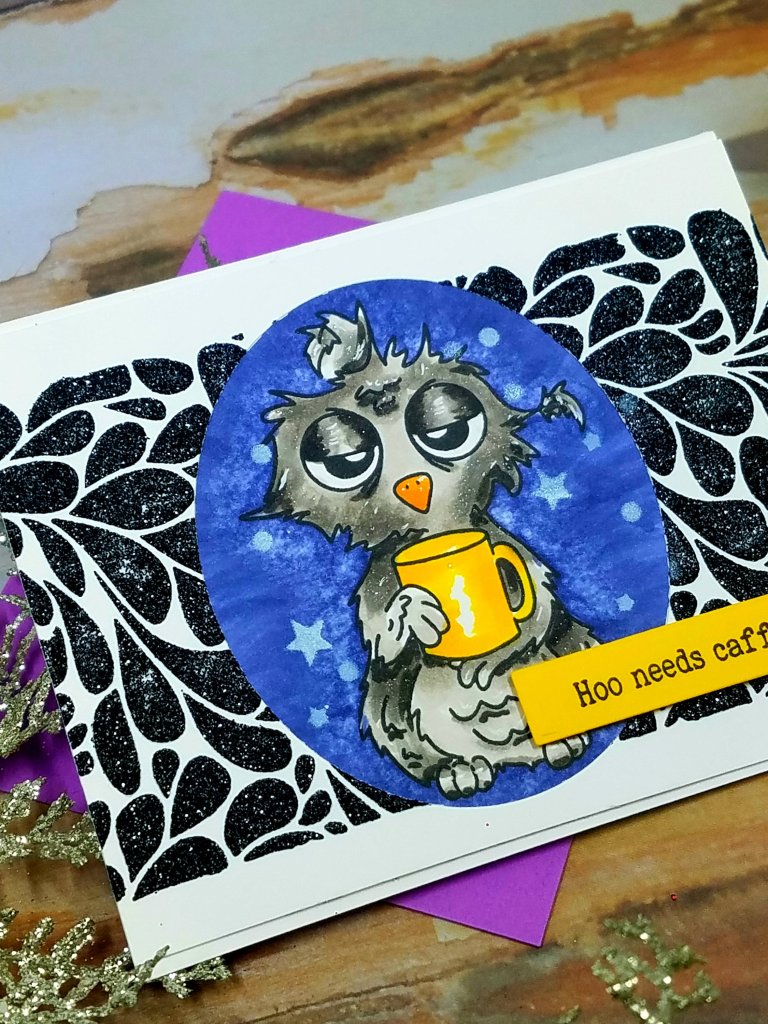
My little owl was so easy to make. I used a Tonic Studio stencil and black Gina K Glitz gel for the front of the A2 landscape card. I die cut an oval with my Gemini Jr machine after the gel had dried. (I left it overnight, so I am not sure how long it takes to dry.) Colored the owl and background with Copics on a separate piece of Neenah 110 lbs and centered it with the oval in front. I used the Circle and Stars Stencil for the stars in the bakground. I then stamped and cut the sentiment on a matching yellow card stock and adhered to the front.


Come back tomorrow to see what crazy Jammie is up to!!! We love our new design team member!! And leave some love in the comments! We love hearing from all of you! Also, use that discount code while the hop "hops" until the 8th of November!

Coffee kisses,
Charmaine
Follow me on Facebook

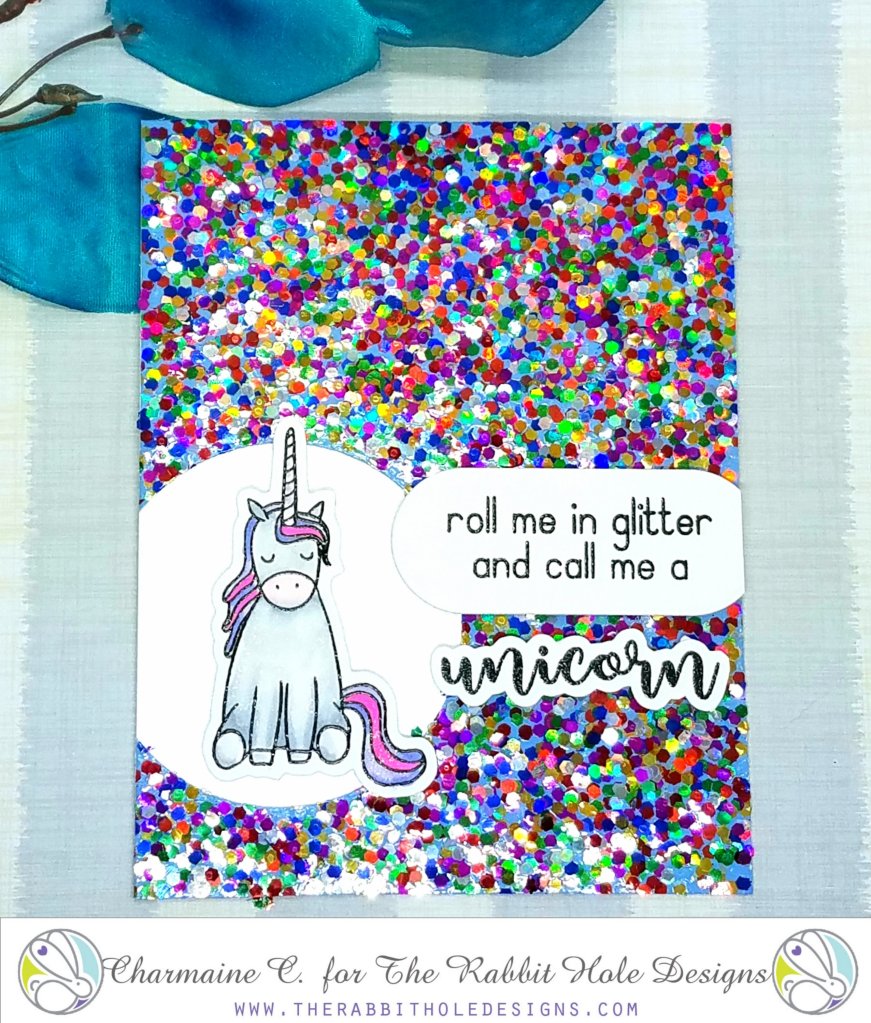
Roll me in Glitter!


After a very rough week and illness we shared liked M&M's in my house, nothing makes me happier than making a card. And my subject? Our trusty sassy unicorn!


This stamp is available at The Rabbit Hole Designs and at Simon Says Stamp.


Here is what I did:
1. I have had this fabulous glitter cardstock for years and decided today was the day to use it. I die cut a circle off center from the left corner.
2. Add silver vellum in the open circle spot.
3. Stamp, cut and color the unicorn.
4. I used my Brother Scan N Cut to cut the unicorn and the word unicorn.
5. This is a top folding card, 4.25 x 5.5.


I hope you can make this easy card that will make a friend's day brighter!
Unicorn kisses,
Charmaine
www.facebook.com/charcards2017
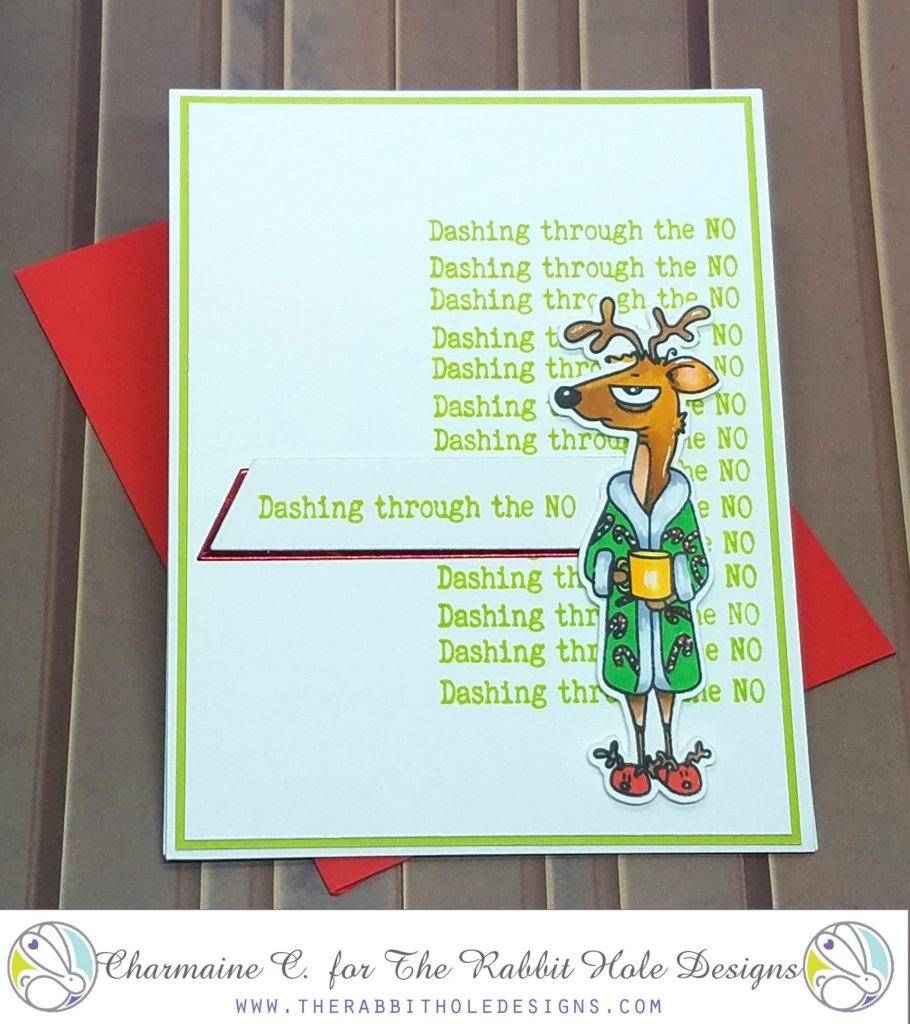
Dashing through the NO!


Good morning my caffeinated critters!
Charmaine with CharCards "on the sleigh"!
 I like to make extravagant cards that take hours but decided that I need a quick card with a punch!
Well, here he is in all his Christmas glory!


This caffeinated reindeer stamp and metal die are available at the Rabbit Hole Design and Simon Says Stamp stores.


                                             Here is what I did:

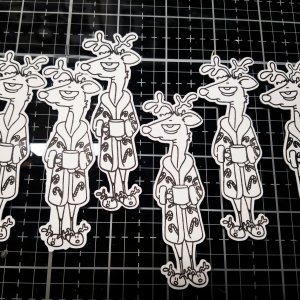
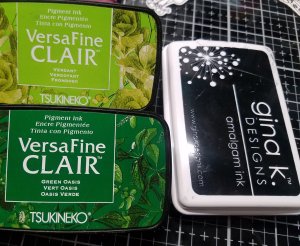
1. I stamped a few reindeer on Neenah 110 lbs card stock and fed it through my Brother Scan N Cut. You can also use the metal die cut. I used Gina K Amalgam ink (Copic friendly) to stamp.


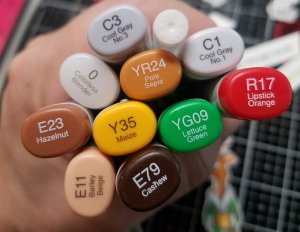
2. I used Copics to color this reindeer. Use a white Gelly pen for highlights and candy canes.


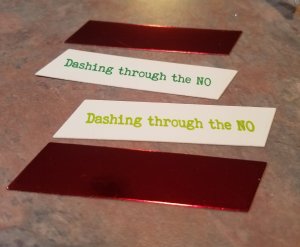
3. Using a 4 x 5 1/4 white card stock piece, I stamped the "dashing through the no" multiple times, 1/4 apart, with my Misti. I like using VersaFine Claire ink for sentiments! I made two different cards with a green variety.


4. Stamp the sentiment and cut with a metal sentiment die. To add some shine to the card, also cut a red piece from red mirror card stock. Assemble with double sided tape.


5. Attach a matching green card stock to the stamped base's back. This should be about an 1/8th bigger than the stamped base.


6. This is a  4 1/4 x 5 1/2 top folding card. Attach the sentiment with double sided tape and the reindeer with dimensional foam tape.
7. For the inside of the card, cut a piece of 60 or 80 lbs colored paper, 4 1/8 x 10 1/2. Fold at center, stamp sentiment and adhere with double sided tape.


8.  Match your envelope and you're done! I made 4 cards under two hours with distractions from my own village.


I hope you will give this a try! Clean and simple for the win! Leave me a comment or better yet, post your creation on our fan page!

Reindeer kisses,
Charmaine


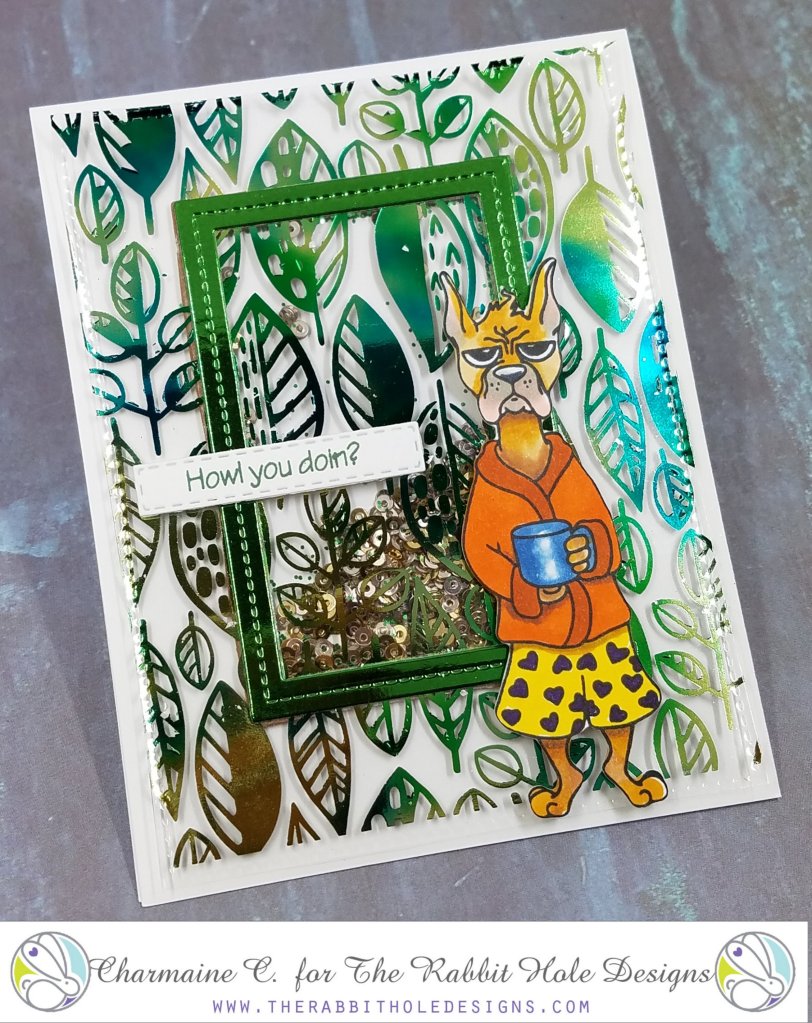
Howl you doin, Therm-o-Web?

Morning Rabbit Hole fans!
We are collaborating with Therm-o-Web this week and sharing how we incorporate crafty items into our own designs using The Rabbit Hole Designs stamps. I hope you are able to fit these ideas into your own creations! There are also some prizes to win!!!
  Image may contain: text

Using our favorite boxer for this project available at Simon Says Stamp and at The Rabbit Hole Designs stores.
T
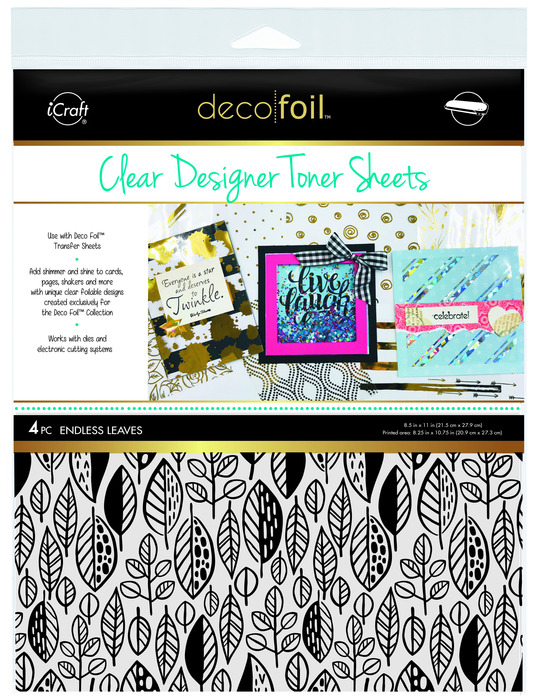
These are clear designer toner sheets. You get 4x A2 sheets in each pack and can be cut accordingly. This is similar to acetate, but already with an image printed on.

To color the toner sheet, choose a Deco foil transfer sheet color that will match your project. I used Emerald watercolor today. Links are on the images.


Here is how I made this Boxer shake:
*
**Switch on your laminator!***

1. Stamp, cut and color Boxer. I used Copics to color.
2.  Stamp and cut the sentiment.
3. Use a frame die to make the actual shaker part.


4. Cut the clear designer sheet to 4 x 5.25. You can also use a stitched die.
5. Cut a piece of transfer sheet big enough to cover the clear designer sheet.
6.  Following the instructions on the packaging, feed the sheet and toner sheet through a hot laminator. The "black" picks up the green and all the shine!
7. Adhere the frame to the designer sheet on top.
8. Apply foam tape underneath the sheet and frame. The frame hides the foam tape.
9. This is a top folding 4.25 x 5.5 card. Place sequins/shakers on top of the card and finish the shaker.
10. Apply the dog and sentiment, and you are done in 10 steps!
Hope you liked my card and all the elements I used from Therm-O-Web. These Clear Designer Toner Sheets are amazing and very easy to work with. I hope you will give it a try!
  For more inspiration, updates, and news make sure to check out these places.


Leafy kisses!
Charmaine
Follow me at www.facebook.com/charcards2017

Therm O Web Collaboration: Fall is in the Air


Morning Friends! 
Charmaine with CharCards on the Rabbit Hole Designs Blog!

This week we are teaming up with Therm O Web to showcase you some old and new products that we use in our products. 
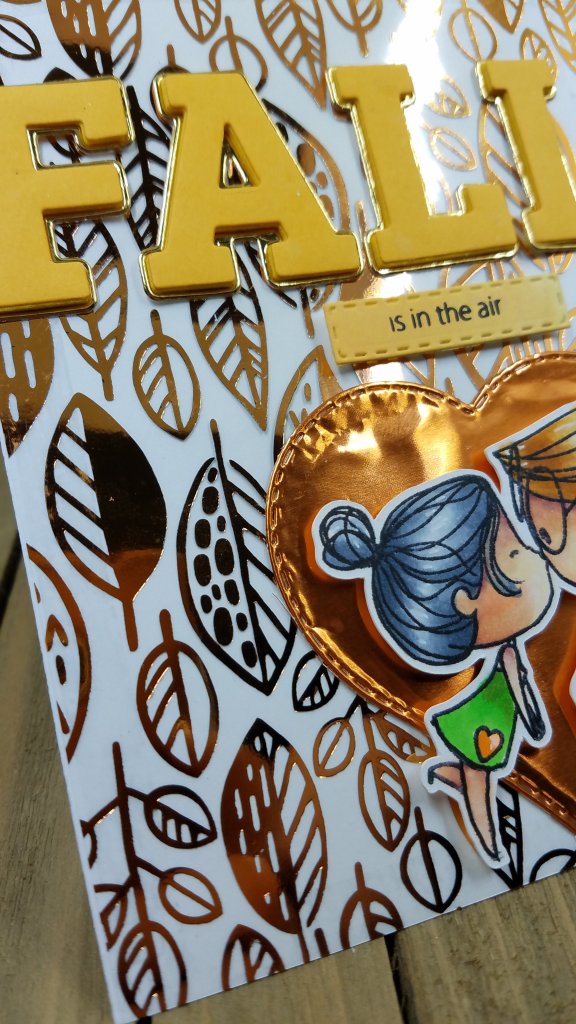
I am an Autumn baby so these gold Deco Foil and leafy designer toner sheets just spoke to me! I will link all my products used in the post.

This image has an empty alt attribute; its file name is 20190915_1600267456851903282201301.jpg


Using my favorite Love you more stamp, I decided that they need a Fall background. This stamp set is available 
Deco Foil Clear Toner Sheets - Endless Leaves pictureDeco Foil Transfer Sheets - Copper picture
Love You More Clear Stamp 4x6

Here is what I did:

** Switch on your laminator***
1. Stamp, cut and color the lovely couple. I used Copics.
3. Stamp the sentiment on yellowish paper, used
  My Creative Time's sentiment strip for the stitched die
4. For the "Fall", I used Pinkfresh's Adore Alpha Die Set and craft foam. Cut another set out of yellow cardstock and another out of gold/ mirror card stock. 
5. Glue the foam and cardstock with liquid adhesive. I used Gina K connect glue

This image has an empty alt attribute; its file name is 20190915_1558458713080945495934890.jpg

6. Now for the fun background: 
This clear Deco Foil Designer Toner Sheet, Endless Leaves, is GORGEOUS.
7. Pair it with ICraft Deco Foil Copper Cabre transfer sheet and run it through the laminator.
(Follow the directions of the packaging). 
The Rabbit Hole has transfer sheets in stock as well. Click here.
8. Cut the leafy background down to your card size (4.25 x 5.5)
9. Adhere the leafy background to the card using Therm O Web tape runner. This will not show through the clear sheet. Amazing right???
10. Adhere all the elements onto the card and as a final touch, use the gold "shadow outline" from letters and adhere to the word Fall. 
11. I used dimensional tape to adhere the sentiment

Hope you liked my card and all the elements I used from Therm O Web. These Clear designer Toner Sheets are amazing and very easy to work with. I hope you will give it a try!

For more inspiration, updates, and news make sure to check out these places.


Leafy kisses!
Charmaine 


Resting Witch Face


You know that look? That look that will even keep a vampire away? Luckily for us, she is withholding her face so we can only see her pretty legs!!!
She is a shaker with halloween colored sequins. Lovely, isn't she?


             She is available at The Rabbit Hole Designs and at Simon Says Stamp.


Hex Yeah 4x6


Here is what I did:

  1. I created the background by using black Gina K Designs Glitz Glitter Gel and the Diamond Flower Stencil.
  2. I sloppily applied the gel on a heavy duty card stock big enough to cover a 4.25 x 5.5. top folding card.  Clean and dry the stencil.
  3. Stamp, cut and color the stamp. Stamp the sentiment.
  4. Once the gel is dry on the paper, use a frame die, like the MFT Square stitched frames, and make a shaker using a sheet of acetate.
  5. Adhere dimensional tape to the back of the frame.
  6. Add sequins to the center and adhere the frame enclosing the sequins.
  7. Use double sided tape on the stamp and the sentiment and you're done!

For more inspiration, updates, and news make sure to check out these links.


Thank you so much for stopping by today!
 Leave me a comment and let me know if she is that bewitching!


Candy Corn kisses,


Charmaine


Easy BOO to you!

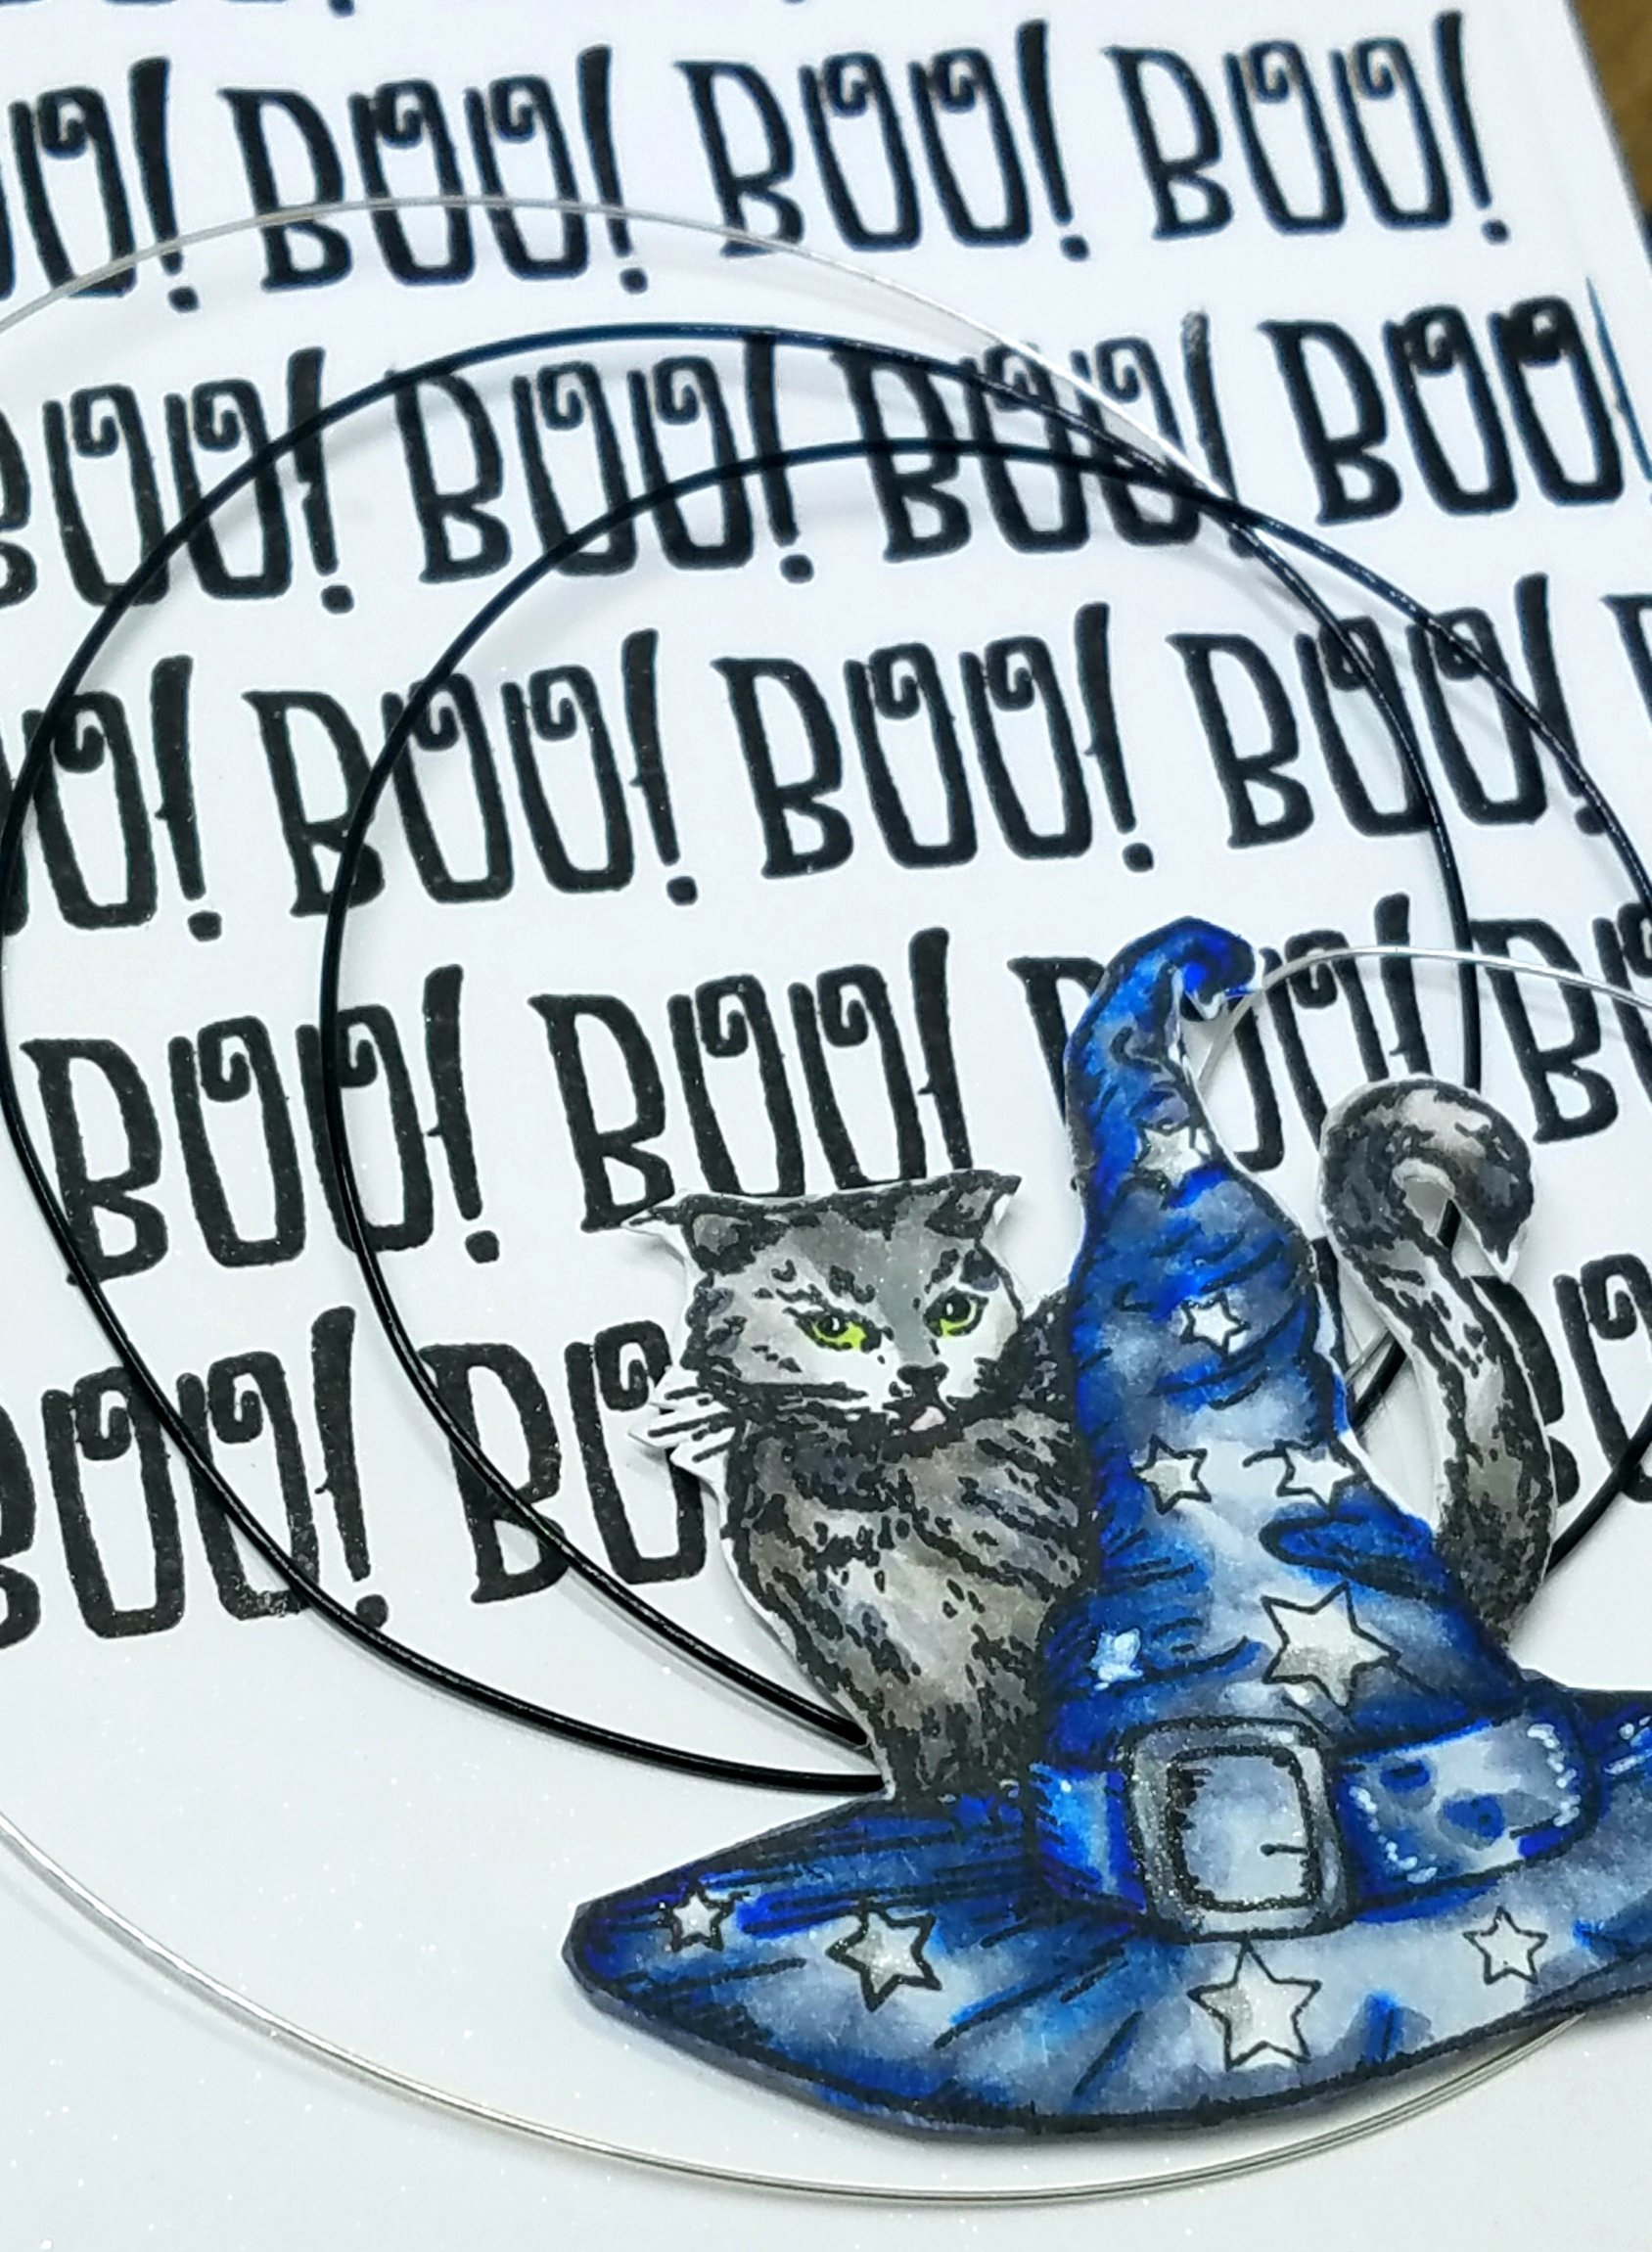
 I have a black kitty cat card that may remind you to be careful of 
the black cat crossing your road!!


This stamp is available at The Rabbit Hole Designs and now at

  1. Repeat stamp BOO! across the 4.25 x 5.5 card stock. I did this free hand but you can use a ruler and pencil lines. I used Versafine Onyx Black ink.
  2. I used a 4 x 5.25 rectangle die to make it just a little smaller than the top folding 4.25 x 5.5 card.
  3. Spray the BOO card stock with Sheer Shimmer Spritz for a little sparkle.
  4. Stamp, cut and color the cat with Copics.
  5. Cut a piece of 24 gauge wire in black and silver and loop them in a circle.
  6. Place the cat on dimensional foam tape and adhere over where the wire ends connect.


For more inspiration, updates, and news make sure to check out these links.
Thank you for visiting today! Hope you can CASE this today!

Vampire Bites,

Charmaine

Follow me here for more creations www.facebook.com/charcards2017


Hey, You swinging Gourd!

 I have a swinging Jack-o'-Lantern card to scare you!


 This gourdgeous pumpkin can be added to make cards, add to treat bags, tags and anywhere pumpkin spice lovers unite! This stamp can be found at the The Rabbit Hole Designs store and our new friend, Simon Says Stamp.


This top folding 4.25 x 5.5 card is made by using  this stamp, glitter gel, a stencil and a swing mechanism.  Here is what I did:

  • First, I used  The Crafter's Workshop Small Aspen Trees stencil and spread Gina K glitter gel over a 6x6 heavy duty card stock. Wash your stencil. Let this result dry.
  • Stamp, color and cut the gourd. I left off the little shadow on the bottom on the pumpkin - this on is going places!!
  • Cut the components of the interactive swing from My Favorite Things. I used acetate for the "swing" part to make it look even spookier! There are Youtube videos on how to use this awesome die!
  • The die set also includes these "cloud" dies; cut a black and purple set and adhere them a bit offset.
  • Stamp the sentiment.
  • Ensure the gel is dry. Line up the black and purple "clouds" to the stencil result. The die is only 4" across. Match the size of the clouds to the stencil and cut accordingly. There will be a nice white border on the left and right sides of your card.
  • Take a separate 4.25 x 5.5 card stock and die cut a circle on the center, but lower part of the card stock. You will use this to color the background.
  • Place the card stock (without the circle) over the stenciled background and use a yellow-ish Distress oxide to create the moon.
  • Place the circle you just cut out and place over the yellow moon. Use Seedless Preserves Distress Oxide to create the background. Work from the circle to the outside.
  • Build your swing, adhere the sentiment and watch that baby swing! If you want the pumpkin to swing even stronger, place a penny on the back of the gourd.

Thank you for stopping by today!!!! 
I hope you can use a technique I mentioned today! 

For more inspiration, updates, and news make sure to check out these links.


Happy Gumball cavities,

Charmaine
Follow me at www.facebook.com/charcards2017 for more ideas
Who do you think you're dealing with


It's already time for copious amounts of candy and a chance for our alter egos to shine through silly costumes. Have you seen the new release from 
The Rabbit Hole Designs?  

I made you a card to bring out your inner witch!


This release is also available at Simon Says Stamp. If ordering from SSS, you will receive this free The Rabbit Hole Designs stamp with purchase.


Hex Yeah 4x6


Click on the image to go The Rabbit Hole Designs store.


This top folding 4.25 x 5.5 card was easy to make and I used some simple card making techniques.


  • Black heat emboss the lovely legs stamp on a 4.25 x 5.5 card stock.
  • Make a mask for the stamp. I used SSS masking paper. Fussy cut and apply to the stamp.
  • I used the Fluffy Cloud die from Sunny Studios and made my own "border stencil" to mimic clouds in the sky.
  • Purple and pink Distress oxides help give the clouds that "fluffy" look.
  • Cut the colored skies card stock at an angle with the Fluffy Cloud die.
  • Remove the mask and color the stamp. I used Copics. (Disclaimer: I have heard that coloring heat embossed images with Copics is a no-no because it destroys the nibs.)
  • Stamp the sentiment with Versfine Black Onyx in the right corner of the top folding card.
  • Randomly stamp bats with the same ink.
  • Attach the colored card stock to the card base with double sided tape or liquid adhesive.

Easy techniques but quite a dramatic result!

For more inspiration, updates, and news make sure to check out these links.


Thank you so much for stopping by today!
 Leave me a comment and let me know if she is that bewitching!

Candy Corn kisses,

Charmaine