Pages

Showing posts with label Candy Twist. Show all posts

Colorful Creations: Crafting a Stunning Birthday Card with The Rabbit Hole Designs

Hello, fellow crafting enthusiasts! Today, Rick here at The Rabbit Hole Designs blog, and I'm thrilled to guide you through a delightful crafting project. We'll be diving into a vibrant birthday card featuring The Rabbit Hole Designs' Sentimentally Speaking Stamp Set, Sentimentally Speaking Dies, and Candy Twist 6 x 6 Stencil. This project is ideal for those looking to create a colorful and elegant card that's perfect for any special occasion.

Step-by-Step Guide

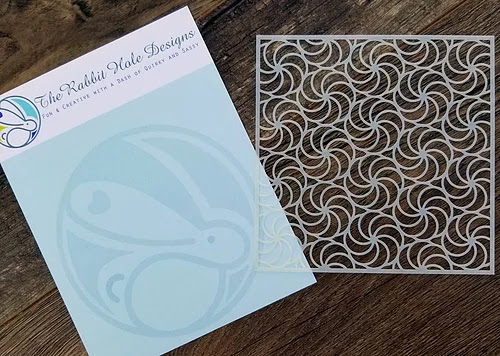
Creating the Background

To start, place the Candy Twist 6 x 6 Stencil on White 80 lbs Cardstock (from my stash). Use Mini Dye Based Ink Cubes (from your stash) to add vibrant colors to each section of the stencil using Bitty Bunny Blending Brushes. I find blending these colors reminiscent of painting as a child—each stroke adding its own excitement to the canvas!

Adding Details

Once satisfied with the blending, use a fine-lined Micron Pen to trace inside the stencil for a defined look. Remove the stencil and use Alcohol Brush Markers to add depth and refine the ink blending further.

Assembling the Card

Cut the inked panel diagonally and adhere it to a White 110 lbs Ultra Thick Cardstock card base. For a seamless finish, apply a strip of Black Cardstock over the seam using Liquid Glue.

Crafting the Sentiment

Stamp "happy birthday" from the Sentimentally Speaking Stamp Set onto White 80 lbs Cardstock using Versafine Clair Nocturne Ink. Use the coordinating Sentimentally Speaking Dies to cut it out and create dimensional layers by stacking die-cut scraps from my stash.

Finishing Touches

Complete your card with Clear Sparkle Enamel Dots for a touch of sparkle that catches the eye.

Final Thoughts

This colorful and elegant birthday card is not only enjoyable to create but also a heartfelt gift for your loved ones. Experiment with different color combinations and techniques to personalize your designs further.

Thank you for joining me on this crafting journey! Feel free to share your creations with us—I love seeing how each of you brings your unique style to life.

Rick

For more inspiration, updates, and news check out these awesome places! 


Affiliate Link Disclaimer: This post contains affiliate links. By purchasing through these links, I may earn a small commission at no additional cost to you. This helps support the blog and allows me to continue bringing you valuable crafting content.

Making Merry! a Layered Holiday Card

Hello my crafty friends and welcome to today's The Rabbit Hole Design blog.  I am sharing this multi-layered card.  The moose image, an illustration by Tatsiana Zayats, is from the July Release Merry Christmoose-Moosemas stamp set and dies.  I have paired it up with the Candy Twist dies.
I stamped the Moose in a Peaches and Cream Ink, colored it with Copic alcohol markers, and die cut the image out.  I die cut three Candy Twist shapes from a 110lb white cardstock.  I glued the three Candy Twist shaped vertically in a row on a piece of 4"x 5 1/4" white 110lb cardstock.  I cut a 3/8" thick cardstock frame from a 4 1/8" x 5 3/8" piece of white cardstock.  I added the frame over the candy twist cardstock with Double Sided Adhesive Foam Tape.  I stamped the sentiment "Wishing you a Merry Christmoose" in black ink and cut it as a strip.  This is attached to th lower front of the frame.  I added adhesive foam squares behind the Moose image and attached it to the middle of the frame.  The completed cards front is attached to a red A2 card base.


I hope you enjoyed the Making Merry card featuring the Merry Christmoose-Moosemas stamp set. Please feel free to leave a comment or ask a question.


Be Creative ~ Stay Inspired

Jenn Gross


Follow me, Journey Coach Jenn, on 

Instagram - https://www.instagram.com/journeycoachjenn/

YouTube - http://www.youtube.com/c/JourneyCoachJenn

Blog - http://www.journeycoachjenn.com/


For more inspiration, updates, and news make sure to check out these places


The Rabbit Hole Designs

The Rabbit Hole Designs Instagram

The Rabbit Hole Designs Facebook Page

The Rabbit Hole Designs Pinterest

The Rabbit Hole Designs YouTube


Easter Bags and Tags

 Hello there, Rabbit Hole Friends!

It's Kelly here on the blog today sharing a couple Easter tags and bags I made for my niece and nephew.
I can't wait to put some treats in here and drop it off at their house. 


 My tag is made from the "Spring Floral 1" paper pack.  I used a store bought tag and traced it on the back to create the base.  I cut thinner strips from other papers in the pack and hand cut the "flags" on the ends.  

I stamped "1 Line Happy Easter" on white card stock and cut the focal point out with a circle die cut.
I carefully cut the sentiment "Happy Easter" so I could stack the words for this project.  I can still use it horizontally later.  I used my stamping tool to align the words on the tag and stamp.  


To decorate the bags, I used stencils and ink.  The pink version uses "Candy Twist" and the green one is the "Back Alley" brick stencil.  The picture shows how I taped one of the bags to prepare it for the ink blending. 


 Thank you for stopping by the blog to see my bag and tag project.
Have a great day,
Kelly

Products used in this project are below:


 1 Line Happy Easter


Holiday Tags!

 Hello there and Happy Holidays!

It's Kelly here on the blog today sharing some holiday tags.

Pull out your Rabbit Hole favorites and spread some holiday joy!

This is a picture heavy post. I had SO MUCH FUN making these tags!

My tags feature several Rabbit Hole Designs Products:
  • Candy twist stencil
  • Caffeinated Reindeer stamp and die
  • Love You More stamp set
  • Kringle stamp and die


To make my tags, I stamped, colored and die cut or fussy cut my images.

I applied Glitz gel with the Candy Twist stencil on store-bought tags.

Stencils work GREAT on tags and are so much fun.  

I assembled my tags after the glitz dried. I used double-sided sticky tape to adhere the elements to the glitter. Nuvo gloss, glitter and foam make these tags extra special.


 for my hubs: 


For more inspiration, updates, and news make sure to check out these places.

The Rabbit Hole Designs 

The Rabbit Hole Designs Instagram

The Rabbit Hole Designs Facebook Fan Page

The Rabbit Hole Designs Pinterest

The Rabbit Hole Designs YouTube


Thank you for stopping by. I hope these tags inspire you to use those Rabbit Hole favorites in fun, festive and even unexpected ways this holiday.

Have a GREAT holiday! 

-Kelly 


Falala Well Latte-da! - a holiday slimline card


Hello my crafty friends! Welcome to The Rabbit Hole Designs blog. I created this fun slimline Falala - Well Latte da! holiday card.  I think the Caffeinated Reindeer might be one of my top three caffeinated critters.  His reindeer slippers crack me up!

The Rabbit Hole Designs is a Super Sponsor for the 2020 Fall/Winter Coffee Lover's Blog Hop  It runs from November 6 -13, so be sure to check out the hop.  You will find the link below!


I decided to create this festive caffienated holiday slimline card.  It features the new Blended Sentiments 2 stamp set and it's "Well Latte-da!" sentiment The Caffeinated Reindeer stamp set provides the main image I colored with alcohol markers.  


I love this barely awake Reindeer.  He is dressesd in a holiday robe and has a silly far off gaze in his eye. Aren't  his slipper so cute?


I used a few additional stencils.  I created the holiday lights and colored rays with the Light Me Up stencil,  Candy Twist stencil, and the Cotton Tail Blender Brushes.  I had the Falala die cut in my stash and felt it would be perfect to add with the "Well Latte-da!" sentiment.  The card front measures 3"x 8".  It is layered on top of a piece of 3 1/4"x 8 1/4" holiday green cardstock.  I attached the layered card front to a Christmas red slimline card base.

Here are The Rabbit HoleDesign products used in this card:

Blended Sentiment 2


Cotton Tail Blending Brushes


I hope you enjoyed this fun slimline Falala - Well Latte da! holiday  slimline card featuring the Blended Sentiments 2 stamps set and the Caffeinated Reindeer stamp set.   I love hearing from you  What do you think of slimline cards?  Have you created any of your own yet?


As a Super Sponsor of the 2020 Fall/Winter Coffee Lover's Blog Hop,

The Rabbit Hole Designs is offering a savings of 10% on all caffeinated images!
Make sure you use the code CAFFEINE in TRHD shop. . 


Social media: #fallwinter2020clh 


Be Creative ~ Stay Inspired

Jenn Gross


Follow me, Journey Coach Jenn, on 

Instagram - https://www.instagram.com/journeycoachjenn/

YouTube - http://www.youtube.com/c/JourneyCoachJenn

Blog - http://www.journeycoachjenn.com/


For more inspiration, updates, and news make sure to check out these places


The Rabbit Hole Designs

The Rabbit Hole Designs Instagram

The Rabbit Hole Designs Facebook Page

The Rabbit Hole Designs Pinterest

The Rabbit Hole Designs YouTube


Don't Bug the Beetle Card

Hey Everyone! Justin here and today I am sharing a project using the new Buggy for Caffeine set! This adorable beetle was the last bug in the set I wanted to make sure I used, and I wanted to take a different approach to this one. My last 2 bug cards were more earthier tones, so I decided that, for the beetle, I would go in a vibrant color direction!

For this card, I didn't do my coloring first. I took a scrap piece of white cardstock with the Candy Twist stencil and applied a thin layer of an electric purple glitter gel. I removed my stencil immediately to be cleaned, and then set my piece aside to dry.

I colored up my beetle with Copic markers and fussy cut them out. Next, I took an A2-sized piece of white cardstock and placed the Square Illusion stencil on top. I blended a red-to-pink-to-purple ombré using dye inks, since I knew they would give me more of that vibrant look I was going for! While the stencil was still on my panel, I spritzed it with some water to get that dappled effect, along with helping the colors blend together more.

Next, I took out some nesting square dies and cut a diamond directly from the upper middle part of the panel. Then, I cut out a diamond frame using the nesting dies from a purple glitter cardstock. I adhered this frame directly over my main panel diamond cut out.

I stamped the sentiment "Don't bug me I haven't had my coffee yet" from the Buggy for Caffeine set in red ink on white cardstock, cut it into a box, and framed it in that same purple glitter cardstock. I wanted to make this into a band, and I used the leftover scrap die cut from my diamond window. I cut it into 2 pieces, adhered them to my card, and adhered my actual sentiment over the top.

All I had left to do was some adhering, and my project was done. I took some clear acrylic bubble embellishments and adhered them to my project. I then took an A2-sized card base, and found where my diamond cut out window would be, and adhered my purple glittery Candy Twist piece directly behind it. I took some foam tape and adhered my main panel onto the card base to give the cut out window some depth. To finish my card, I used foam tape to adhered my beetle to the front of my card, and I was done!

I used the following products in this card:


For more inspiration with your The Rabbit Hole Designs Creations, be sure to follow along at these other locations:


For more details about products used in this post, you may also follow along at my personal blog, Just a Note by Justin, as well!

I hope you enjoyed my project and that it sparks some buggy inspiration for your next creation!

Happy Crafting!

Hoppy Easter Egg Card


Hey Everyone! Justin here, and today I am sharing a fun Easter card that I made using the new All Ears set, part of the March 2020 release and available now!

There are so many fun ways to use these adorable little bunnies, and, for this project, I decided to only use 4 of them!

First, I stamped out my bunny pile from All Ears and colored up 4 bunnies from the bottom row (starting at the bottom left bunny and working my way over) with my warm gray alcohol markers. I then fussy cut the bunnies out so there is no border.

To create my Easter egg background, I cut (2) 4.125" x 5.375" panels from white cardstock, once of which also had an Easter egg cut out from the center. I laid the Easter egg cut-out piece on top of the no-cut-out piece, and taped them together with a few pieces of purple tape for stability while stenciling. Then, I put the Candy Twist Stencil on top of the attached panels and ink-blended a pastel ombré. After I was done blending, I removed the stencil (you know, that moment that perfectly emotes the emoji that has hearts for eyes). Before removing my Easter egg cut-out piece, I splattered the inked area with some sparkle silk for extra shimmer. I removed my Easter egg cut-out piece and let my panel set aside to dry.

From here, the card became fairly easy to put together. After the Easter egg panel dried, I adhered it to an A2-sized piece of light blue cardstock. I stamped the sentiment "Hoppy Easter" from All Ears on a .5" high sentiment strip, and framed that with some light pink cardstock. I placed my 4 little bunnies from All Ears into a position where it looked like they were over hanging the strip, and covered the back of my bunnies and strip with some foam tape, and adhered the piece to my card.

I then took some sequins from one of the packs I received when ordering from The Rabbit Hole Designs that had a pearly pastel palette, and adhered them to my card.

I adhered my panel to an A2-sized card base and I was done!

Here are the products I used to make my project:

All Ears


Candy Twist Stencil


For more inspiration with your The Rabbit Hole Designs Creations, be sure to follow along at these other locations:


For more details about products used in this post, you may also follow along at my personal blog, Just a Note by Justin, as well!

I hope this card is providing you with some fun ideas with how to make some adorable Easter cards or just fun bunny cards in general! Thanks for stopping by the Rabbit Hole Designs blog!

Doggone It, Be My Valentine!

Valentine's Day is coming! I'm sharing a card featuring many products from  The Rabbit Hole Designs

I love this card so much and I cannot wait to give it to the Hubs!! 

I stamped the background using the paw print and bone 
from the "Doggone" set with brown ink on kraft paper.
Several paw prints in the set to pick from. 

I used gold glitter glitz gel with the "Candy Twist" stencil. 
Once it dried, I cut it out with a heart die.

Then I stamped, colored and fussy-cut my pups.

I stamped & colored the large open hearts 
from "Love You More" to create balloons.

I stamped the sentiments from "Doggone".

There's glitter pen on the dog's scarf and Nuvo Glaze on the balloons.  


For more inspiration, updates, and news make sure to check out these links.


 Hope you enjoyed my Valentine take using the "Doggone" set!
Thanks for stopping by! 
-Kelly