Pages

9 Shades of Grey - Starring Clarence


 Hello my crafty friend! It's Amanda, from Pear Blossom Press, back with another fun card. And today, Clarence is the star of my monochromatic mini-slimline! Lol, I pulled out lots of grey markers to color him; not quite 50, only nine. Isn't he cute though? Head on over to my blog for all of the details... pearblossompress.com

If you'd like to recreate a card like this, be sure to head on over to the shop and pick up these supplies:

Thanks so much for stopping by today! I hope I've inspired you to give this card a try. If you do, tag me on Instagram @pearblossompress so I can cheer you on! I'll be back soon with more fun cards to share. In the meantime, check out these fun places for more inspiration, updates and the latest news...

Hot Foil Plates are FAB-U-LOUS!


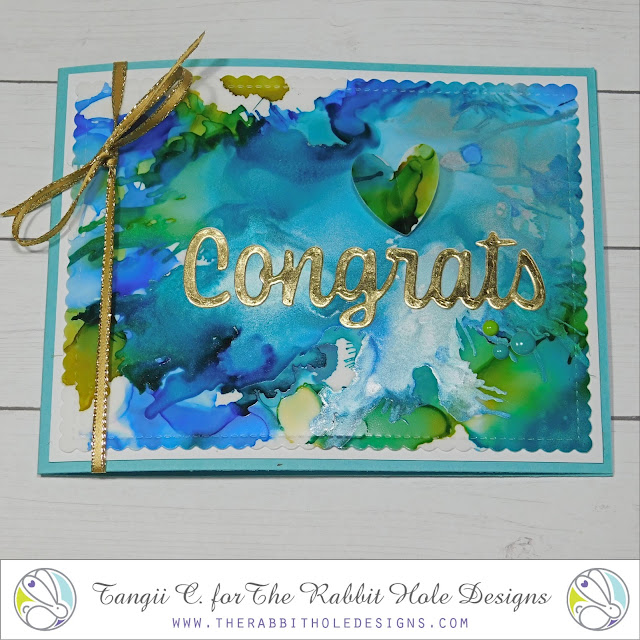
Hey y'all, happy Friday-eve! Oh my gosh!  I had some serious fun playing with our new Hot Foil Plates.  For this card I used the Congrats Hot Foil Plate and then used the Scripty Congrats die (the word die, not the shadow).


First I ran the foil plate through, then I placed the word die over it and ran it through again.  My eyesight isn't excellent, but I didn't have a hard time making sure it was lined up.  I adhered it to my Alcohol Ink panel and added a gold ribbon, a heart and a few enamel dots...voila!  Easy peasy and I love how it turned out!

You can also read about this card on my blog, here with links to the products I used, etc.  Thanks for popping by, come back again soon!

A Happy Happy Happy Birthday! - Foiled Shaker Card

Hello my crafty friends and welcome to today's The Rabbit Hole Designs blog.  I am sharing this Happy Birthday Foiled shaker card.

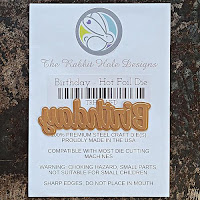
I am using the Happy stamp set, the Birthday Foil Plate, and the Birthday Die set to create today's card.
A - I stamped the Happy stamp in light, medium  and dark blue inks on a piece of 4 1/4" x 5 1/2" baby blue cardstock living a 2" blank space to the right of the card front. The word is stamped 3 times, verigated, and in 4 sections
B -  Using a piece of heat resistant acetate and my Glimmer Hot Foil Machine, I foiled the word Birthday in blue foil.  It came out beautifully!
C - I die cut the Birthday outline die from the right side of the card front, placing it vertical to the  horizontal stampped Happy-s.  I secured the foiled Birthday acetate window to the backside of the cardfront in the Window outline with adhesive tape and glue. On the backside of the card front, I framed out the Birthday window with double-sided foam adhesive tape.  I also frame out the remainder of the card back with the adhesive foam tape.  I filled the pocket of the Birthday well with fun candy like sprinkles.  I removed the release paper and attached a light lemon A2 card front.  The word Birthday is readable and the words Happy are now horizontal
D - I decided  to add a yellow bow around the top of the card, so I added a small slit in the crease of card base to thread the ribbon through so it could be tied in the front.


I hope you enjoyed this step tutorial.  Did you notice anything interesting in photo step "B"?  ...I foiled my foil plate!!!  LOL!  Yep!  I set the foil down shiny side up.  Oops!  It happens and it did not damage my Birthday Foil Plate.  I still was able to foil the heat resistant acetate with no issues.  I hope you got a chuckle out of that #truestory!  

Be Creative ~ Stay Inspired

Jenn Gross


Follow me, Journey Coach Jenn, on 

Instagram - https://www.instagram.com/journeycoachjenn/

YouTube - http://www.youtube.com/c/JourneyCoachJenn

Blog - http://www.journeycoachjenn.com/


For more inspiration, updates, and news make sure to check out these places


The Rabbit Hole Designs

The Rabbit Hole Designs Instagram

The Rabbit Hole Designs Facebook Page

The Rabbit Hole Designs Pinterest

The Rabbit Hole Designs YouTube


Sip, Sip, Ahh!


Welcome. Lauren here today with this coffee loving bunny card. I love the smell of coffee and that first sip in the morning is pure heaven. I thought that the expression on this bunny from the Je t'aime stamp set reflects exactly how I feel about the smell of coffee first thing in the morning. Yum! I put this cutie into the brand new Coffee Shop Background to make this sweet card.

I started out by inking up and stamping just this one bunny from the stamp set onto white cardstock. I also stamped and fussy cut a mask for her using masking paper.

I placed the mask over the stamped bunny, then positioned the Coffee Shop Background stamp so the coffee cup would be directly below the bunny's nose. I made sure that I inked only the part of the stamp I wanted to show up on my panel.


I removed the bunny mask and colored the stamped images using Prisma color pencils. I also stamped my sentiment above the counter in black ink. On separate white cardstock, I stamped, colored and fussy cut a couple of hearts. Then I adhered them above the bunny's nose. 


Next, I created an embossed background for my coffee shop scene to sit on. I first prepared an A2 (4,25x5.5") black cardstock panel with the Cottontail Embossing Powder tool. This virtually eliminates stray embossing powder from sticking where you do not want it to. Then, I used embossing ink to stamp the small coffee bean from the Blended sentiments set and one of the hearts included in the Je t'aime set randomly over the cardstock panel. I covered the stamped areas with white embossing powder, returned the excess to my container, then heat set it. I trimmed this down a little so that a border of white card base would show once I adhered it.


I cut my coffee shop scene to my desired size, adhered a piece of self adhesive white foam sheet the same size and adhered it to my embossed background. 

Here are the links for The Rabbit Hole Designs products I used for this card:

Coffee Shop Background 4x6 – The Rabbit Hole Designs

Je t'aime 3x4 – The Rabbit Hole Designs

Blended Sentiments 2 4x6 – The Rabbit Hole Designs

For more inspiration, updates, and news make sure to check out these awesome places! 


Thank you so much for stopping by today!


Hold my beer


Hello! I hope you checked out the fun new releases for October. 

Vanessa here today to share a card I had a lot of fun making using the new Clarence Surfing stamp set illustrated by Dustin Pike, and the new peanut stencil. The sentiment is from Sassy Sentiments; a must have for your collection. 

This is a mini slimline card. I stenciled a bunch of peanuts onto cardstock and fussy cut them out and glued them onto my layered card front to create a hill of peanuts for Clarence to "ski" down. I used the peanut stencil on the board to make it look like he's on a peanut shell; colored him and cut him out and attached the shell directly to the card and his head/body with dimensional tape. "Here, hold my beer" seemed appropriate.  Lol!! 

Hope it made you smile! Have a great day!

 For more inspiration, updates, and news make sure to check out these places.