
Hello my crafty friends! It's Amanda from Pear Blossom Press and today, I'm sharing this fun Christmas card featuring products from The Rabbit Hole Designs and Therm-O-Web. I really love how this card came together and it was easy enough to mass produce. Look at all of the dimension and shine on it...
To create this card, I taped off a narrow border around the edges of a white A2 top folding card. I sprayed Pixie Spray to the back of my Candy Twist Stencil and stuck it to the front of the card. I used a makeup brush to stencil on Festive Berries, Aged Mahogany, and Vintage Photo Distress Oxide Inks to create a vignette. With the stencil still in place, I applied a coat of Gina K White Glitz Glitter Gel on top. I removed the stencil and tape right away and set the card aside to dry.
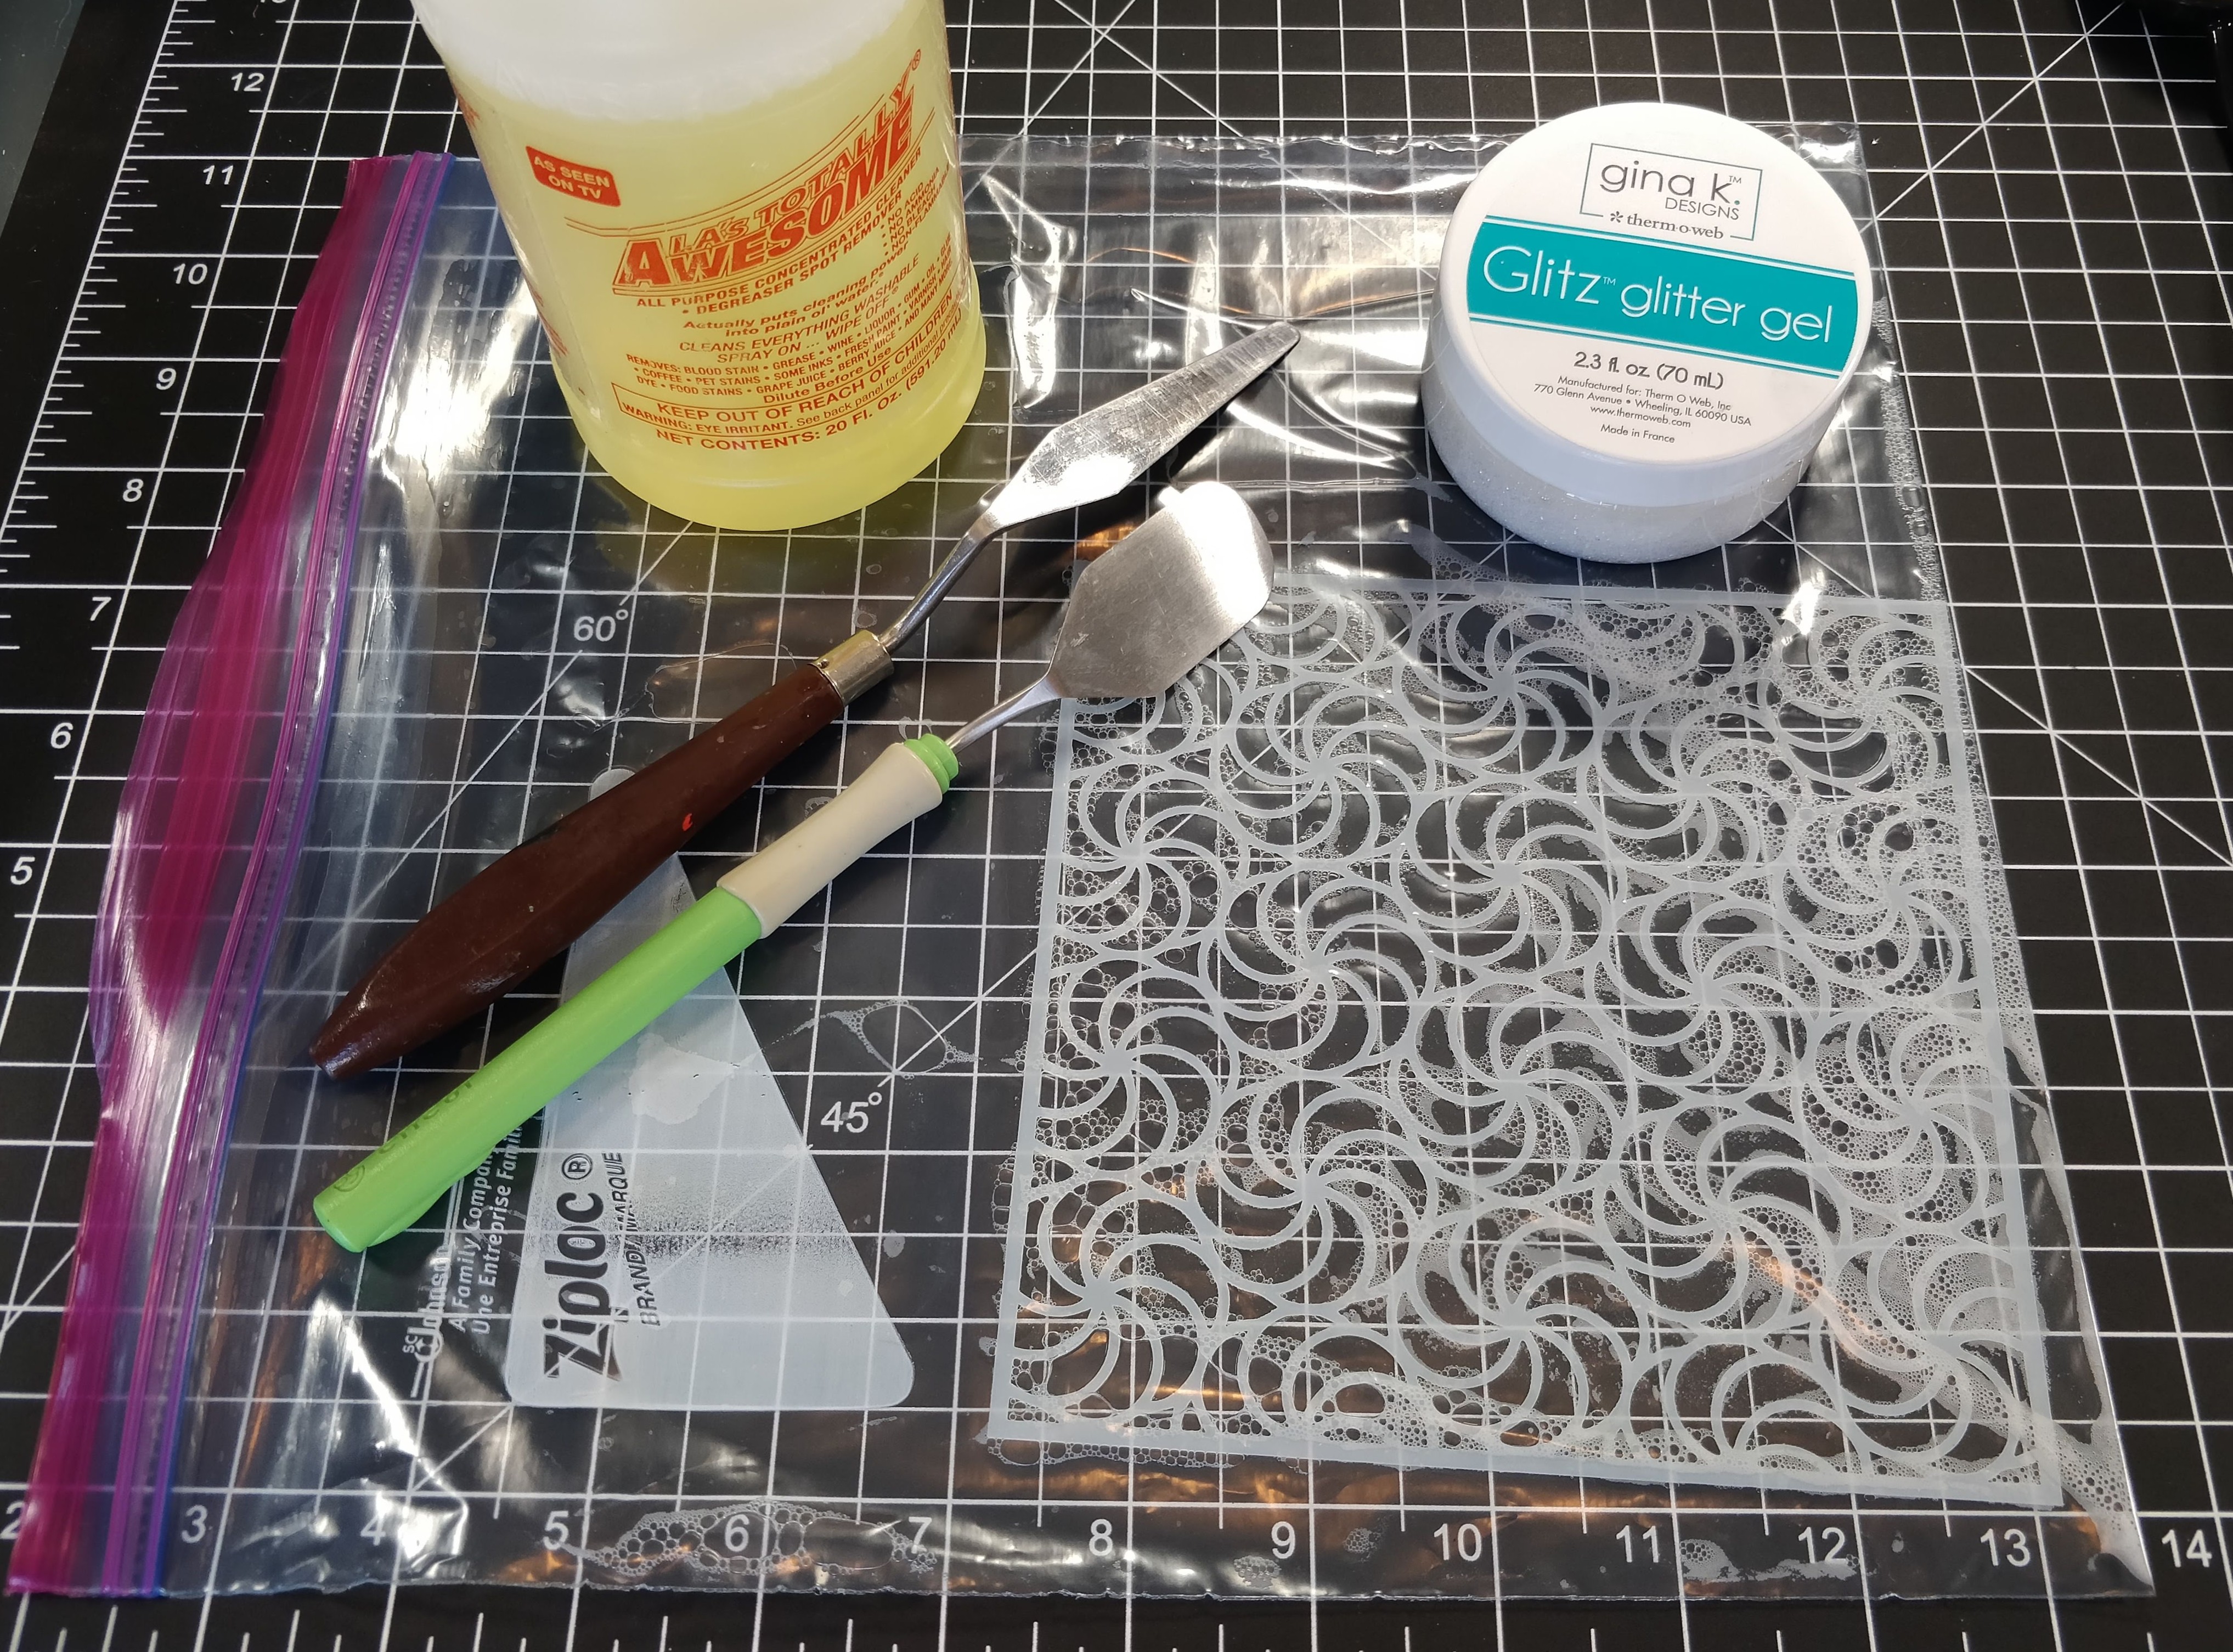
Here is a quick tip for working with stencils from MaryAnn (one of the owners of The Rabbit Hole Designs). She suggested I stick dirty stencils into a large Ziploc bag with a squirt of Totally Awesome Spray, or Windex, to help keep the glitter gel from setting and to make clean up easy. It totally works! You only need a little of the cleaning solution to cover the stencil in the bag and you could stack a few up while you are working, to save time and clean them all up at the end. Thank you MaryAnn, great idea! (Side note: Totally Awesome spray is also totally stinky; use in a well ventilated area.)

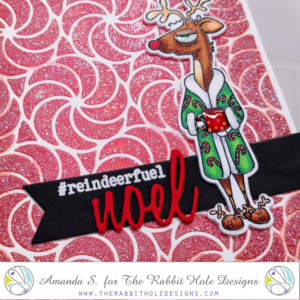
Back to my card... While the card was drying, I stamped, embossed, and Copic Colored the Caffeinated Reindeer. Isn't he fun? He even has little reindeer slippers! I used the Coordinating Die to cut him out. I also used the same die to cut out a piece of White Foam Adhesive. This is a layer of foam with adhesive on both sides; it die cuts perfectly. I peeled back the top piece of release paper and adhered the colored reindeer to the foam piece. I die cut a fishtail banner and embossed part of my sentiment in white. I die cut three layers of the word NOEL from red cardstock and stacked them together. I glued the word to the banner, then glued the banner to my dry card. Then, I peeled the release paper from the back of the reindeer and placed him on my card. To finish the card, I wanted to add a little shimmer to the reindeer, so he wouldn't be unbalanced, compared to the background. I used a gold gel pen to add dots to his mug, Aqua Shimmer Pen to his eyelid, and Diamond Glaze to his eyeball and mug.
I hope I've inspired you to get a jump on some of your holiday cards. Head on over to my blog for links to the specific products I used for my card. Before you go, check out another fun collaboration project from Shanna. Then hop on over to Therm-O-Web for even more inspiration and all of the details on how to enter to win a gift card! I'll be back at the end of the week with another sparkly card that will have you drooling...
oh how FUN!
ReplyDeleteI'm going to share in the Coffee Loving Papercrafters FB page!
It's morning and the deer resembles
ReplyDeleteme so much right now. Wonderful card.
thanks for sharing.
Great, love it!
ReplyDeletethat glittery sparkle is da' bomb
ReplyDeleteWhat a great background. And the reindeer is adorable.
ReplyDelete