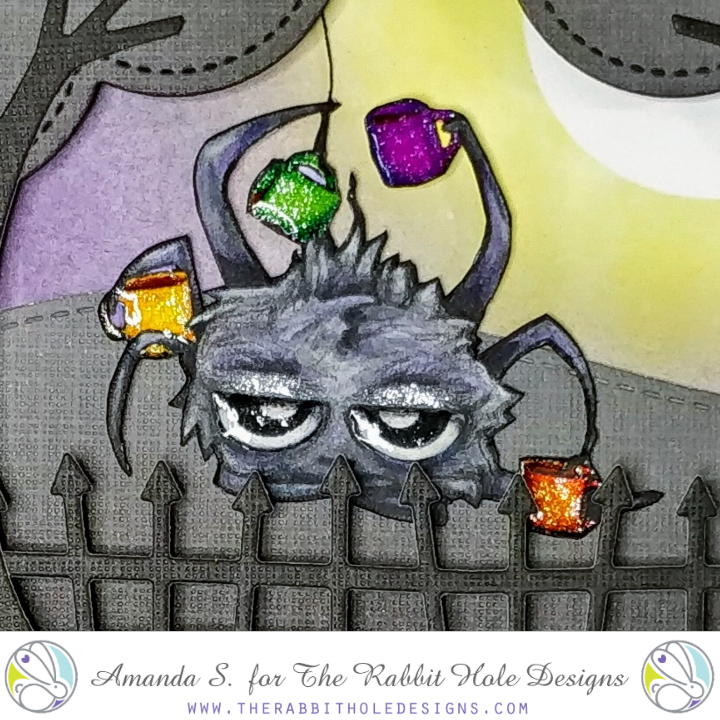
Hello my crafty friend, it's Amanda from Pear Blossom Press again! How do you take your coffee? I usually prefer mine sans spiders, but this one is so cute, I couldn't resist. I was inspired by my friend Jenn to dangle the adorable Caffeinated Spider from a thread and let her swing. Isn't she cute?!
Now I know a lot of people missed the chance to order the Caffeinated Spider when it was offered as part of a mini coloring class from Sweet Sentiment, but don't worry, she'll be available from The Rabbit Hole Designs starting on September 30th. I also missed Jammie's class, so I had to color her up on my own.
Luckily, I took a coloring class with Kathy Racoosin last weekend. It was fantastic! And I learned that I'm the Jon Snow of coloring; I know nothing! All kidding aside, I really did learn some great new techniques that I want to work on. Kathy teaches how to add details with colored pencils (a medium I rarely work with). So for this card, I wanted to practice some of the new tricks I learned.

I started by stamping my spider and laying down a base coat of color with several shades of grey Copic markers (N3, N5, & N7). Then I brought in my colored pencils and went to work. I chose random dark pencils to deepen up the nooks and crannies. I added a little purple over some of the highlight areas, just for a touch of color. And I added lots of tiny strokes to look like hair all over the spider. For the mugs, I opted for bright colors and added a touch of shading. Once I was happy with the coloring, I fussy cut the spider and glued a piece of black thread behind the green mug.
While the glue was drying, I masked off a 1¼" circle on a 3¼" x 4¼" panel. I ink blended Squeezed Lemonade Distress Oxide ink around the circle. Then I blended Wilted Violet Distress Oxide ink on from the bottom up, leaving about ½" of white space between the two colors (don't mix them, it won't be pretty). To bring the colors together and darken up the edges of the purple, I lightly blended in Black Soot Distress ink just to where the yellow started. This gave me a nice bright moonlit sky.
To create a scene, I die cut a pair of tree trunks, a spooky fence and a stitched rectangle frame from black cardstock. I also cut a stitched hillside piece and a pair of tree tops from grey cardstock. To add a little shading to the grey pieces, I blended more black soot ink along the bottoms. I glued the hillside piece flat to the ink blended panel. Then I glued the trees and fence to the rectangle frame and added a double layer of foam tape to the back of the frame. Before sandwiching the frame to the panel, I draped the spider in between.
For the A2 card base, I cut and folded a piece of purple woodgrain cardstock. The color was more pink than I wanted, so I blended wilted violet and black soot around the edges to get the right color. Then I stamped and embossed the sentiment along the bottom right edge and glued on the scene. For a little shimmer and shine, I painted Liquid Pixie Dust onto the spider's eyelids and the coffee mugs. I added Diamond Glaze to her eyeballs and the mugs. And to finish the card, I glued on a few sequins that came for free in my last order from The Rabbit Hole Designs!
So tell me what you think. Fun right? I love the way she swings back and forth with that bothered expression on her face. She is the cutest spider I've ever seen. And the thread is one of the easiest ways to add an interactive element to your card. Plus, it couldn't be more perfect for a spider to hang from, right?
Thanks for swinging by today! (See what I did there? I must've been a dad in another life...) You can find the sister article to this on my blog today, along with links to the specific products I used. I'll be back soon with another fun card...
fabulous!
ReplyDelete