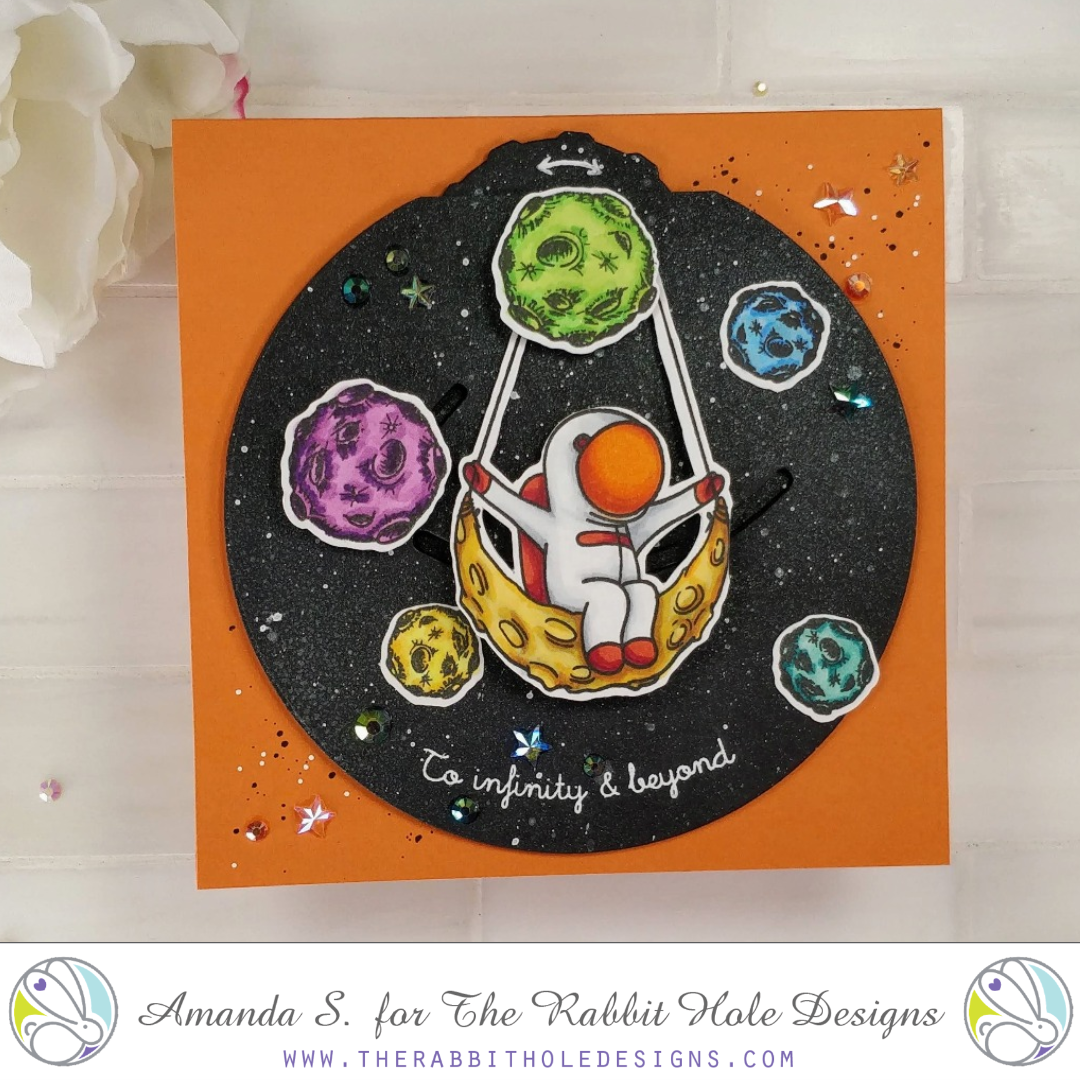
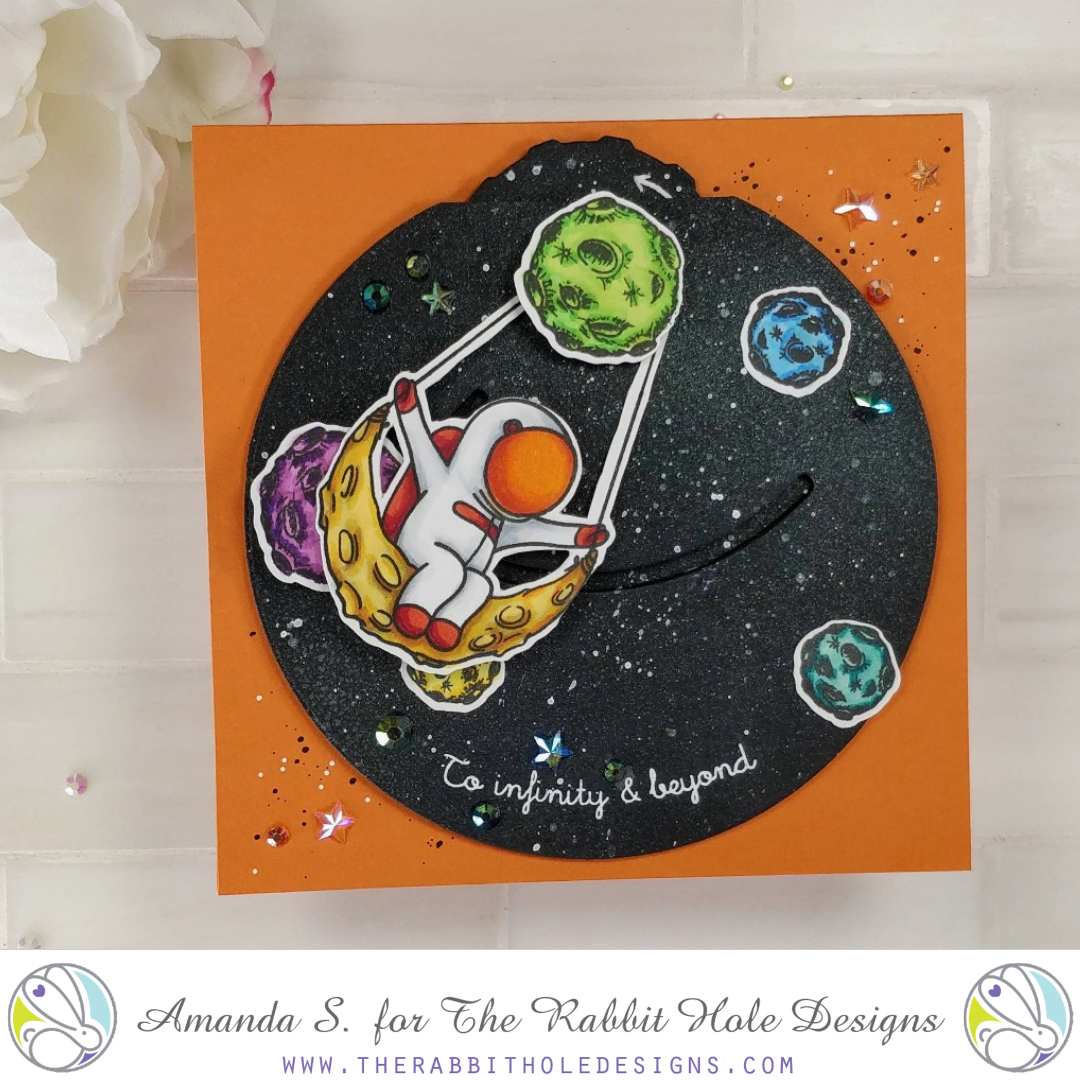
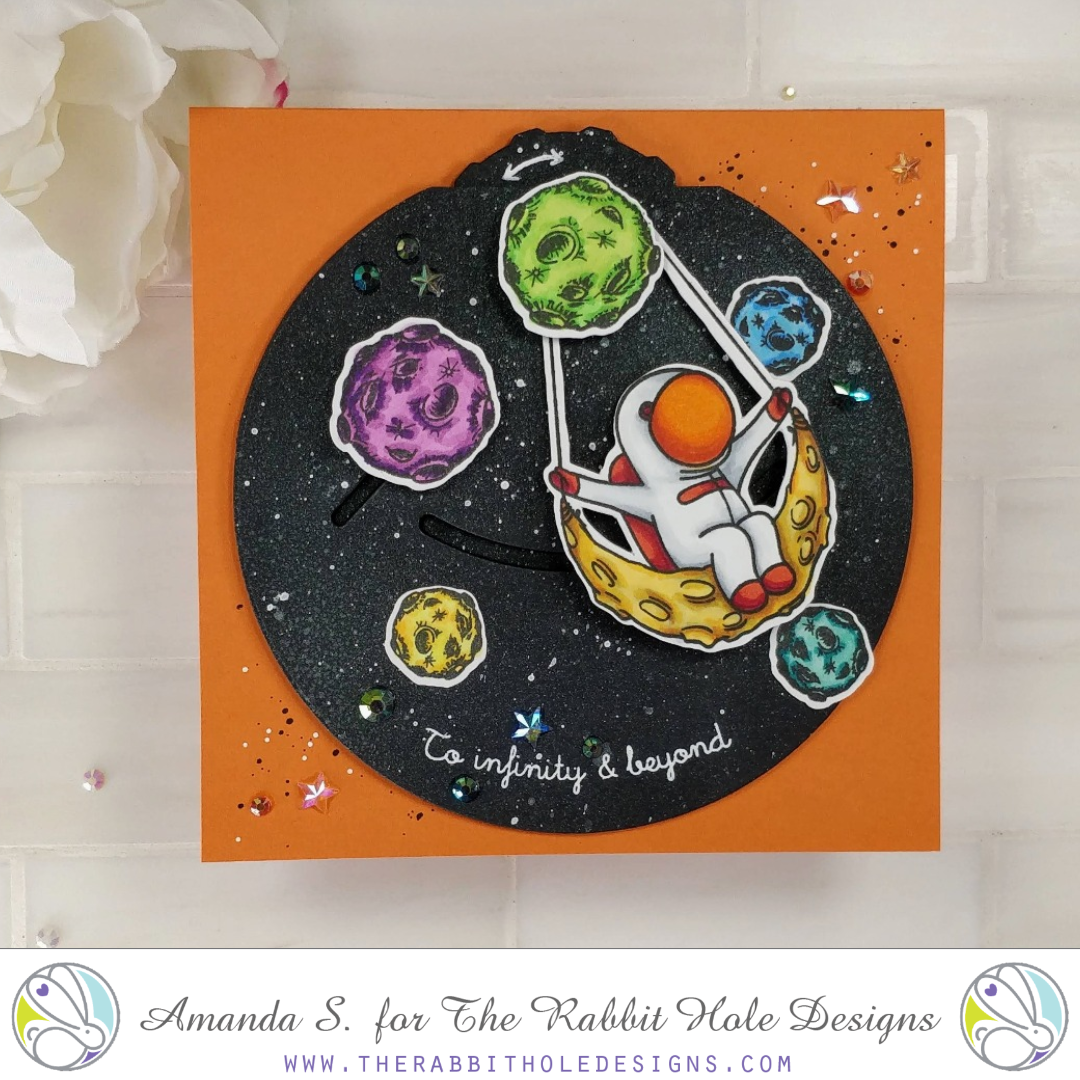
Hey crafty friend, Amanda from Pear Blossom Press here again. I've got an awesome new interactive card for you today! I paired up images from Space - Infinity & Beyond, and Space - Miss You, along with a neat double dial die set, to create a fun swing card. Check it out in action...
To prep, I stamped my images and Copic colored them. I extended the arms of the astronaut's swing and connected them at the top with a black pen. Then, I cut out all of the images with my ScanNCut. To create the galaxy background, I borrowed a trick from my friend Cassie, and just splattered white paint and shimmer mist onto black cardstock. It's fast and easy. I cut out a 5" circle and trimmed the top off to create the card front. I used the die set to cut the slots from the circle, as well as the dial, link and washers. It may seem complicated, but I promise, this was really easy to put together. Here are step-by-step photo directions to assemble the pieces...
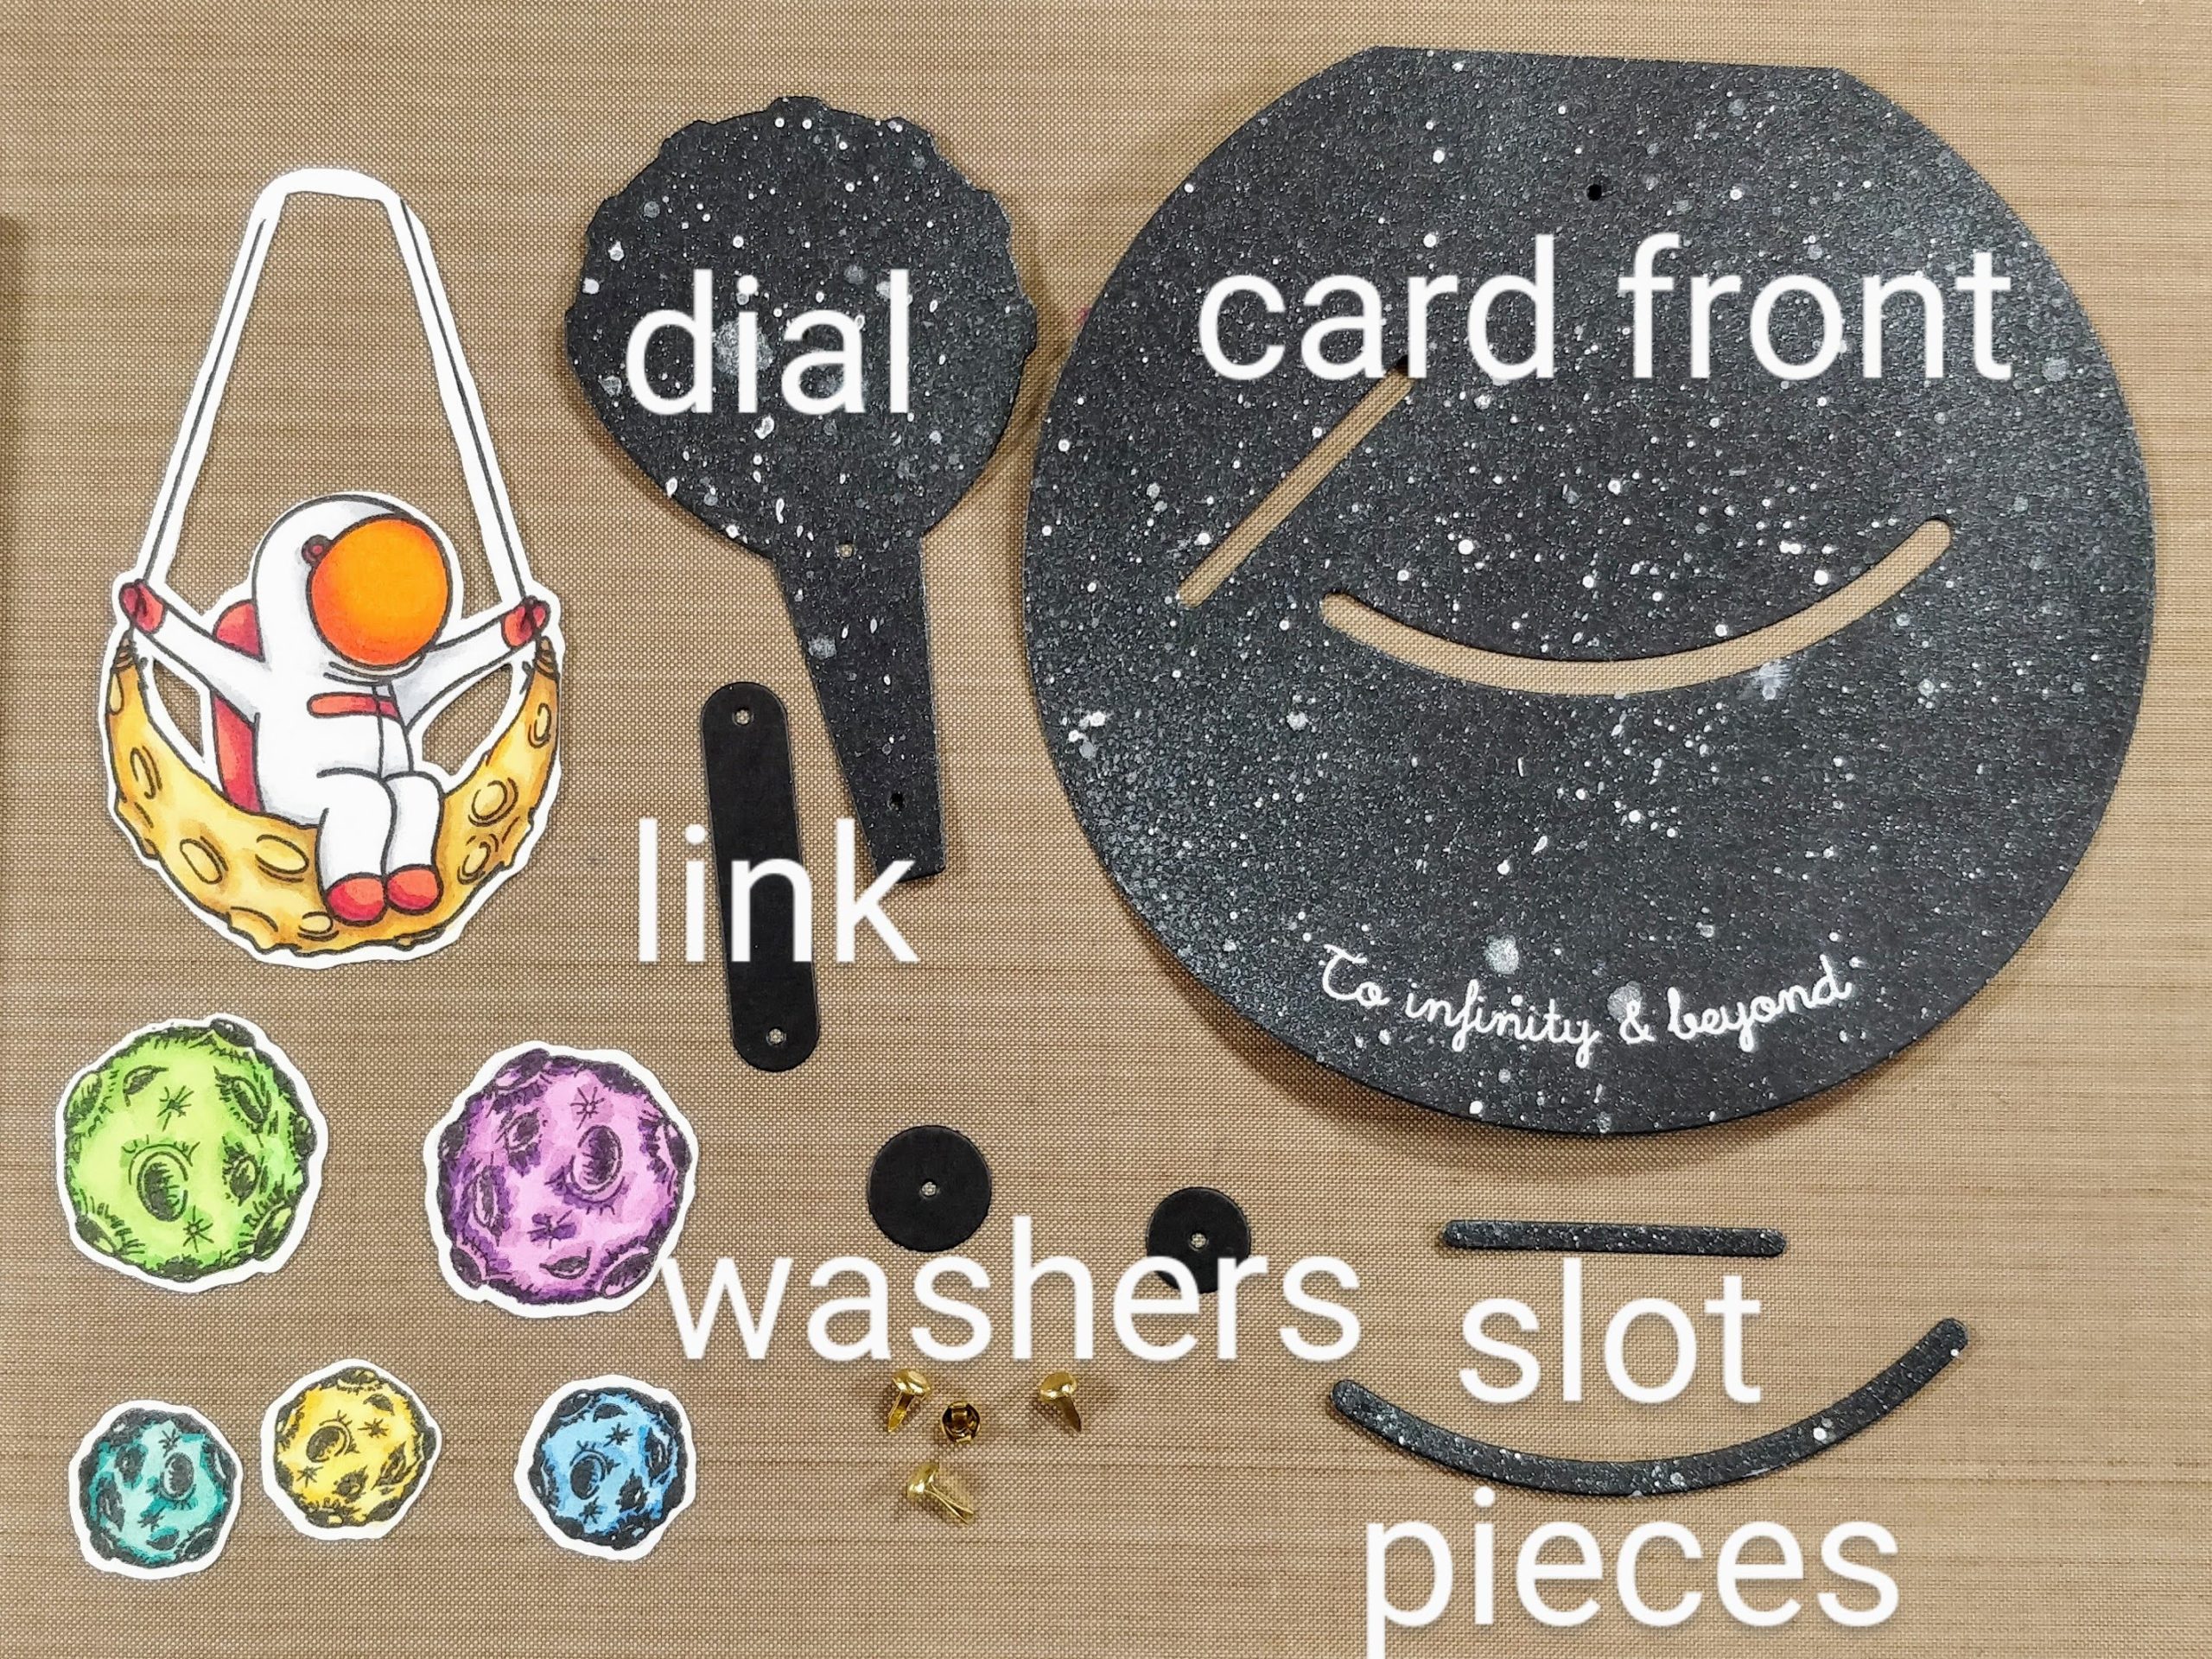
Parts for Swinging on the Moon Double Dial Card.
1. Attach link to dial with brad.
2. Attach dial to card front (narrow tweezers help create extra space when opening brad).
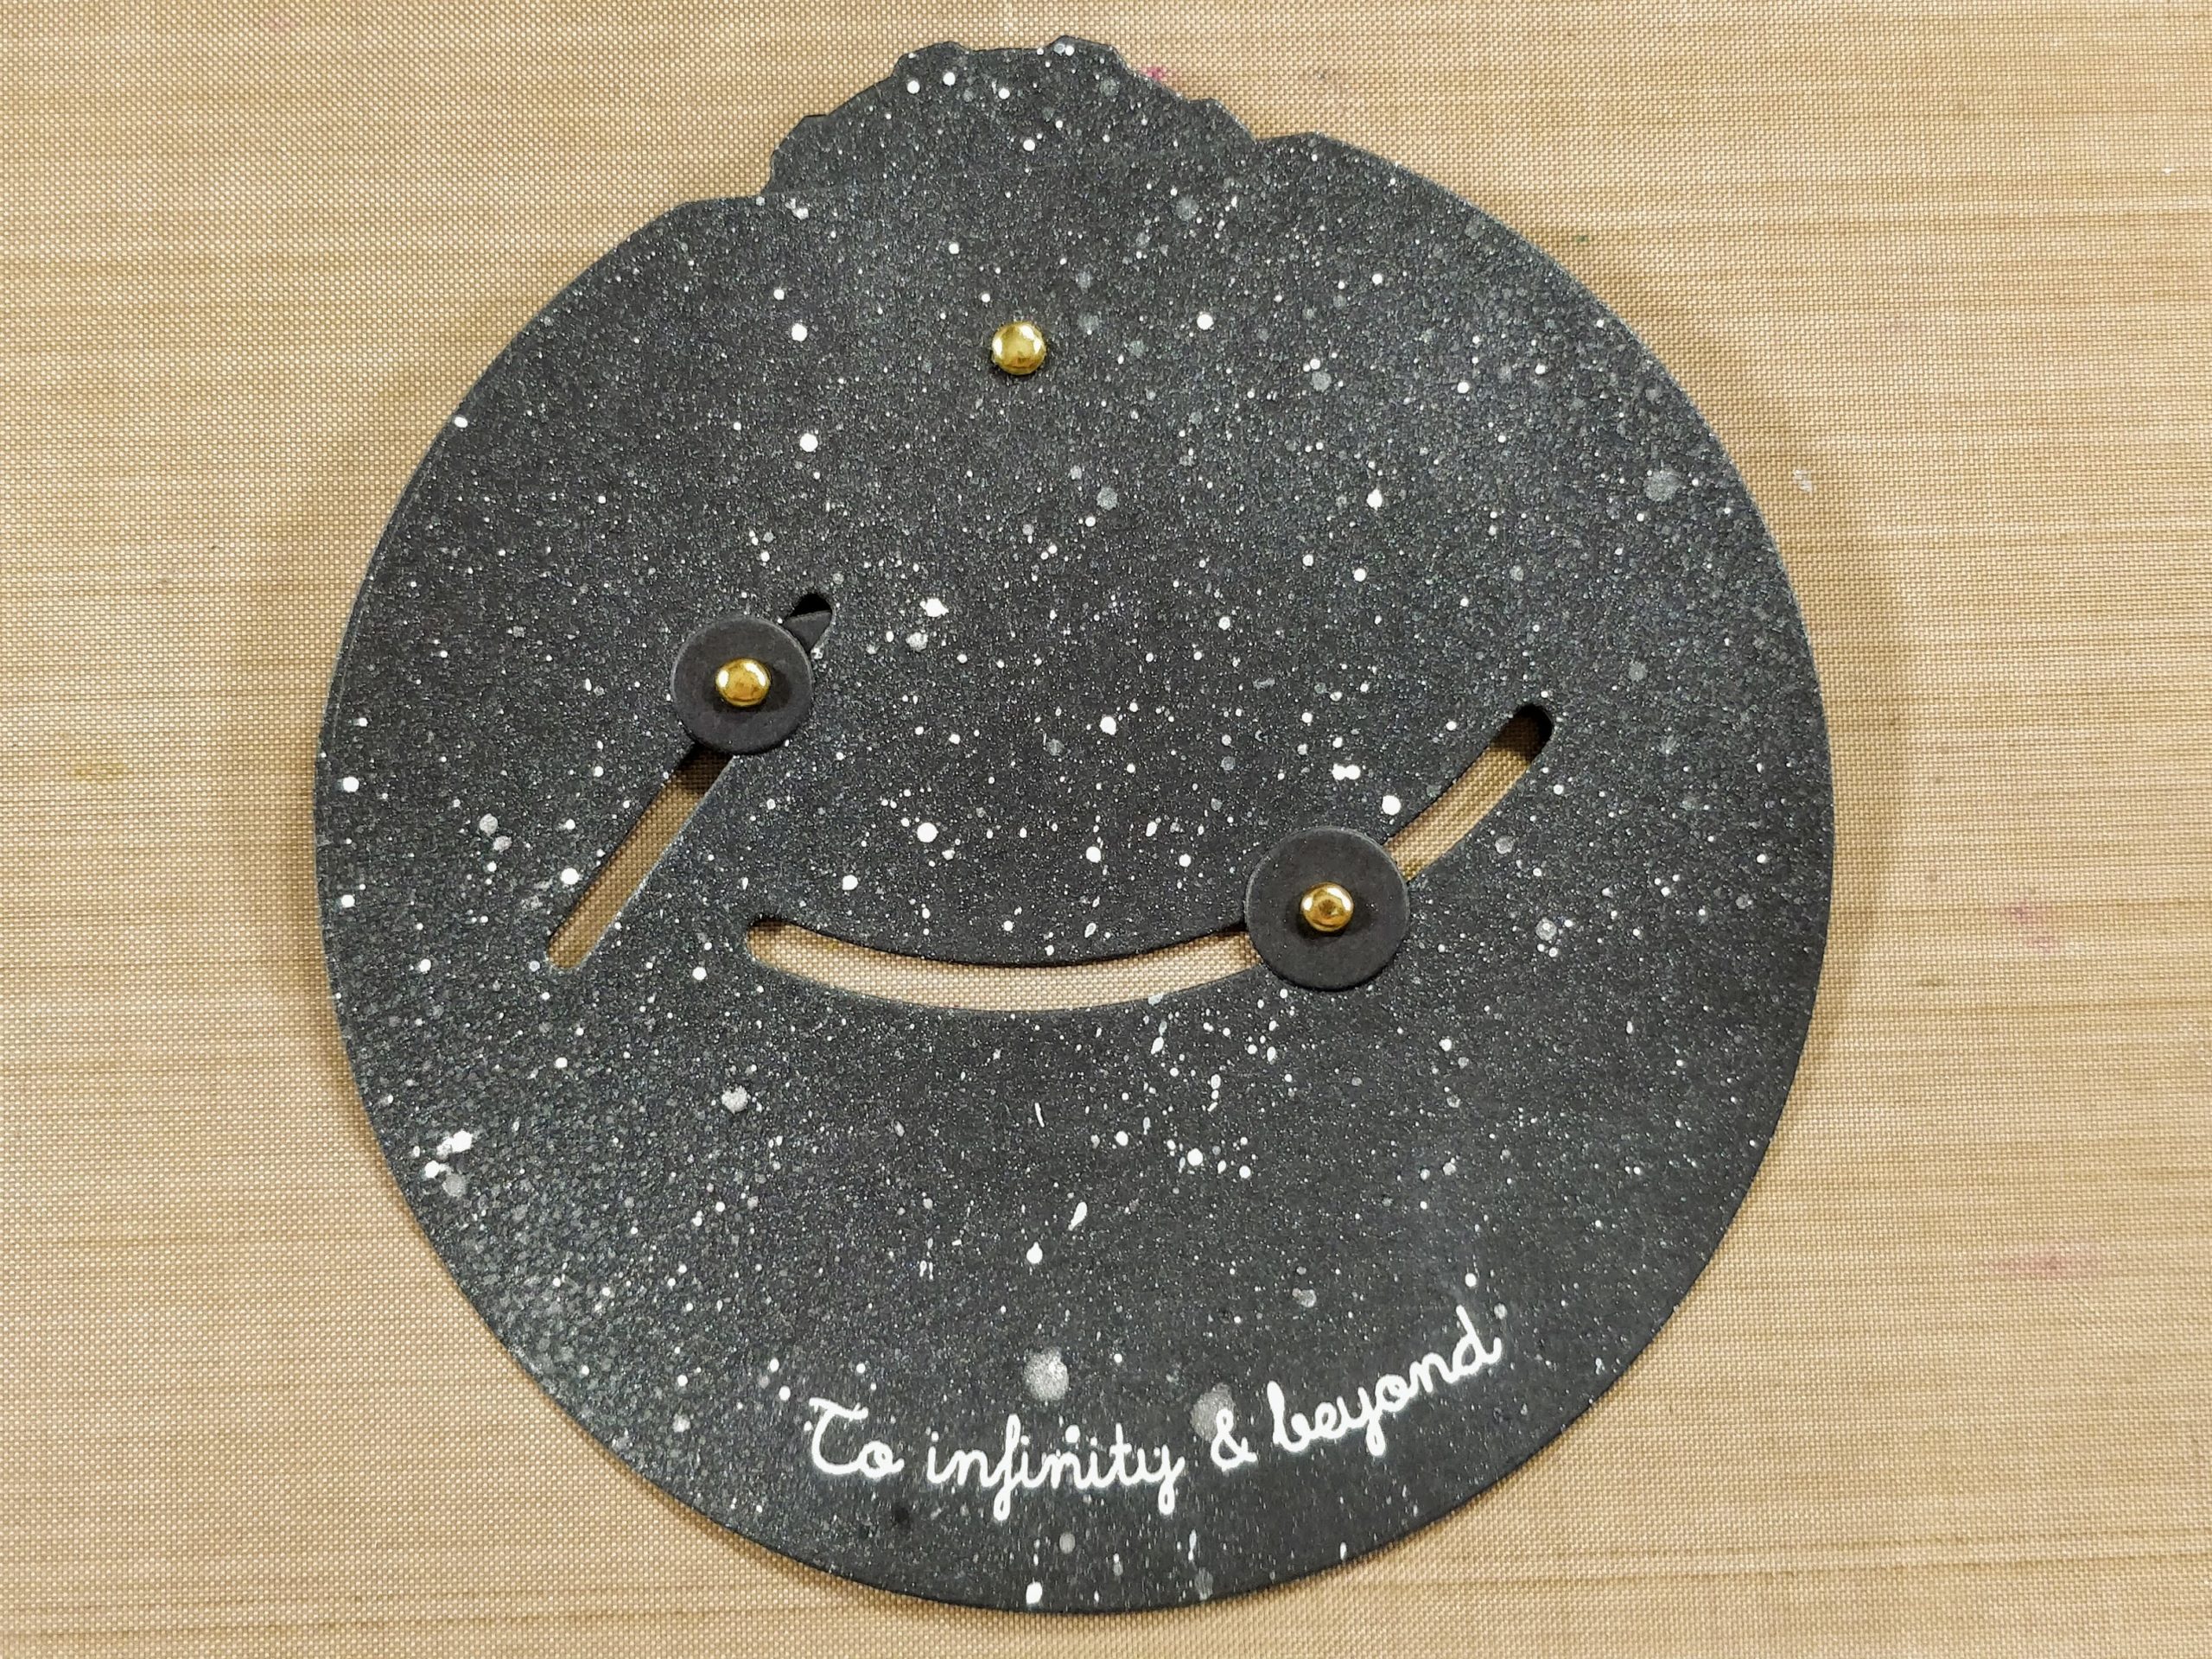
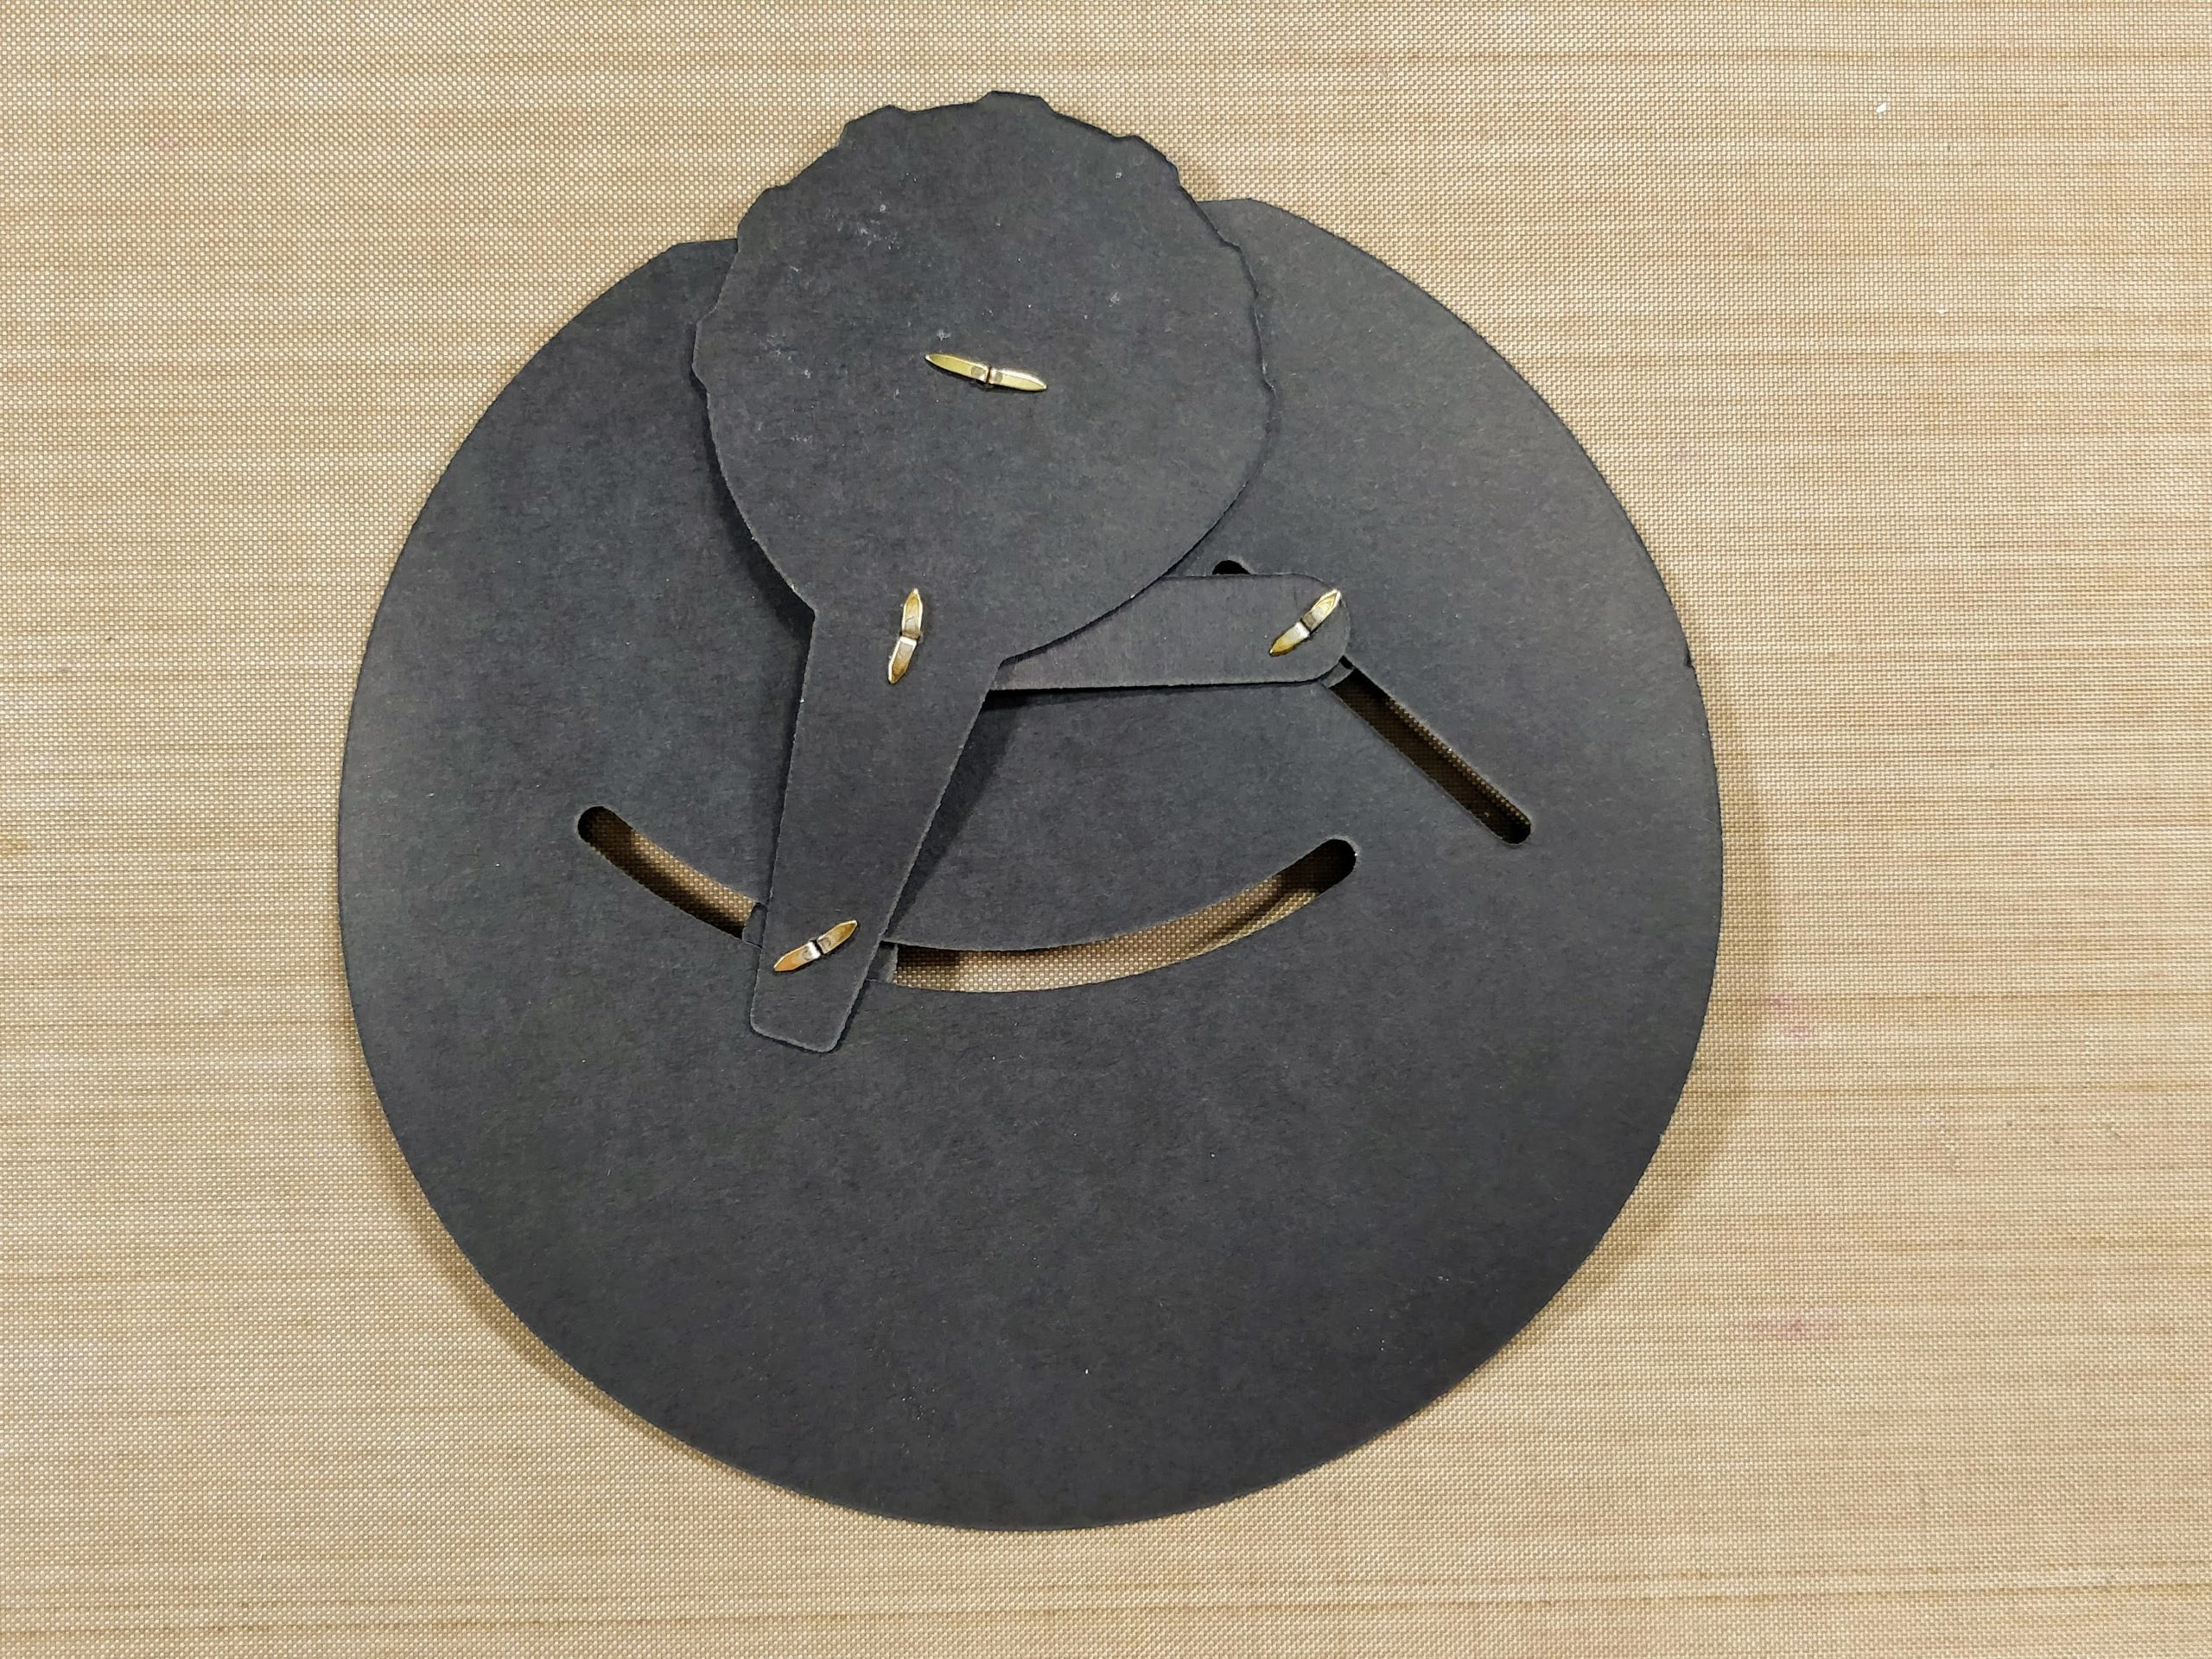
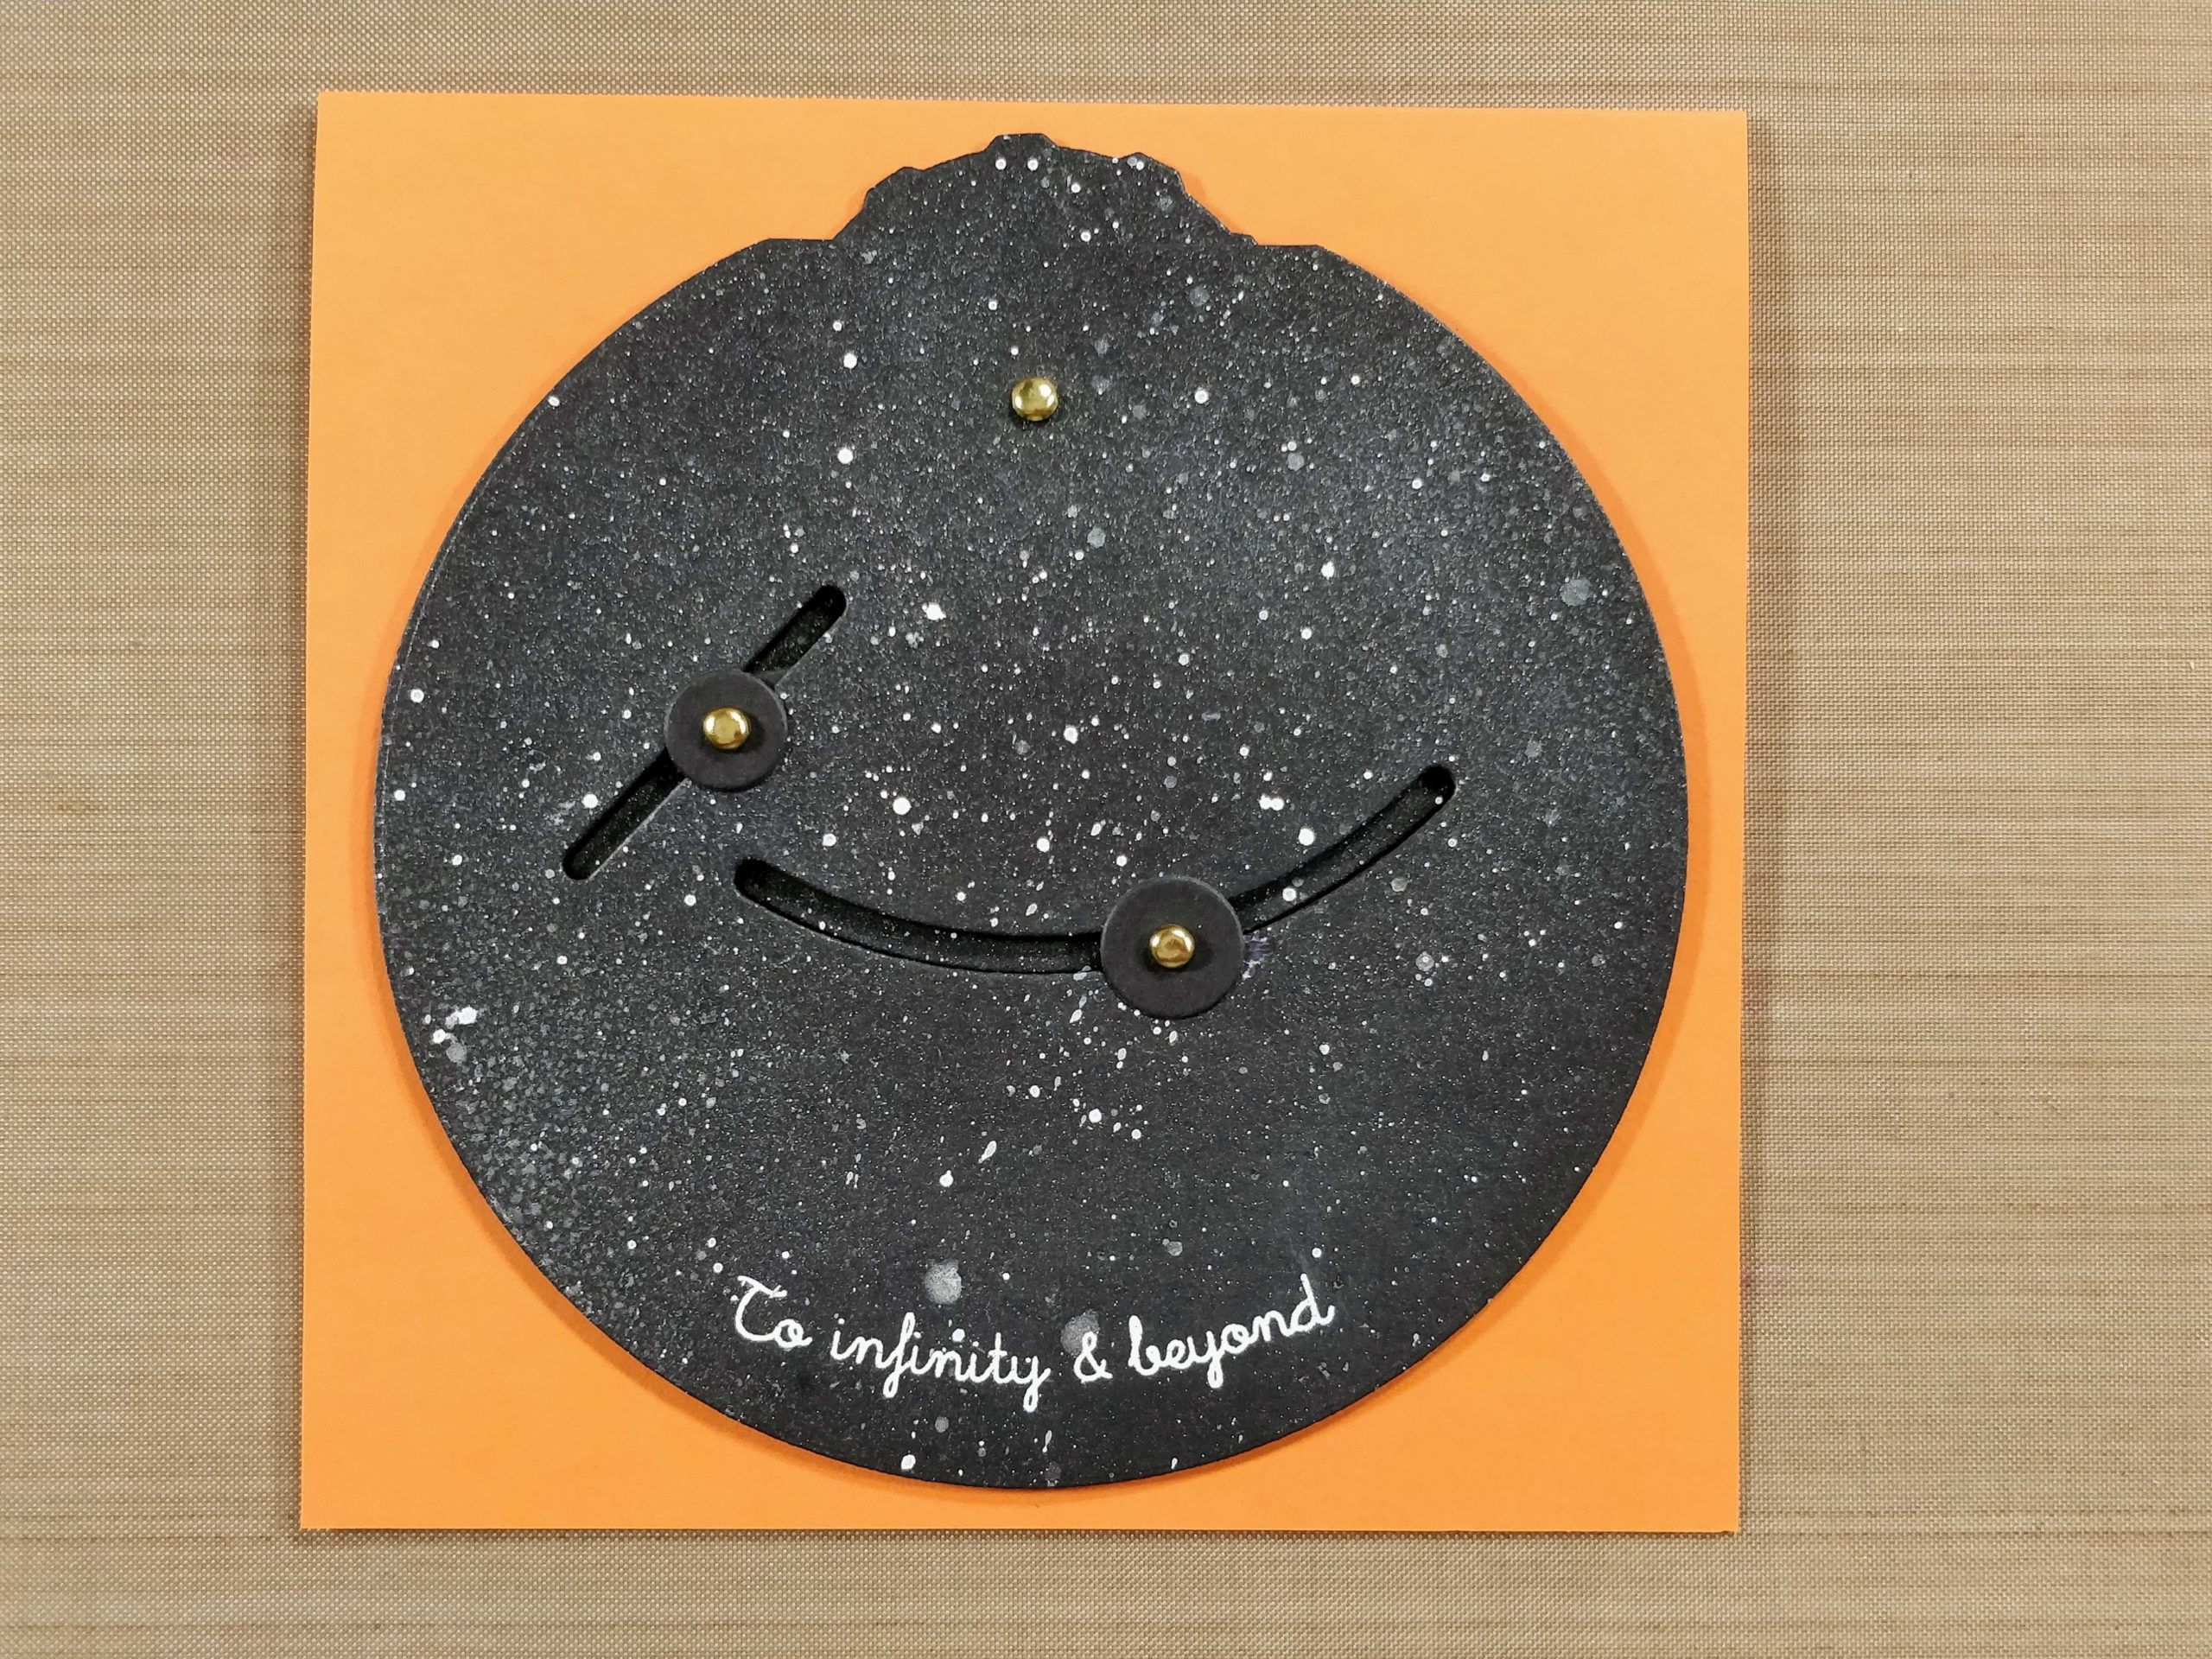
3. Use brads and washers to attach link and dial arm to card front (view from front).
(View from back.)
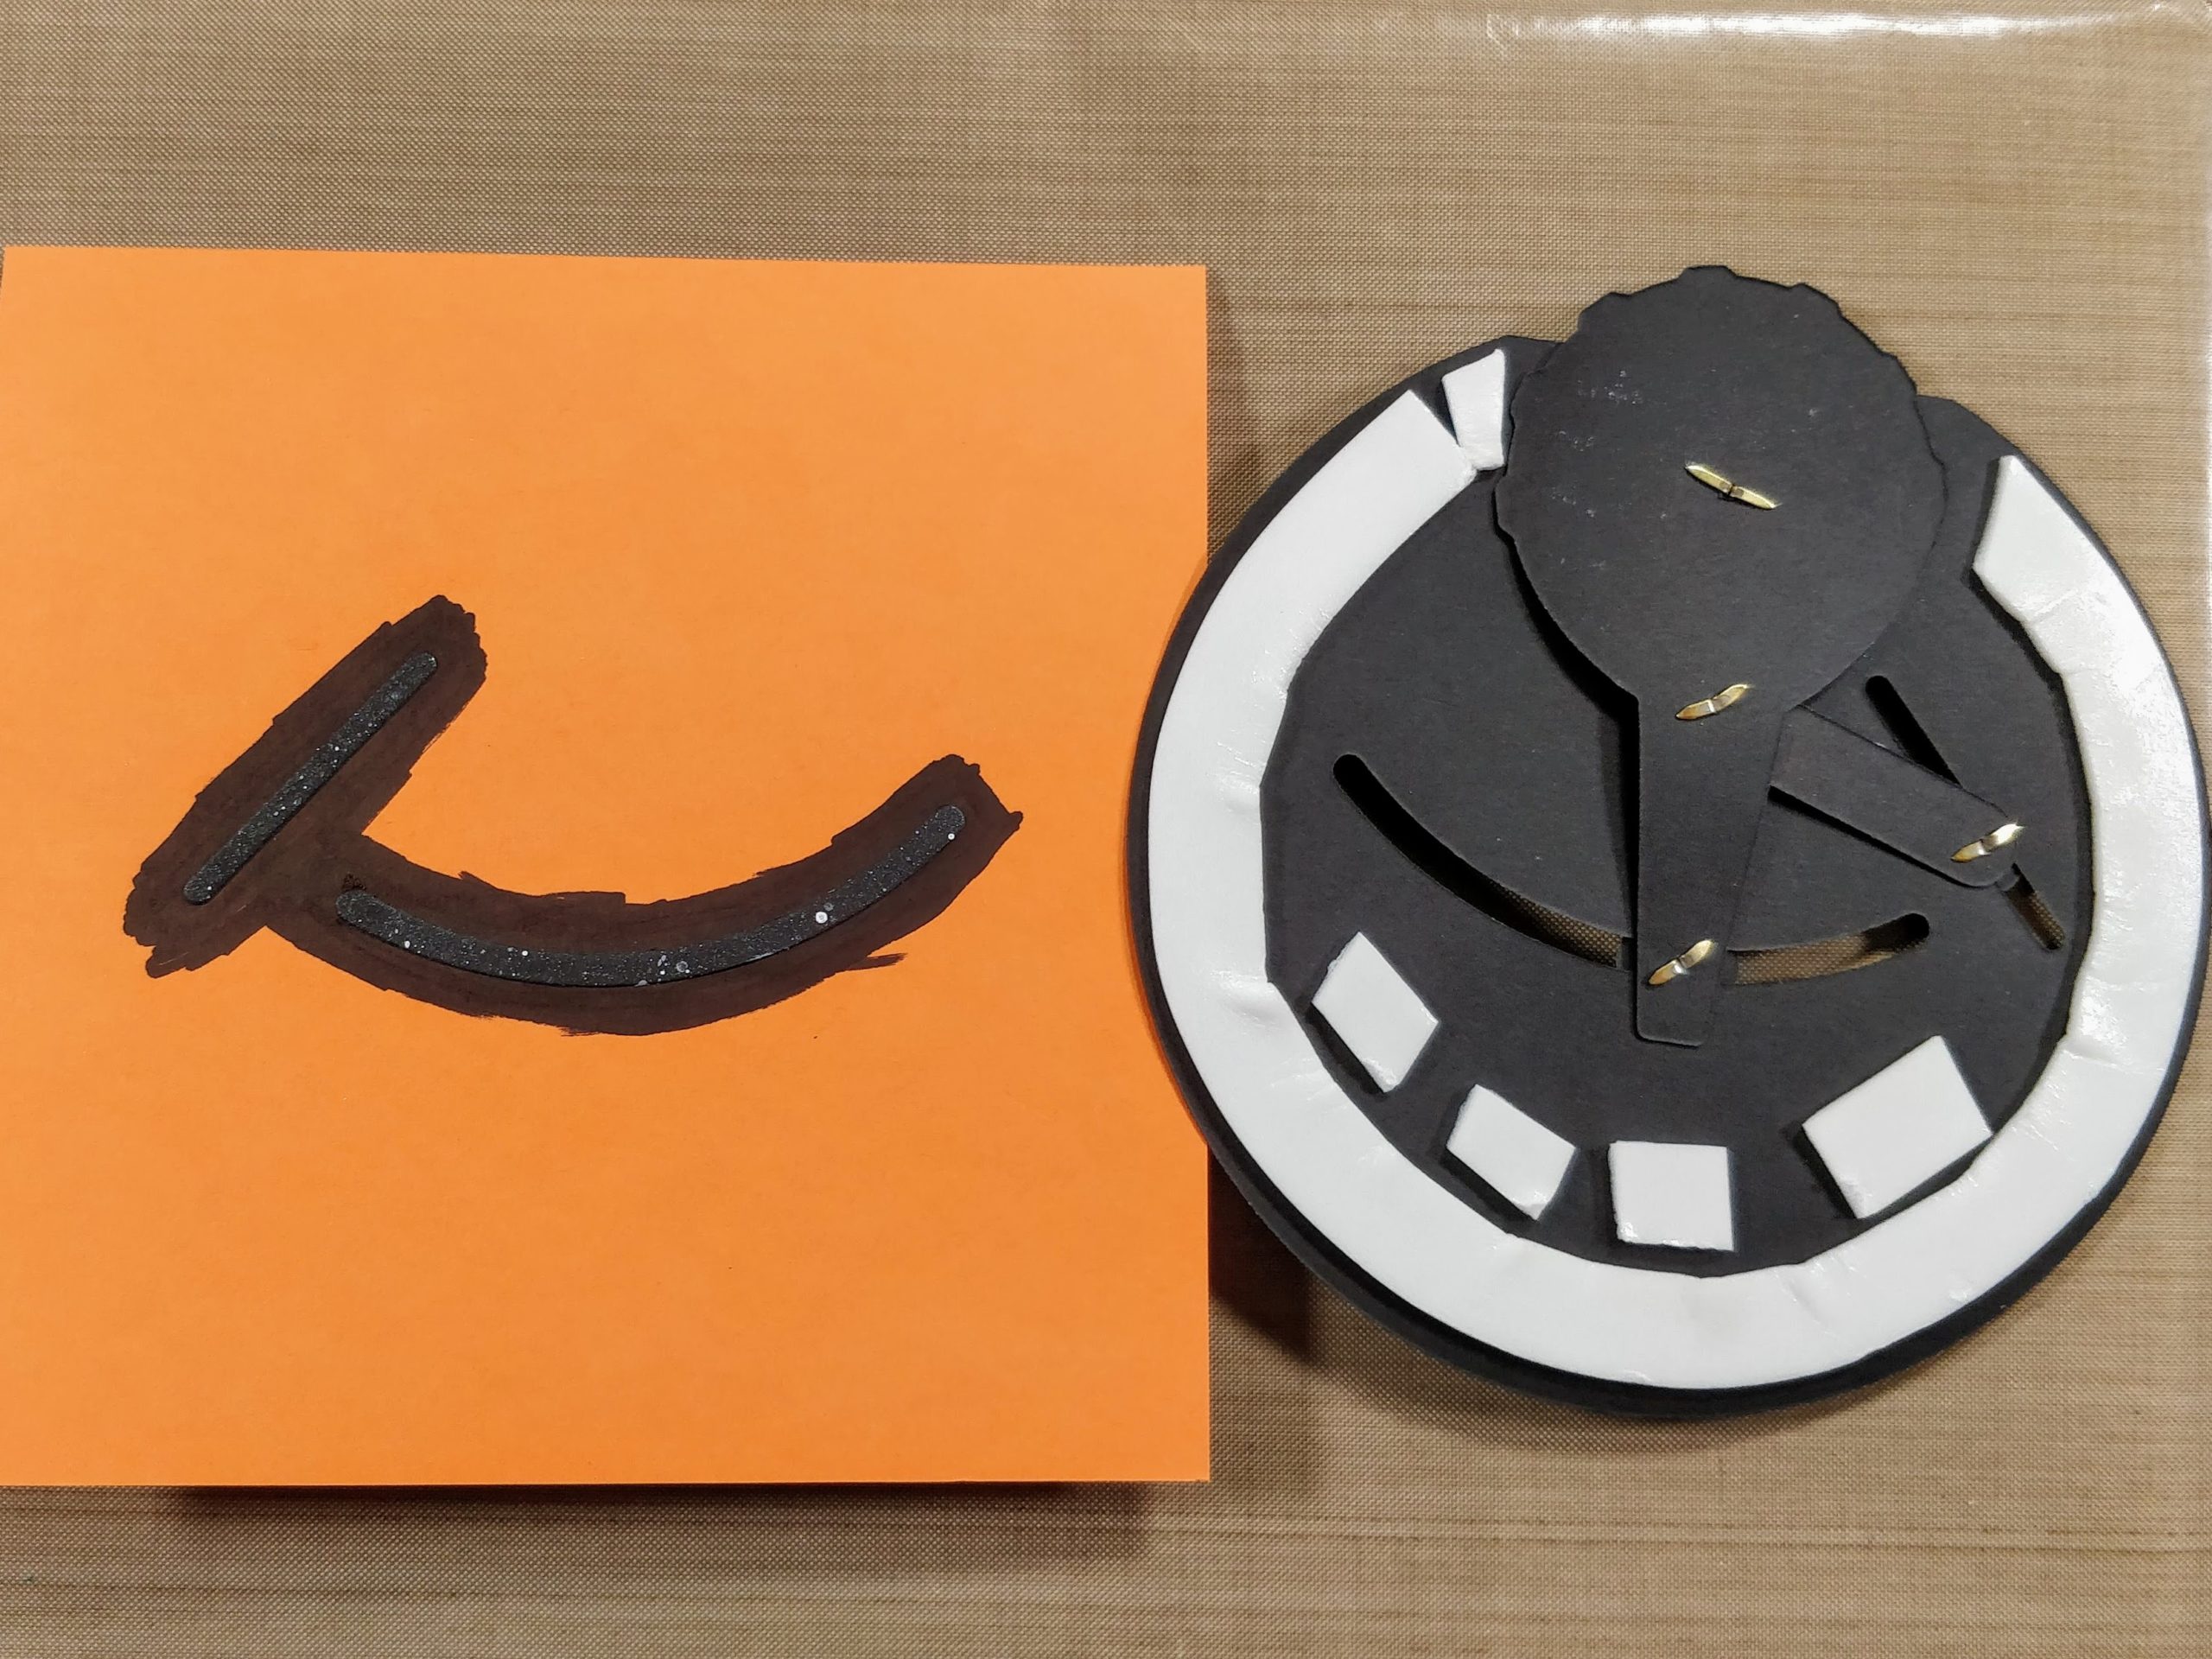
4. Attach black slot pieces to card base and use marker to darken area around them. Apply foam tape to back of card front, away from moving parts.
5. Attach card front to card base.
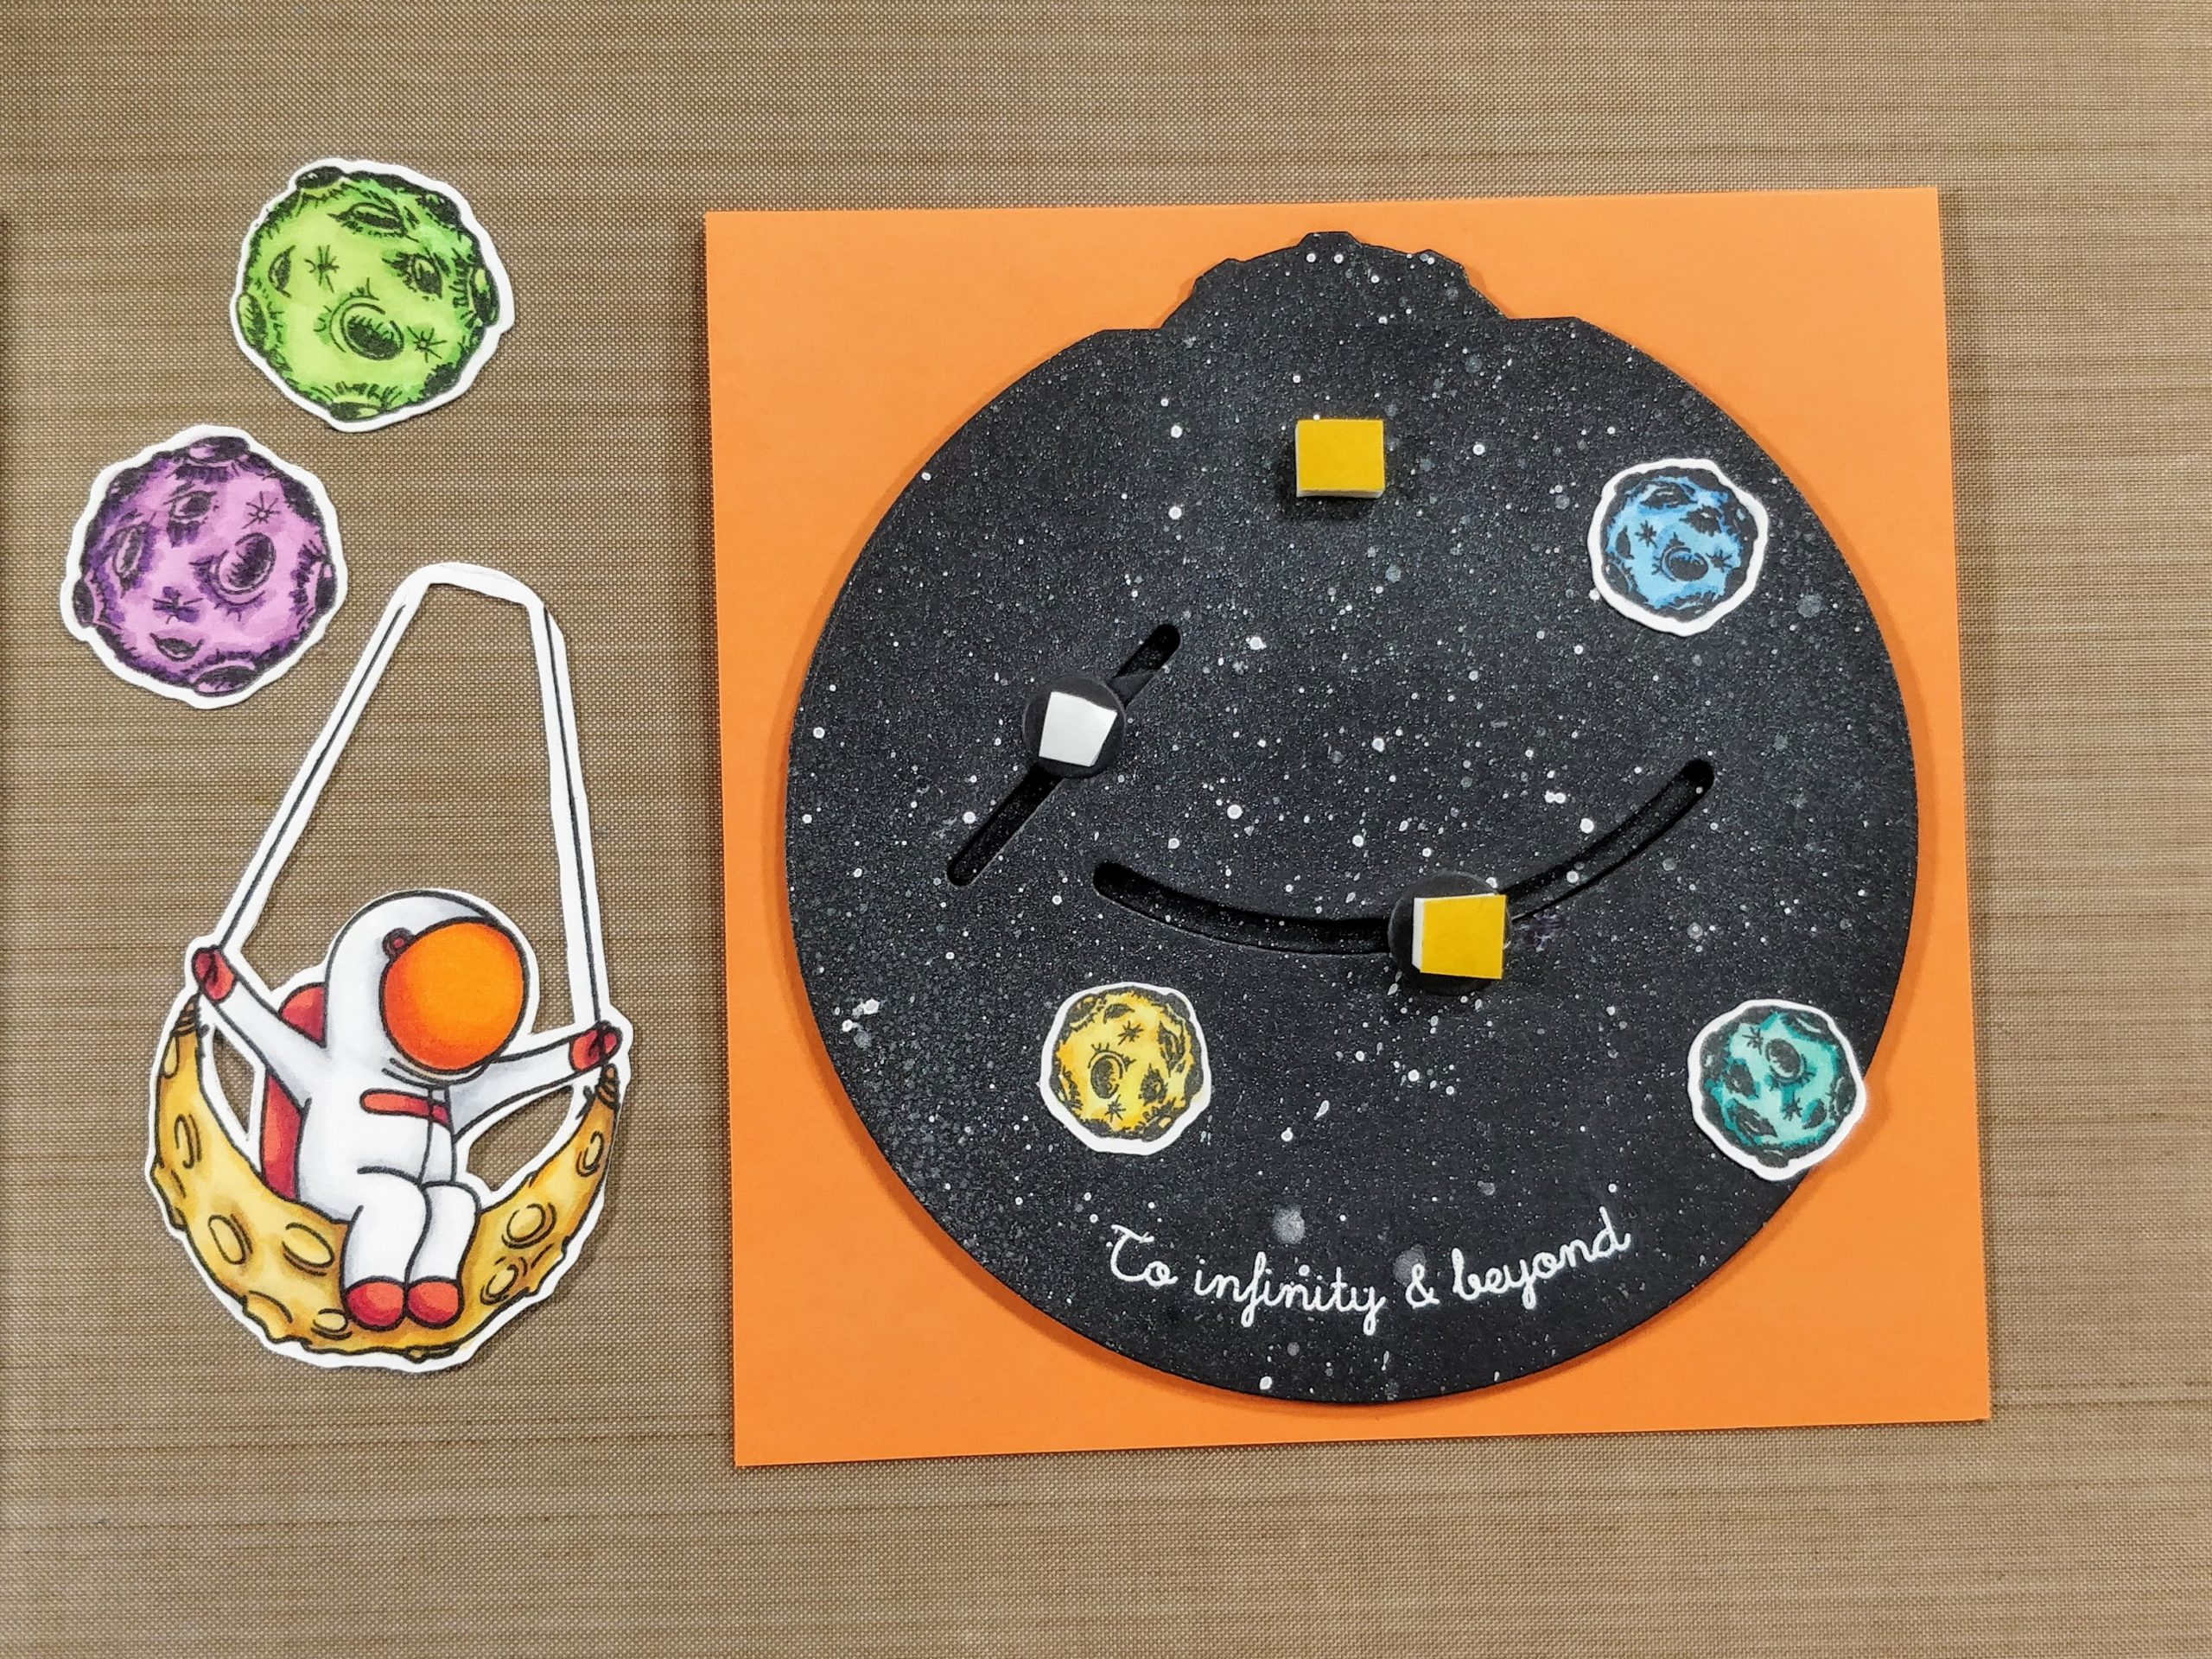
6. Apply double thick foam tape (yellow) on dial brads. Apply regular foam tape (white) on link brad. Glue small moons flat to panel.
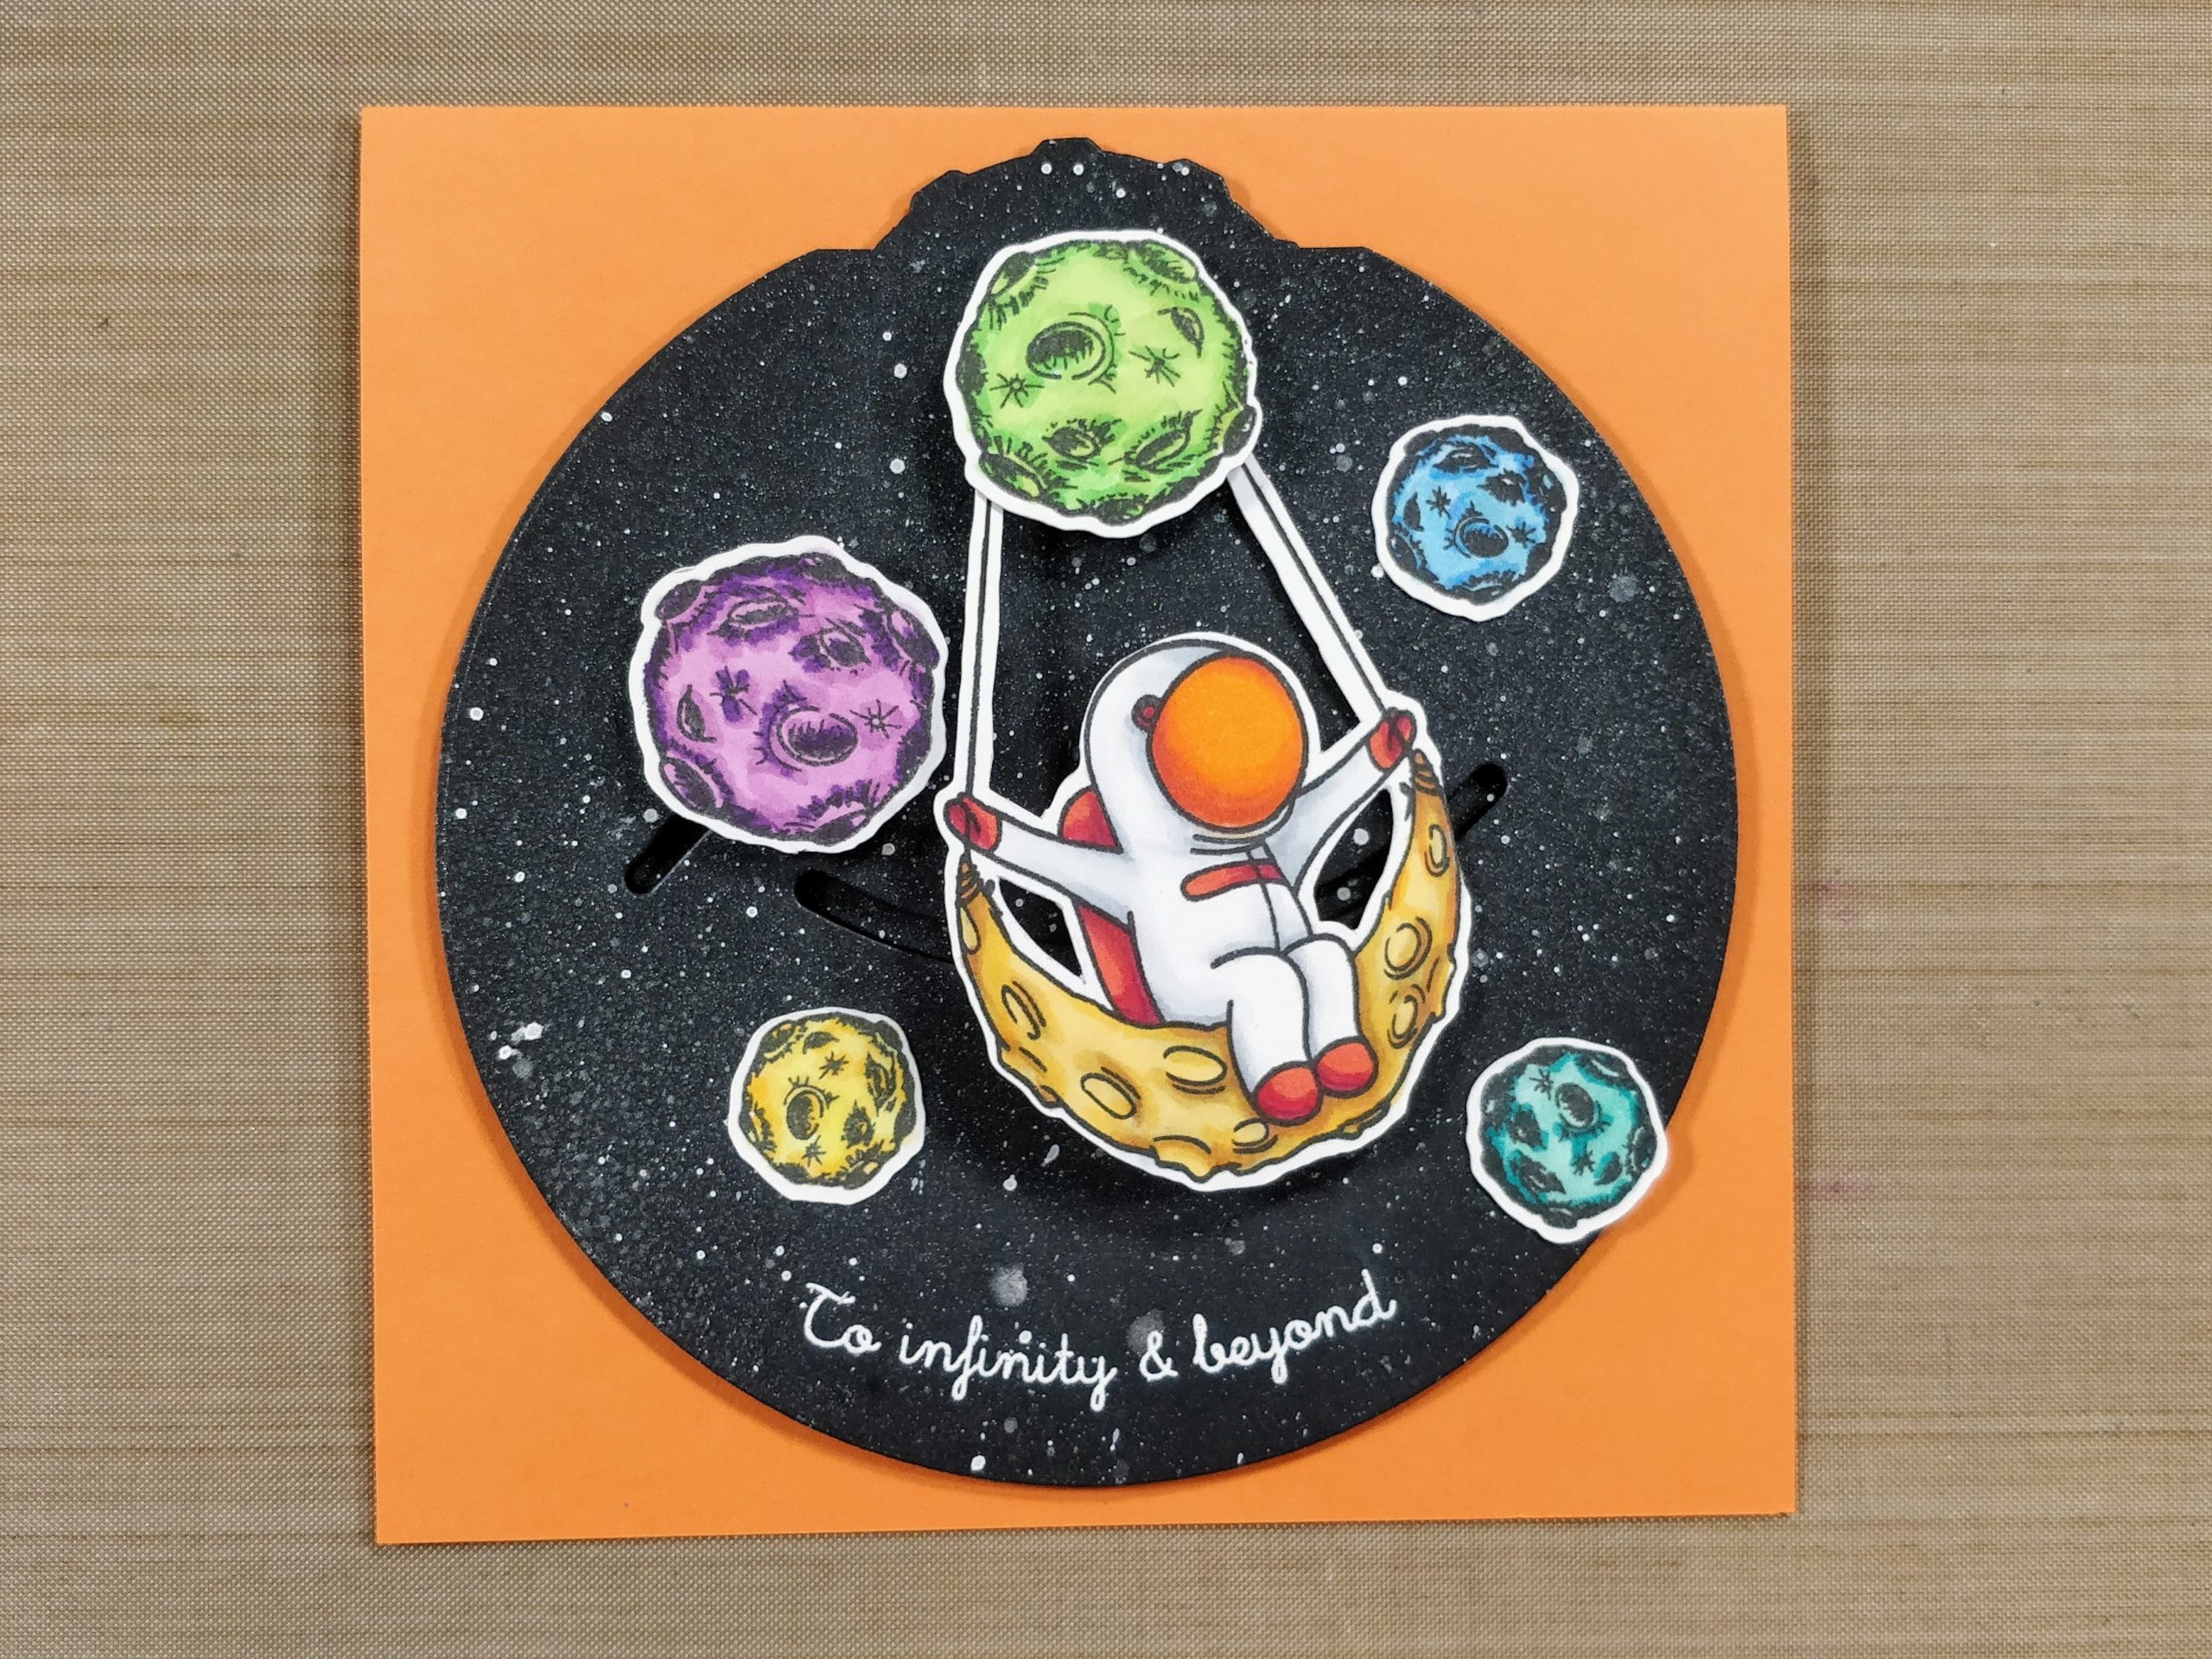
7. Attach swing to foam on dial arm. Attach purple moon to foam on link.
8. Attach green moon to top brad.
To finish the card, I added a few dots to the top right, and bottom left corners of the card base with black and white pens. I glued a bunch of round and star shaped gems all over too. And a hand drawn arrow on the dial, lets the recipient know how to operate the mechanism.
Thanks for stopping by today. I'd love to know what you think of this one! You can find the sister article to this post on my blog. Head on over for links to the specific products I used. If you'd like to see more cards using these stamp sets, you might like this article, and this one. I'll be back soon with more fun cards to share.
For more inspiration with your The Rabbit Hole Designs Creations, be sure to follow along at these other locations:
The Rabbit Hole Designs BlogThe Rabbit Hole Designs InstagramThe Rabbit Hole Designs Facebook PageThe Rabbit Hole Designs PinterestThe Rabbit Hole Designs YouTube
The Rabbit Hole Designs BlogThe Rabbit Hole Designs InstagramThe Rabbit Hole Designs Facebook PageThe Rabbit Hole Designs PinterestThe Rabbit Hole Designs YouTube



No comments:
Post a Comment