
Next, I stamped, embossed and watercolored my octopus. Then I cut him out with my ScanNCut. I painted a large scrap of watercolor paper with green and orange watercolor and die cut several pieces of seaweed from the green, and a piece of coral from the orange. I stamped and embossed my sentiment onto black cardstock and die cut it with a fishtail banner. I also die cut "hello friend" from white, blue, and black cardstock, gluing them together slightly offset.
Once I had my embellishment pieces cut out, I laid them out onto the ink blended panel and decided on placement for my slider track. I used a small slider die and a circle die to cut the track and finger notch into the panel, reserving both pieces that I cut out. Before I assembled the sliding mechanism, I stamped and embossed the ink blot onto the panel. Then, I glued the seaweed, coral and hello friend sentiment flat to the panel. At this point, I glued the solid blue panel to the card base, then lined up the ink blended panel and used it as a guide to glue the reserved piece cut out with the slider die. (That way the track would have the ink blended piece behind it, and you wouldn't see a big dark blue line.)
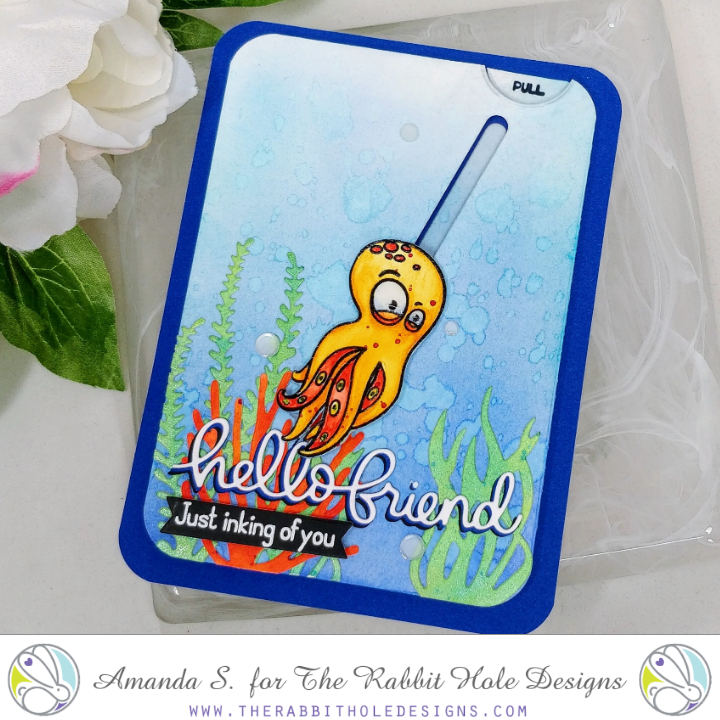
To assemble the sliding mechanism, or pull tab, I flipped the ink blended panel over and added double thick foam tape around the edges and inside, leaving a gap for a 1" x 4" strip of acetate over the track. (I left the release paper on the outer layer of foam tape because I wasn't ready to stick it to the card yet.) I used a powder tool on the sides of the track and the foam near the acetate strip, so it would be able to glide freely. I glued the reserved finger notch piece to the top of the acetate, making sure it lined up evenly with the top of the inked panel. I stamped and embossed "pull" on it. With the acetate strip slid down the track, and the pull tab lined up with the edge of the panel, I glued a Slider Element (looks like a plastic Tic Tac) to the acetate at the very bottom of the track. Then I glued the top of the octopus' head to the element. This locks the octopus to the front of the panel, and the acetate strip to the back, so I could remove the release paper from the foam tape and stick the panel to the card. I made sure to line it up so the track was right over the piece I'd already glued down. To finish the card, I popped the banner sentiment up with foam tape and glued on a few white sequins. To add a little more shine to the card, I covered the eyes and sequins with a coat of Diamond Glaze.

brilliant!
ReplyDelete